

- Dishonored Trophy Guide - December 25, 2022
- Deathloop Speedrun Guide - July 29, 2022
- Mirrors Edge Speedrun Guide - July 28, 2022
This Minecraft speedrun guide is designed to help beginners finish their first-ever random seed glitchless, or RSG, any% run. I’ll list and explain the strategies I believe are optimal yet accessible for this run. I’m not going over anything too complicated like the trigonometry that goes into finding a Stronghold. Everything here is essentially plug-and-play. After reading this Minecraft speedrun guide, you’ll have the tools and knowledge to complete your first run.
Once more experienced, you can start experimenting with the more complicated strategies and tactics. For now, stick to what I explain here, and you’ll be well on your way to a sub-30-minute time.
Understanding the Route
Before the Run
Setup Your Tools and Settings
Before you start thinking about loading up a new world for a Minecraft speedrun, you’ve got a few tasks you need to take care of.
Minecraft 1.16 is notoriously bad in terms of code-optimization. The game runs fine on most decent PCs, but it lacks the FPS consistency needed for a game to speedrun at a high level. This has led to the Minecraft speedrunning community allowing the use of a handful of pre-approved mods to help with the game’s performance, overall increasing the consistency of your runs.
To install these mods, you will need to first install Fabric. Fabric is a modding toolchain that includes many useful features for modders. It doesn’t do anything for you by itself, but it provides the technical groundwork that many other mods are built off of.

Head to the Fabric website and download the installer. Run it, and install the correct version for the version of Minecraft you’re running.
Once you’ve got Fabric up and running, you will want to install a set of mods known as the CaffeineMC mods. There are three in total:
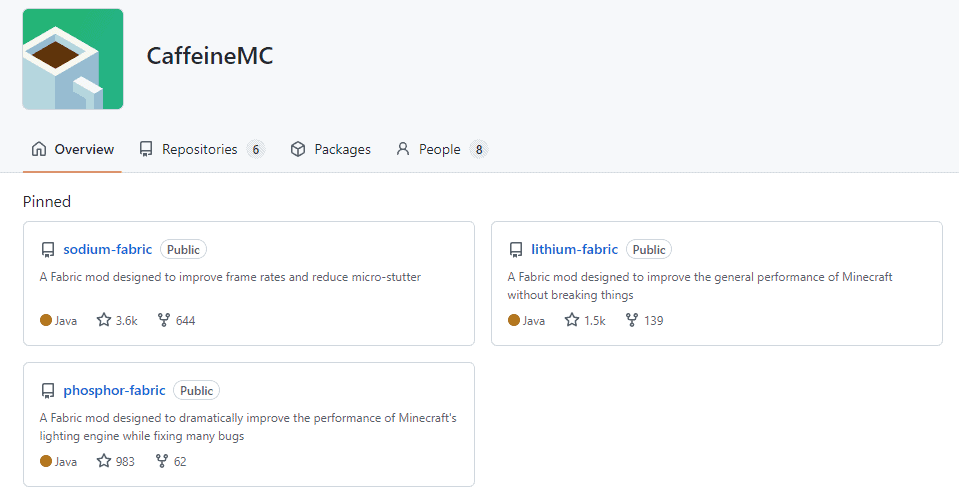
- Sodium.
- Lithium.
- Phosphor.
These mods and a few other speedrun-approved mods can be found on the official Minecraft Speedrunning Discord server.
After installing Fabric and the three CaffeineMC mods, you’re nearly ready to start running. Before that, you’ve got three more setup tasks to complete.
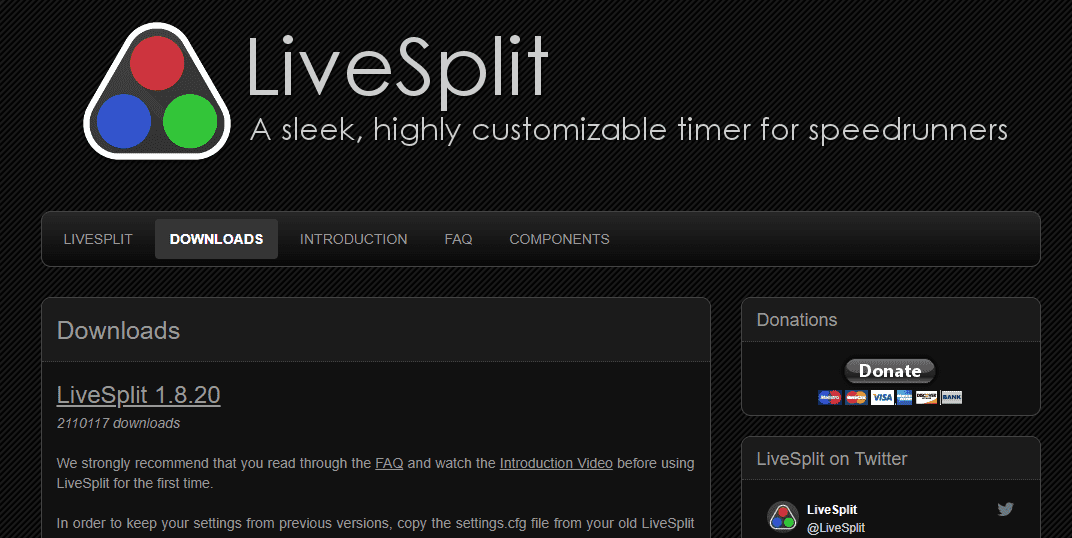
This should go without saying, but if you plan on timing your speedruns, you’ll need a speedrun timer. Using the stopwatch on your phone is no good, especially if you plan on submitting your runs to a leaderboard. Livesplit is a universal speedrun timer used by Minecraft runners, as well as runners of pretty much every game ever ran. If you haven’t downloaded and set it up, do that now. You’ll be saving yourself a lot of time and effort in the future. Read through the documentation on the Livesplit website and watch the introduction video. Those resources should allow you to effectively set up your instance of Livesplit for Minecraft.
You’ll also want to allow your Minecraft application to use more of your PC’s RAM. By default, Minecraft only uses a max of 2GB of RAM. If you have a medium to high-end PC, that’s only a fraction of the total RAM you have to play with. Letting Minecraft use more RAM will make your game run more consistent.
Head into your Minecraft launcher and go to the installations tab up the top. You should have already set up Fabric at this point, so navigate to Fabric in that installations menu and click on the three dots next to where it’s listed. Click edit, and then click on more options at the bottom. There, you should see JVM arguments. The first line in that JVM arguments section should read “-Xmx2G”. This is how much RAM Minecraft is allocated. As you can see, it’s 2GB by default.
How much RAM you change this to will depend on the quality of your PC. If you’ve got 16+ GBs of memory, you can afford to allocate 8GB to Minecraft while running. If not, increase its allotment to whatever you feel comfortable with.
With that done, you’re ready to hop into the game and start speedrunning.
Reset Efficiency – Resetting for Favorable Conditions
Resetting isn’t something you should worry about for now, but it’ll be helpful for you to understand what it is.
This is a Minecraft Random Seed Glitchless 1.16 speedrun guide. The keyword there is random. The quality of the world you’re playing in all comes down to luck, and when you’re in the top 1% of runners, that luck makes all the difference. For some people, having a mediocre start makes getting a competitive time impossible, which is where resetting comes in.
Resetting involves creating new worlds and not starting your speed run until you find one with favorable conditions. Those conditions are determined by the strategies you’re planning on using. Sometimes you might only need one or two resets to get a runnable world. Other times it might take you up into the double digits to find a seed worth playing.
Your speedrun timer doesn’t start until you do, so this is all technically done before the run starts, so there’s no time pressure. You can take as long as you need. Still, people don’t want to sit around all day waiting for the game to load. To combat this, top runners will run multiple instances of Minecraft – as many as their PC can handle. This way, they could be loading up to nine different worlds at one time, making it more likely that they’ll find a playable world faster. They only start their runs when they find a world worth playing.
As I mentioned, this isn’t something you need to worry about as a beginner. Instead, your focus needs to be on your in-game knowledge, your mechanical skill, and overall just practicing your runs. The minutes you’ll save by resetting your worlds will not make a difference to your run, but they will to top-level runners.
So, that’s what resetting is, but it’s not something you need to do right now. Instead, load up a randomly generated survival world and go from there.
One last thing – it’s advised that you play on easy mode. While normal mode has slightly higher drop rates, easy mode makes your hunger deplete slower, which is worth the trade-off.
The Overworld
To complete a Minecraft any-percent speedrun, we need to kill the Ender Dragon. To that, we need to fulfill the following conditions:
- Craft enough Eyes of Ender to activate the end Portal.
- Find a Stronghold.
- Kill the Ender Dragon.
How we tackle each of these tasks determines the strategy and tactics of our speedrun. It affects the routes we take and our overall priorities during a run. For an RSG any% run, we generally break those goals down even further:
Craft Enough Eyes of Ender to Activate the end Portal
- Create a Nether portal.
- Find a Bastion and Nether Fortress.
- Loot gold from the Bastion and trade it with Pigmen for Enderpearls.
- Kill Blazes in the Nether Fortress to collect Blaze Rods to craft Eyes of Ender.
Find a Stronghold
- Use our Eyes of Ender to determine the location of the Stronghold closest to use.
Kill the Ender Dragon
- Use either bed from a Village or beds crafted with string from Bastions to defeat the Ender Dragon.
That’s a generalized view of the run, with each step being broken down even further in practice. Different strategies are used to create a Nether Portal, for example, and different methods of triangulating the Stronghold’s location continuously increase in complexity.
For now, though, that’s the basic layout you need to follow. I will be going through a run with you, highlighting the different strategies you can use at different points. Hopefully, you can see the similarities between what I said above and the things I’m discussing below.
Village Route
Goals
1. Find a Village:
- Collect enough food for the run.
- Craft stone tools from materials in the village.
- Get at least seven Iron Ingots.
2. Craft:
- Craft an iron pickaxe.
- Craft a flint and steel.
- Craft a bucket.
3. Find a lava source to construct a Nether Portal in.
The first strategy I’m going to cover is the Village route. This is considered more beginner-friendly, albeit slower, than the more popular ocean route. If you’re new to speedrunning Minecraft, this is where I would recommend you start.
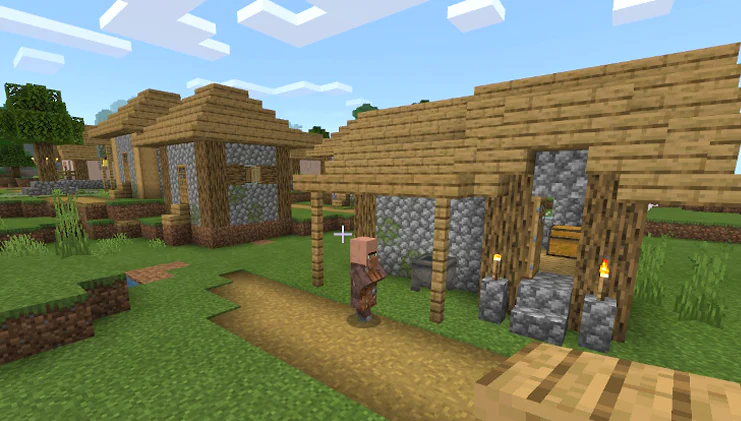
Find a Village
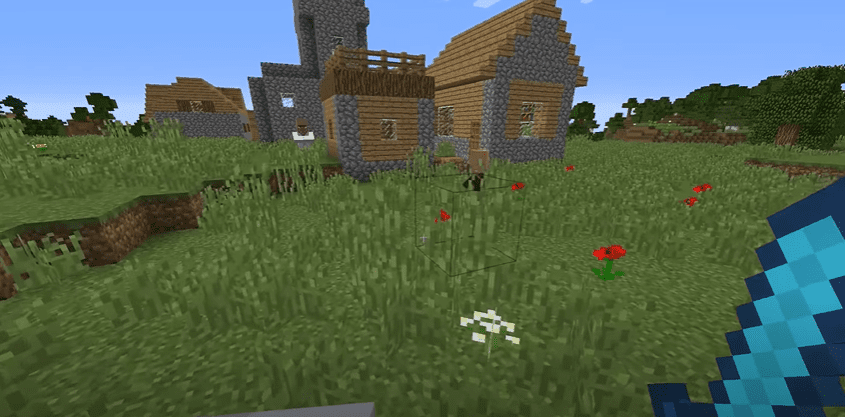
The very first thing you need to do upon loading into your world is to find a village. Villages will have all the supplies we need to get into the Nether for the next step of the run.
You can wander around in search of a village the old-fashioned way, but that’s slow, tedious, and completely sub-optimal. Instead, runners use a strategy involving the pie-chart portion of your F3 menu.
When you press Shift+F3, it’ll open up the regular F3 menu, but there will be a little pie chart on the bottom right-hand side of your screen. This pie chart is full of useful information, and there are a few different versions of it you can toggle through.
Underneath the pie chart, you’ll see a list of different words with numbers. These are the different versions of the pie chart you can view. From the default pie chart, you’ll want to toggle over to “tick,” which should be number three or four, then “level,” which should be number one, then “blockEntities,” which should be number two.
This pie chart version will show you all the block entities in your render distance, whatever you have that set to.
In this pie chart, you will want to look for blocks commonly found in villages. Things like blast furnaces and brewing stands. If any of those are present, it indicates a village somewhere in your render distance. If you can’t see any indication of life, you can either run for a while until you’ve gotten enough fresh chunks to spawn, or you can restart your run.
Loot the Village
Locate and make your way over to a village. Once you’re there, you’ve got a few different things to get done. We need to find:
- Wood and stone.
- Iron.
- Food.
- Beds.
The order in which you go about obtaining each of these doesn’t matter much and will likely depend on the layout of the village if you’re trying to be as optimal as possible.
Wood and Stone
For wood and stone, you can punch out three logs that are a part of a villager’s house. Turn them into 12 wooden planks. Take eight planks and make a crafting table along with eight sticks.
Place your crafting table and create a wooden pickaxe, then use that pickaxe to collect nine cobblestones from the same villager’s house. Using that stone and your sticks from earlier, craft a stone shovel and a stone axe, and you can also craft a stone hoe if you want to collect the hay from the village for food. If you’re not planning on collecting the hay, you can take six cobblestones instead of nine.
Iron
There are two different methods of obtaining iron in a village, and there’s a backup strategy in case both methods fail you.
First, you’re going to have a look to see if there are any Iron Golems in the village. More than likely, there are. Each of these will give you three to five iron ingots when you kill them. We need at least seven ingots.
Find an Iron Golem and build up to three blocks from the ground in a straight line. When you’re three blocks high and on the same surface as the Golem, it will not be able to hit you, but you’ll be able to hit it. Take your stone axe and start jumping attacking the Golem. After around seven hits, the Golem will die and drop its ingots. If you’re lucky, you’ll get four or five ingots.
Repeat this process if there’s another Golem in the village until you have enough iron ingots.
If you kill all the Iron Golems in the village and still don’t have enough iron, see if there are any blacksmiths in the village. Blacksmith buildings look like forges and are very distinct, so you’ll not miss them. The chests inside a blacksmith can spawn with iron and obsidian, which can come in useful later in the run.
Food
The best source of food in a village is hay. This is also the reason you might want to consider crafting a stone hoe. Loot enough hay from around the village and break it down into wheat. Then turn that wheat into bread. Take as much as you feel comfortable with.
If you have to look for bread, you can try to loot some apples from chests in the village, or in the worst-case scenario, loot the carrots and potatoes the villagers are growing.
Beds
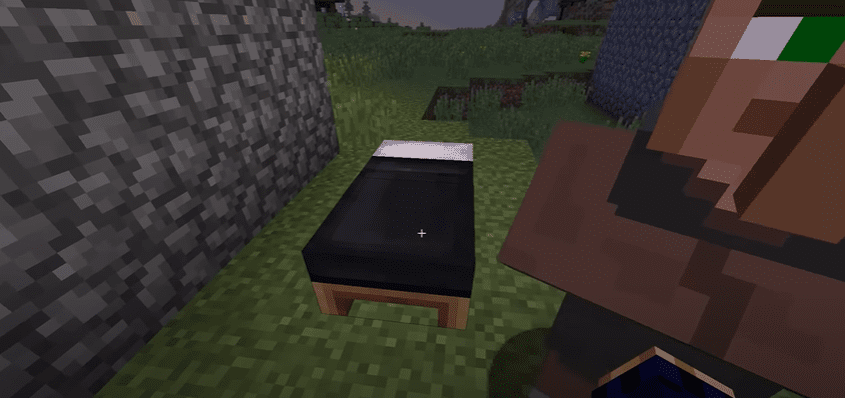
Getting beds is easy. Each house in the village will have at least one bed, so just go and break as many as you think you’ll need. The minimum number of beds you need to kill the Ender Dragon is five. You might want to take at least 10 with you for a beginner.
Village Iron Backup Strat
There’s a backup strategy for the village route if you don’t get enough iron to craft everything you need. Specifically, there’s a way to get a bucket without crafting it yourself. You’ll still need to source enough iron for your pickaxe and the flint and steel, though.
To do this strat, you need to have a farmer villager. Suppose you don’t have one naturally in your village. In that case, you can make one by placing down a composter in the village and waiting until a villager approaches it and assigns a role. What you’re looking for is wheat to emerald trade. You should have plenty of wheat from breaking down the hay in the village.
Trade your wheat for three emeralds.
Next, you need a fisher villager. Again, if you don’t have one naturally spawning, you’ll have to make one by placing it down a barrel.
This time, you’re looking for a trade that is emeralds for a bucket of cod. Make that trade, empty the cod of your new bucket, then fill it with water.
This might sound like a lengthy process, but it’s not nearly as long as mining for the extra iron.
Plus, you can force your villagers to refresh their trades by breaking your composter or barrel and then replacing it.
Entering the Nether
By the time you’re done with the village, you should have:
- Between five and 10 beds.
- An iron pickaxe.
- A bucket.
- A steel ingot.
- Food.
- Stone tools.
Once you’re done with the village, you need to source a piece of flint so that you can craft flint and steel. Flint frequently drops from gravel, and gravel tends to spawn in water, so it shouldn’t take long to find some.
With all that in your inventory, you can start looking for a lava source so that you can enter the Nether.
You can find lava pools pretty commonly enough in any plains. Keep a listen out for the sound of the lava bubbling up, and you should be able to find one. If you’re struggling to find a lava pool on the surface, consider digging down. Lava spawns much more frequently underground than above ground, so that’s always an option at your disposal.
The only requirement you need your lava pool of choice to fulfill is that it has a straight edge at least four blocks long. If it doesn’t, you can place blocks so that it does.
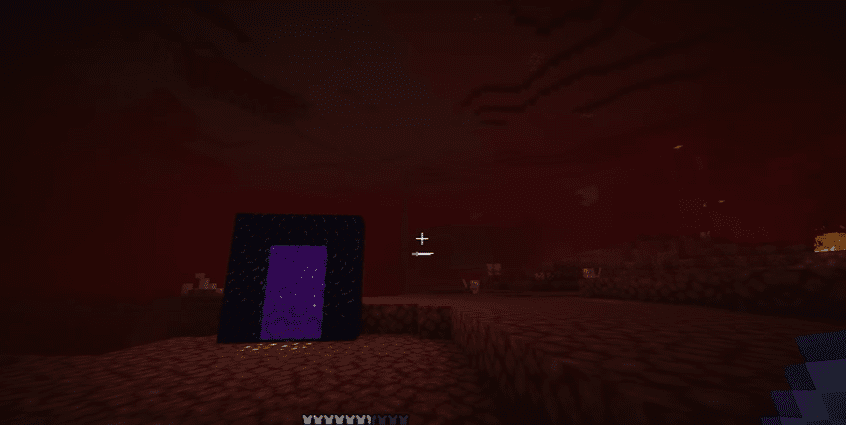
Once you’ve found a decent lava pool, you need to use your water bucket to create a Nether Portal. If you’ve never used a bucket and a lava pool to make a portal, you will need to learn how. The process is a bit too specific to explain here, but this YouTube video by TBOGGs explains it pretty well.
Once your Portal is built, hop on into the Nether.
Ocean Route
The ocean route is a bit more technical and difficult than the village one. It’s newer and more advanced, leading to faster runtimes but more room for error. If you’re a beginner, I would recommend you focus on getting runs with the village route down before moving on to this one.
Our overall goals here are the same as usual:
- Get enough Eyes of Ender to power a portal.
- Find a Stronghold.
- Kill the Ender Dragon.
However, how we go about this is vastly different from the village route.
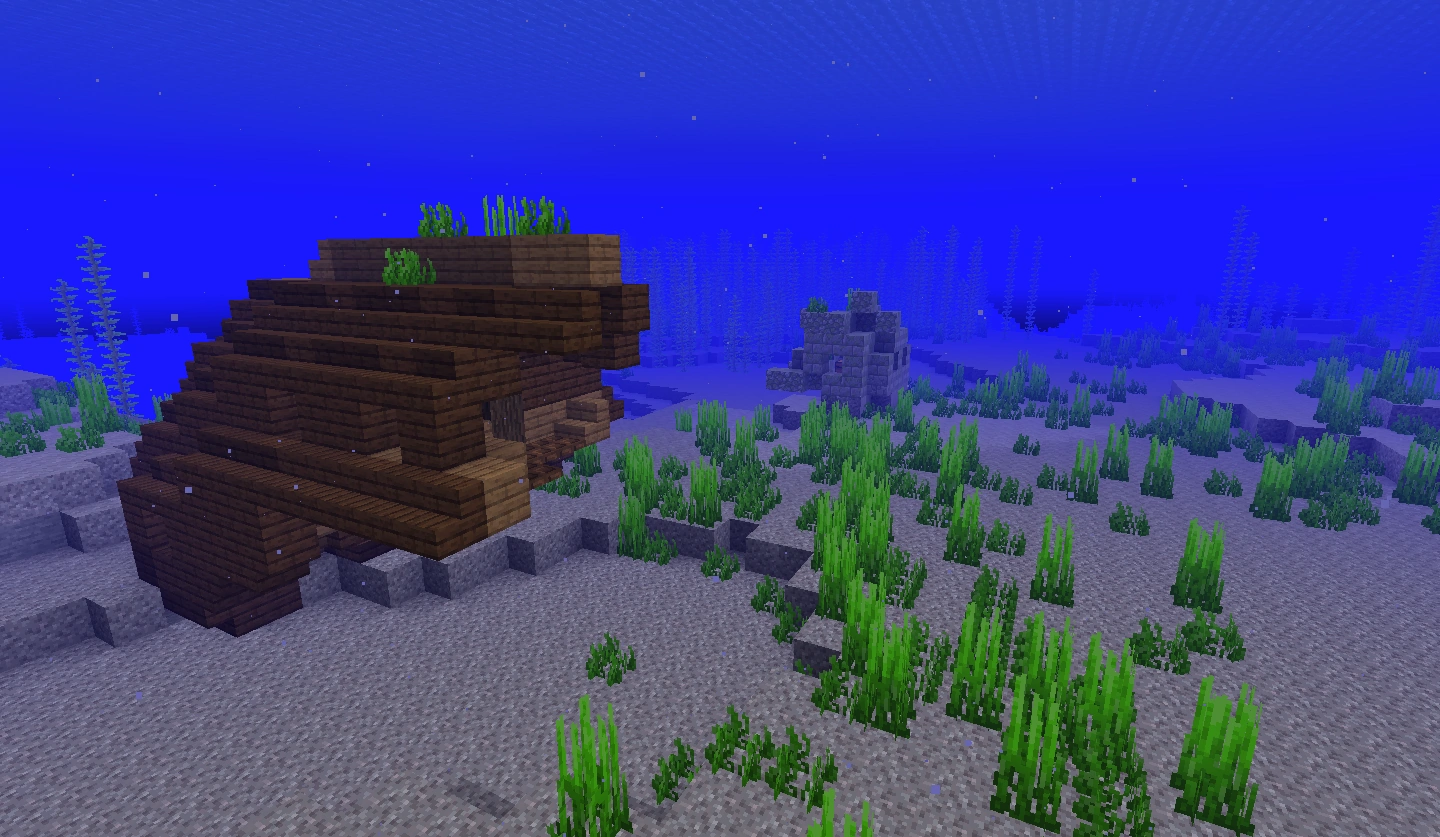
First and foremost, forget about finding a village. Instead, you need to focus on finding a shipwreck.
Shipwrecks spawn with chests. Those chests have a high spawn rate for iron, killing the need to ever visit a village. They can also spawn with food, although not enough for the entire run. That’s something we’ll take care of later, though.
So, when you spawn in, get some wood to make a crafting table, boat, three doors so you can refresh your breath underwater, and some sticks. Take that boat and find a shipwreck. Ideally, your newly generated world will spawn you next to an ocean, so you won’t have to look far.
When you find a shipwreck, loot it. If you get enough iron to craft your pickaxe and other tools, great. If not, either look for another shipwreck or if you managed to loot a treasure map, go find the buried treasure.
Either way, get enough iron – about 10. Take your shovel and mine some gravel until you get a piece of flint to drop, then craft some flint and steep. Once you have those 10 iron and your flint, it’s time to build your Nether Portal.
Building a Nether Portal in this route is different than the village route. You’re not looking for a lava pool. Instead, you’re going to be building the portal underwater. To do this, you need to find a magma ravine.
You’re looking for a specific orientation of magma blocks in the ravine. You need an L-shape or a corner of three magma blocks. It doesn’t matter where these blocks are located in the ravine, as long as they follow that shape.
Again, I’m going to point you towards a YouTube video for the specificities on how to craft the Portal – this time by Hamito.
Craft the Portal, and enter the Nether.
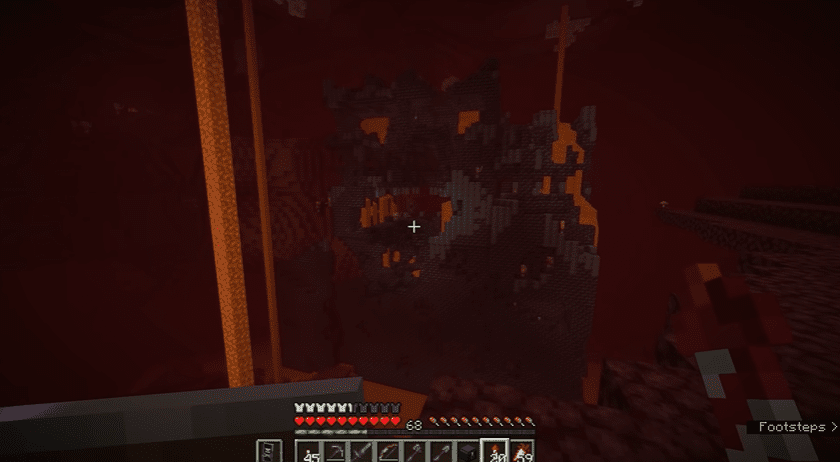
The Nether
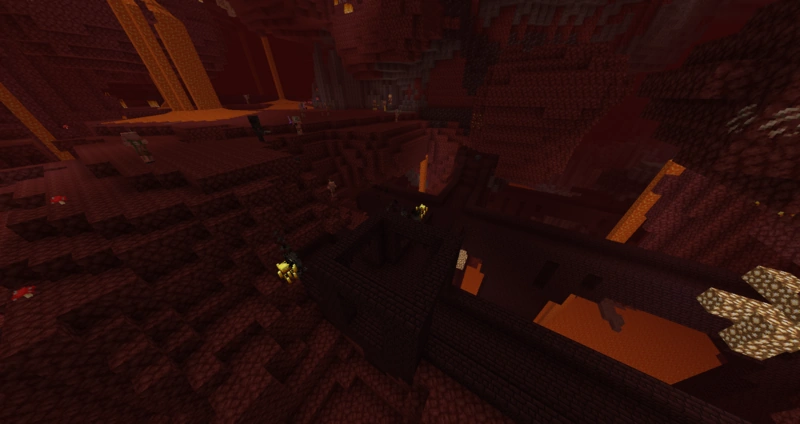
The route in the Nethers is similar for both the village and ocean strategies, with the ocean strategy requiring a bit more work to make up for our lack of beds and food.
In the Nether, we have a few goals:
- Find a Nether Fortress and get six Blaze Rods.
- Find a Bastion:
- Get gold.
- Trade gold for Ender Pearls.
- Find obsidian.
- Get enough string to craft beds (ocean route).
- Kill Hoglins and craft mushroom stew for food (ocean route)
Before we start, I want to briefly explain how structures spawn in the Nether.
Picture the Nether as a graph along a flat surface using an X and Z axis. In the center is 0,0. That graph should have four different quadrants representing the different pairings of X and Z coordinates. In the top left, you would have positive/negative, the bottom left would be negative/negative, the top right is positive/positive, and the bottom right is negative/positive.
This graph, and these quadrants, represent the Nether. From 0,0, there are four quadrants in your render distance. There can only be one structure for each quadrant or set of coordinates. For example, if you found a Bastion at negative/negative, you would know not to continue with that coordinate pairing. Instead, you go in the direction of negative/positive, eventually finding another structure. If you continued down negative/negative, you wouldn’t have found another structure for thousands of blocks.
That might sound complicated, and it is, but it’s no different from regularly reading your coordinates in your F3 menu. Remember that if you find a structure, you must flip at least one of your X or Z coordinates.
The Bastion
Our method for finding a Bastion relies on reading entity counts from our F3 menu. Bastions spawn with many entities inside of them. If we can find a way to read those entities from a distance, we can locate a Bastion from any given point in the range.
So, open up your F3 menu. There are a few figures here I want you to pay attention to. First, near the bottom on the left-hand side of your screen, you should see a list of letters and number pairings starting with “SC.” To the right will be “M” and “C” for monster and creature, respectively. Take the numbers for M and C, and add them together. Put that number somewhere to the side for now.
Towards the top of your screen, you’ll see a ratio labeled “E:” It will look like this, “E: 14/152”. This represents the entities in your render distance. The number on the right is the total entities, while the number on the left is the entities in the chunks you’re looking at or in your FOV.
Take the right-hand side number, the one representing the total number of entities in your render distance, and take away your M+C number from earlier. If the resulting number is greater than 30, your area has a Bastion. You can put this on paper into the following equation: E-(M+C) > 30, where E is the total entities in your render distance. If that equates to true, there is a Bastion in your area.
Once you’ve established the Bastion’s presence, you need to locate what direction it’s in. We’re using the left-hand number in that E number pairing. Given that number represents the number of entities in our field of view, we can use it to figure out what direction has the most entities present. Wherever that is, is where the Bastion is.
Go into your options and turn your FOV setting down. This will zoom your game in and make pinpointing the Bastion’s direction easier. Open up your F3 menu and spin in a slow circle while paying attention to that E number. You want to head in the direction where it peaks.
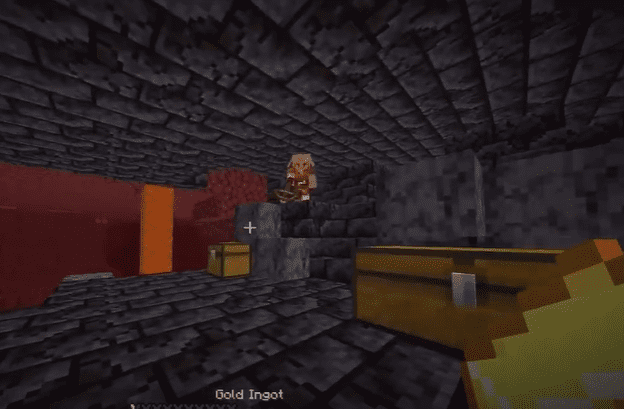
Inside the Bastion
There are four different types of Bastions:
- Bridge
- Housing
- Stables
- Treasure
Each one has a different layout and, by extension, a different route you must take. These routes are very specific and require knowledge of the Bastion’s layout beforehand, making it arguably the most difficult and inaccessible part of the entire run.
I can’t guide you through how to route each of the Bastions here. Instead, I would highly recommend you watch this YouTube video by Couriway. This will give you more than enough study material and should highlight how you’re meant to be navigating each Bastion type for optimum efficiency.
I can’t walk you through how to route a Bastion, but I can walk you through your purpose there.
The whole reason we’re visiting a Bastion is two-fold. First and foremost, we’re looking to trade with Piglins for Ender Pearls. Secondly, we want to get our hands on obsidian.
If you route your Bastion correctly, you’ll have a lot of gold and hopefully some obsidian from looting the chests. At that point, you need to funnel the now angry Piglins into a place you can access but where they can’t escape or damage you. Again, this is naturally integrated into each Bastion route.
Take your gold ingots and throw them into the hole that you have your Piglins in. You should have at least a stack and a half if not two stacks of gold from looting the Bastion. You’re looking for a few things from the trades:
- At least 16 Ender Pearls.
- Enough obsidian to craft a portal.
- Lots of string (ocean route).
- A few fire resistance potions.
These trades can end up taking a while. While you’re waiting, you can go and kill some Hoglins if you need food, or you can search for mushrooms to make a stew. Once trades are done, and you have the materials you need, move on to trying to find a Nether Fortress or if you found a Fortress first, move on to leaving the Nether.
The Nether Fortress

Now, if you’ve been to a Bastion before a Nether Fortress, you know you need to go to a different quadrant in the Nether. The same goes for if you went to a Fortress first. So, pick a direction and keep going until you’re within the necessary, coordinate range. Use any spare Ender Pearls to teleport if you have them. This will save you a fair bit of time. Make sure you don’t use too many or throw yourself into lava.
Once you’re in the right quadrant,
We will be utilizing our F3 pie chart again to find a Nether Fortress, so go ahead and hit Shift+F3 to bring that up. This time, you want to navigate like this:
- Tick.
- Level.
- Entities.
- Block Entities.
In this part of your pie chart, you’re looking specifically for a mob spawner. The presence of a mob spawner could mean two things – either a Nether Fortress or a treasure Bastion with a Magma Cube spawner. The only way to determine which it is in advance is to perform the prior calculation we used to find a Bastion and hope it equates to false. To do that, we need to find out what direction the spawner is in.
When you see a mob spawner on your pie chart, go into your settings and turn your render distance down. After that, hit F3+G. This will open up your chunk boundaries and allow you to see the chunk you’re currently in.
Open your pie chart if it’s closed and navigate back to the block entities screen. Start hitting F3+F, once at a time. This increases your render distance by one each time you hit it. Once you get to the render distance that allows you to see the spawner on your pie chart, you want to decrease your render distance by one. The spawner should no longer be visible. Then, you’re going to step into the chunks next to you in each direction. When the spawner reappears on your chart, you know you’re going in the right direction.
At this point, you can run a Bastion calculation to determine if it’s a fortress or not if you want. For now, let’s assume that it is.
Inside the Nether Fortress
Routing a Nether Fortress isn’t nearly as complicated as routing a Bastion. However, I would still advise you to seek out some videos or watch top-level speedruns to see how it’s done.
As a rule of thumb, you’re looking for the section of Fortress that doesn’t have a Netherrack roof. If it does, you’re in the wrong section. There are a few quick tips you can use to navigate a Fortress if you came in from the wrong side:
- Go upstairs with no Netherwort.
- Go downstairs with Netherwort.
- Always run away from balconies.
If you follow those three rules, you’ll end up in the right part of the Fortress.
At this point, you want to pop any fire resistance potions you managed to get from the Bastion. This will help massively when the time comes to deal with the Blazes. Also, if you somehow managed to either find or create a shield, that will help you a lot. If you have the iron to spare, I would recommend you do. At least until you become more familiar with the Minecraft RSG any% speedrun.
Find the spawner, and get ready to kill some Blazes. As a beginner, I recommend you try to walk away with at least eight Blaze Rods. Once you’re more comfortable with the run and have more experience, you can cut that number right down. For now, though, play it safe.
When fighting Blazes, make sure you’re going for critical hits with your axe. On easy mode, you will kill one with two of these attacks.
Once you’ve gotten all your supplies from the Nether, meaning your Blaze Rods and Ender Pearls, use your obsidian to create a new Nether Portal. Light it up and take it back out to the Overworld.
The Overworld Part II
Once you’re back in the Overworld, you’re almost done with the run. Before you do anything, if you take the ocean route, you’ll want to take a second to turn all the string you got from the Bastion into wool and that wool into beds for fighting the Ender Dragon. You’ll need at least five, but if you’re a beginner, eight to 10 beds will be a more ideal number. You’ll also want to take this time to turn your Ender Pearls into Eyes of Ender using your Blaze Rods.
Now, you need to find the Stronghold. Finding a Stronghold is a part of this Minecraft speedrun that has been beyond optimized. To speedrun Minecraft, there are many other strategies for increasing complexity. Many speedrunning strategies use advanced trigonometry and require memorization in advance. This is a beginner’s random seed glitchless guide, so I will not give you those advanced methods. Once you’re comfortable with speedrunning Minecraft, you can consider moving up a tier using those more optimized and complicated Stronghold locating methods.
For now, keep things simple.
You’ll want to head to at least X:1200 Z:1200 coordinates. It doesn’t matter if either or both of the numbers are minus; you’re 1200 blocks out from 0,0 each way. Then, simply start throwing your Eye of Ender up in the air and following it. Pick it up each time you throw it, unless it breaks, and throw it again. Repeat this process, following the Eye each time until it stops leading you forward.
Once you’re in the chunk where the Eye of Ender stops leading, open up your F3 menu and look on the left-hand side for “Chunk:” There will be three numbers – you’re focusing on the first and third. Move around in your chunk until the first and third numbers are both four, then dig straight down. You’ll end up digging into the Stronghold.
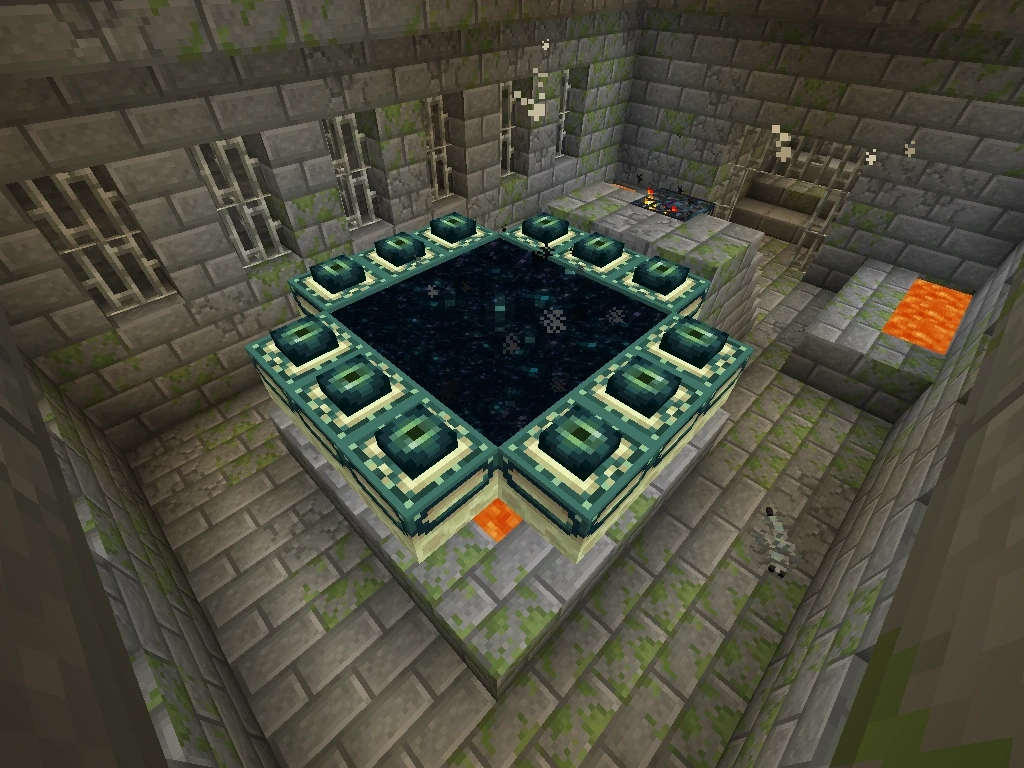
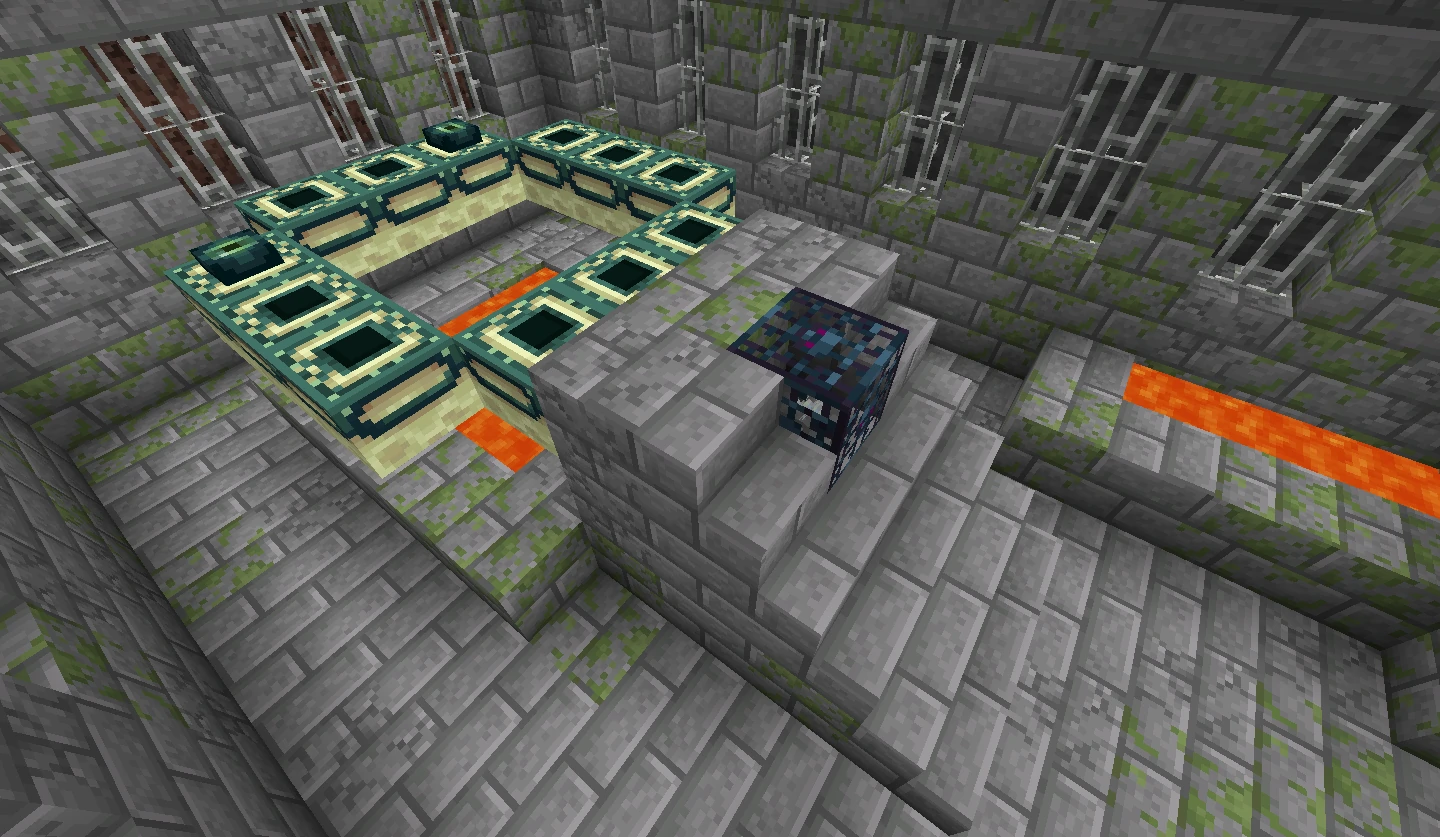
In the Stronghold and End
There’s no real way to route a Stronghold as a beginner. Instead, you’ve got to find the end Portal the old-fashioned way. Explore the Stronghold and make sure you’re keeping an eye out for areas behind fake walls. If you turn your subtitles on, you’ll know you’re close when you see lava bubbling on your screen.
Once you find the Portal, place all of your Eyes of Ender and teleport to the end.
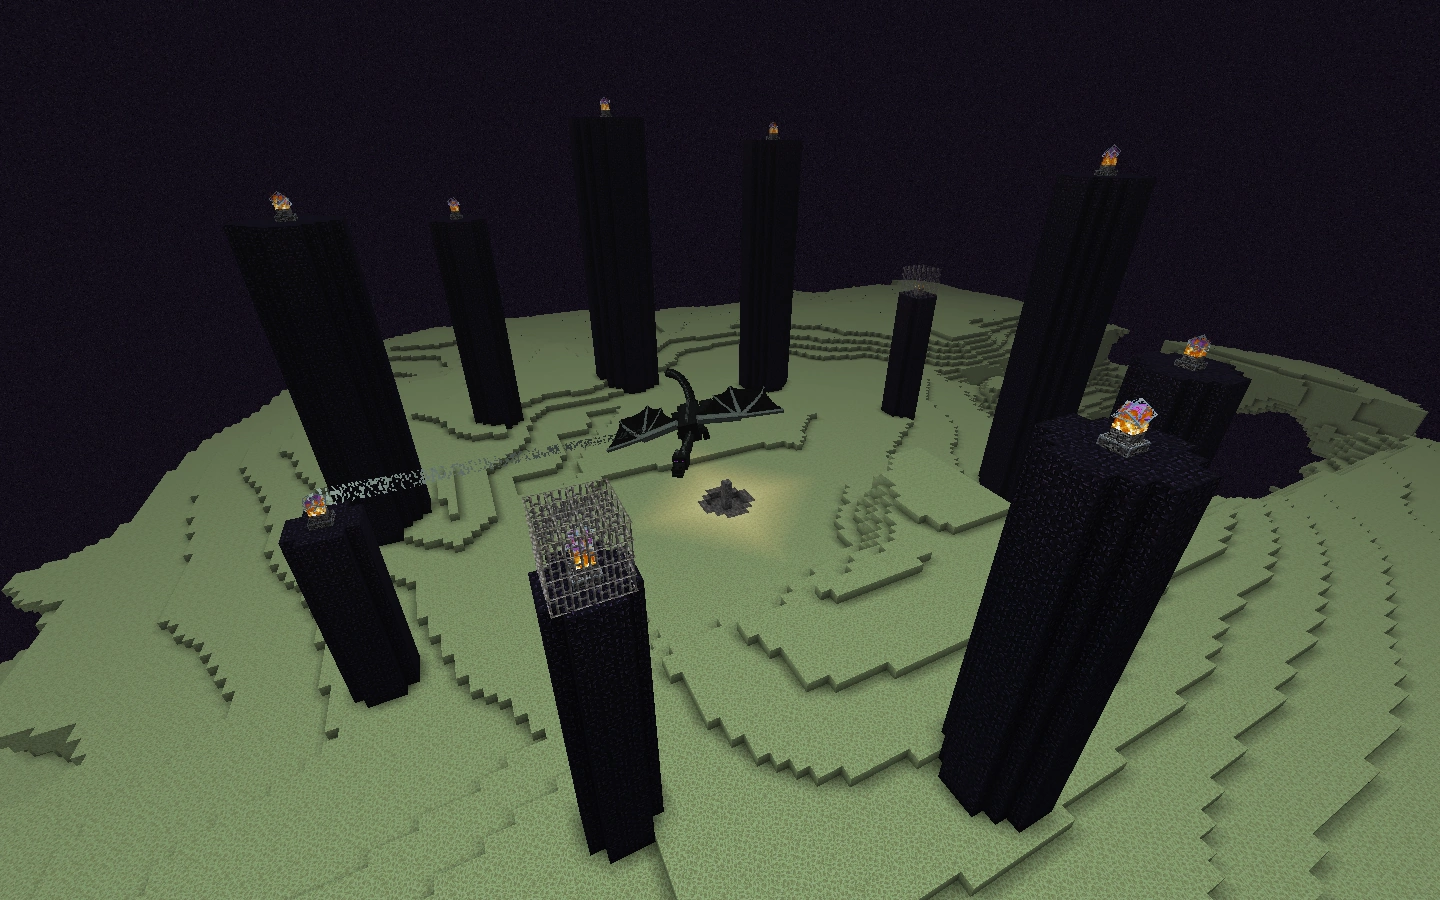
The strategy for the end is simple. Place beds on top of the Bedrock pillar in the island’s center and blow them up to kill the dragon. You’ll want to have an additional obsidian block with you so that you have something to place the bed against. Head to the pillar, and build up next to it until you have an obsidian block to the side one higher than the pillar. If you place a bed against that block, it should sit on top of the pillar.
Once your setup is ready, head to one of the sides of the arena and build up in a straight line. This encourages the Ender Dragon to perch on the Bedrock pillar in the island’s center. Wait, and once the dragon perches, use an Ender Pearl to teleport over to him. This runs in cycles, so you’ll want to time it before the dragon lands. If you miss your timing or don’t kill it quickly enough, return to the sides and wait for another phase.
When the dragon starts slowly flying down towards the center, use your beds and aim to hit the dragon’s head. An experienced speedrunner can kill the dragon in five beds, but it might take you a few more.
Once the dragon is dead and the credits roll, you’re done! Congratulations, you just finished your first Minecraft speedrun.
Outro
That’s it! Hopefully, this Minecraft speedrun guide helped explain things to you. There’s a lot more that goes into these speedruns. The strategies I talked about are just the tip of the iceberg. Once you’re comfortable with what I talked about, you can start diving into that high-level stuff.
For now, though, you should be happy if you can finish a speedrun regardless of how long it takes. The top runners have been doing this for years, so don’t feel any pressure! Take your time and have fun.
Continue reading:
Spider Man Miles Morales Trophy Guide