

- The Forest Achievements Guide: King of the Cannibals - May 31, 2023
- Genshin Impact Trophy Guide – Teyvat Trophy Hunting - May 18, 2023
- Cult of the Lamb Doctrines Tier List - April 17, 2023
If you have been absorbing the recent and trending gaming content out there at the moment, then I would be very surprised if you have managed to avoid the waves of Elden Ring content out there. This new From Software title has reinvented the Souls genre, offered an open-world adventure unlike anything ever seen within the gaming medium, and above all, has given players a genuine next-gen game that they can be proud of, and call a masterpiece. However, for this game to run, the earlier FromSoft games walked, and they did so with a rather confident strut. Dark Souls was the break-out title that put From Software on the map after the cult success of Demons Souls. However, for me personally, Bloodborne, even today, remains the most awe-inspiring and quintessential game that this renowned developer has ever produced.
Bloodborne placed us smack bang in Yharnam, a dark, gothic setting where players would have to survive the hunt and fight off the many perilous residents of the city who have been afflicted with a Bloodborne disease. You, the player, will need to find a cure for this hellish curse, and in doing so, you’ll have to take down some of the most terrifying and gruesome creatures imaginable. It’s a truly enthralling adventure, a game that is much more fast-paced and reactionary than typical Souls titles, and in terms of the overall theme and aesthetic, it’s hands down the most visually striking game in the genre. However, it’s a tough game.
So with that in mind, we have put together a trophy guide that will guide you from 0% to 100% completion in the most streamlined way possible. We can’t promise you won’t die tonnes while trying, but with this guide, you’ll at least know without any doubt that you are on the right path to success. So without further delay, here is our Bloodborne Trophy Guide. Let the hunt begin!
Bottom Line Up Front
Genre: Soulsborne, JRPG
Number of Trophies: 40
Difficulty: 6/10
Platinum %: 21.58%
Number of Playthroughs: One
Time to Complete: 25-50 hours (largely depends on Souls-like experience)
Roadmap to Success
Before we break down each of these trophies on this list, I want to give you a clear path to success which will streamline the process and make sure you get this list checked off in as little time as possible. If you want to stop and smell the roses, feel free, but we want to make sure that you not only know where to go and in what order but also give you the tools to get in and out if that’s how you like to do things. So with that in mind, here is our roadmap to success:
Step One: Work Your Way to the Final Battle

The First step is about as straightforward as a Soulsborne game can be. All you have to do is work your way through the game’s content, beat the bosses that stand in your way, uncover the secrets of Yharnam, and ultimately stop short just before the end. The last fight in this game sees you fight against Gehrman, the First Hunter. What you want to do is ignore this guy until you have done everything else you need to do; otherwise, you will end up doing multiple playthroughs and potentially triple your playtime, and no one wants that. So, in short, play naturally until you encounter Gehrman, the First Hunter. Here are all the relevant trophies for this section:
- Cleric Beast
- Father Gascoigne
- Victor Amelia
- Shadow of Yharnam
- Blood Starved Beast
- The Witch of Hemwick
- Rom, The Vacuous Spider
- Micolash, Host of the Nightmare
- The One Reborn
- Mergo’s Wet Nurse
- Darkbeast Paarl
- Amygdala
- Celestial Emissary
- Martyr Logarius
- Ebrietas, Daugther of the Cosmos
- The Source of the Dream
- The Choir
- Nightmare Lecture Building
- Cainhurst
- Yharnam Pthumerian Queen
Step Two: The Dreaded Chalice Dungeons + Extras

Once you get to the end of the game and leave Gehrman, the First Hunter waiting for your arrival, you can start doing all of the optional content within the game. This includes the optional bosses hidden in secret areas, and of course, the dreaded procedurally generated dungeons present within Bloodborne known as the Chalice Dungeons. These dungeons aren’t incredibly hard, especially if you are well leveled and have the benefit of experience that a full playthrough brings. However, they are repetitive, grind-intensive, and time-consuming. Also, you will need to upgrade your weapons to +10 and acquire rare runes and a (5) Blood Gem. Here are all the relevant trophies for this section:
- Blood Gem Contact
- Rune Contact
- Chalice of Pthumeru
- Chalice of Ailing Loran
- Chalice of Isz
- Hunter’s Craft
- Weapon Master
- Blood Gem Master
- Rune Master
Step Four: Endings and NG+
Then once you have braved the Chalice Dungeons and upgraded your character and their killing tools as much as possible, there are only two things left to do here. You will need to complete the game and achieve all of the different endings. These are achieved by completing certain actions before the end battle. However, when you complete the game once, the game will immediately loop and place you in New Game Plus. So if you want to get all of these endings in one playthrough, we would urge you to use save manipulation and grab the file from your save folder, then place it on a USB and reload this save three times to get all of the endings. Then lastly, when you begin NG+, there is an item that players will have to grab, which is only available after completing the game. After you grab this, you should be the proud owner of the Bloodborne platinum, congrats! Here are all the relevant trophies for this section:
- Yharnam Sunrise
- Honoring Wishes
- Childhood’s Blessing
- Hunter’s Essence
Bloodborne Trophy Guide
Okay, so now that you know what path you need to walk to survive the hunt, then it’s about time we dug into the details. As with every game of this nature, all of these tasks are easier listed than completed, and some of these bosses will test you to your very limit. So without further ado, here is our Bloodborne Trophy Guide:
Cleric Beast
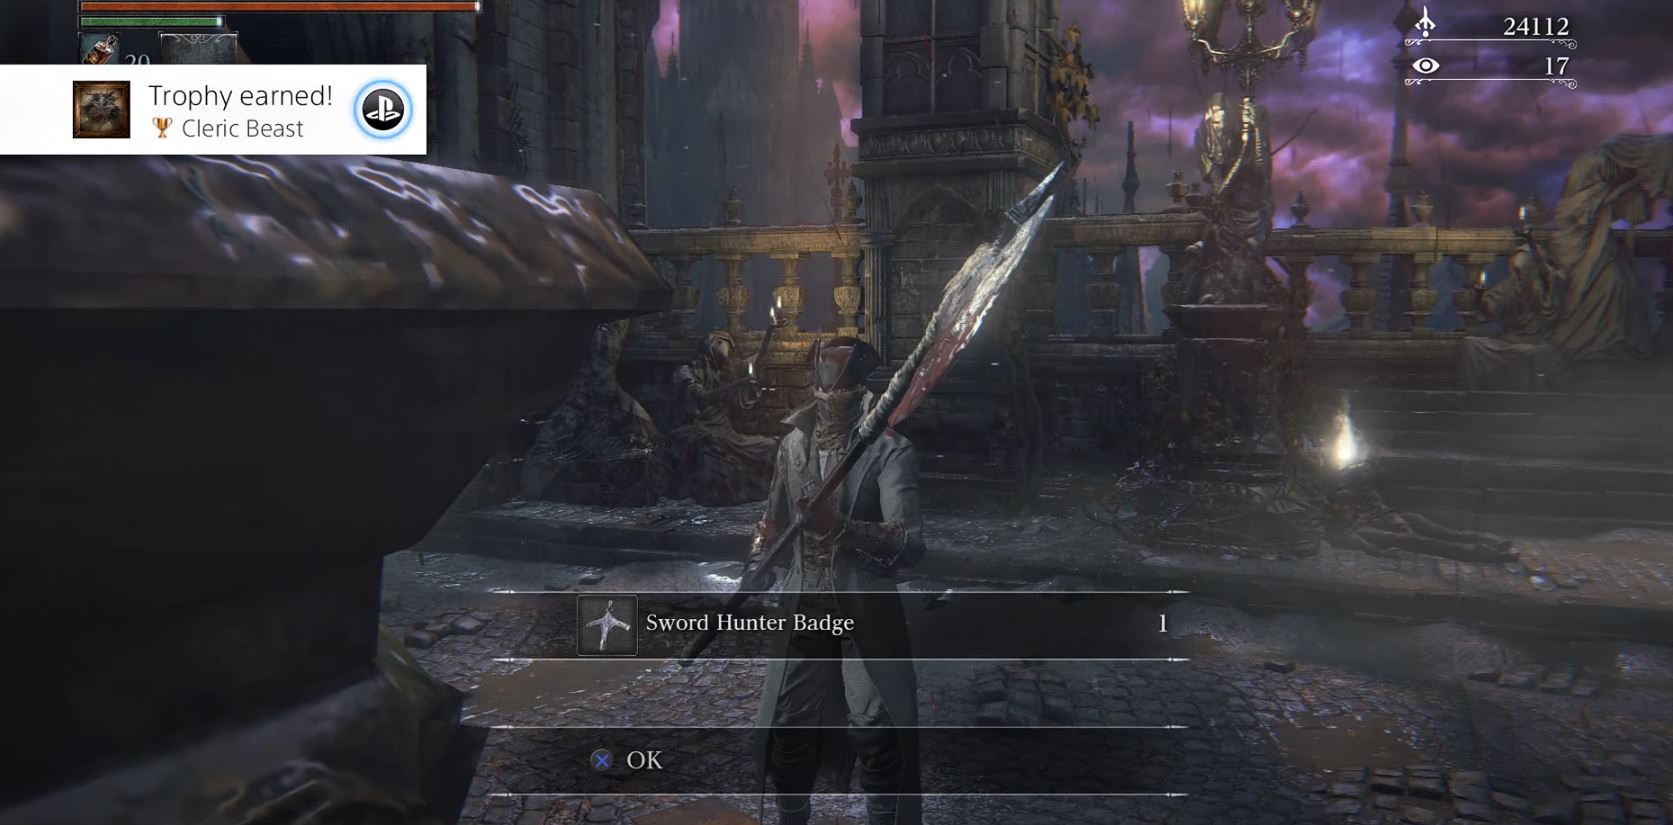
Rarity: Bronze
Player Earned (%): 68.53%
This boss is located on the Great Bridge in Central Yharnam and is perhaps the easiest boss in the game. Here are a few helpful tips to take them down:
- The Cleric Beast is weak to fire, so Oil Urns and Molotov Cocktails are great in this fight.
- The ideal position to take this monster down with melee attacks is directly behind the Beast.
- Don’t retreat after getting hit. Double down and try to regain all your health by staying on the offensive
Father Gascoigne

Rarity: Bronze
Player Earned (%): 65.66%
After the Cleric Beast, you have the first canonical boss of the game, Father Gascoigne. Here are some tips to beat this tricky customer:
- Acquire the Tiny Musicbox by completing Gascoigne’s daughter’s side quest. This is a held item that can be used to stun Gascoigne in battle.
- Tombstones on the battlefield serve as great cover both when trying to get quick attacks in and when you need to retreat to heal.
- Don’t Overuse the Tiny Musicbox, as he will transform into permanent beast form after three uses, and the fight will become twice as difficult.
- Gascoigne has a pretty predictable attack pattern of melee and gun blasts, so use your gun to parry and deal visceral damage.
- Keep Moving and use range attacks like Molotovs if you get a chance.
Victor Amelia

Rarity: Bronze
Player Earned (%): 56%
Here are some tips to beat this Boss:
- Fire is your ally here, so bring lots of Molotovs, Oil Urns, and Fire Paper.
- This Boss is capable of healing, so you might want to bring some Numbing mist with you to shorten the length of this fight.
- Keeping your distance and peppering this boss with Molotovs is the best way to deal damage effectively. Then when you run out and need to resort to melee attacks, you should try to get in behind and deal strong combos.
Shadow of Yharnam

Rarity: Bronze
Player Earned (%): 52.01%
Here are some tips to beat this Boss:
- As you will be fighting three enemies at once here, you should try your best to take down the ranged attack enemy first. Their fireballs are annoyingly accurate and hit hard, often inviting the other enemies in for a powerful combo. So take them out first.
- Use your camera effectively and make sure you have an eye on all enemies on the battlefield. To lose track of even one of these guys is basically a death wish.
- Be aware that all of the enemies will change to phase two when even one of these guys falls to 30% health.
- When you are down to two enemies, try to separate them as best as you can, as they have exceptional range.
Blood Starved Beast

Rarity: Bronze
Player Earned (%): 58.80%
Here are some tips to beat this Boss
- There are quite a few useful items for this fight. Blood Cocktails are able to distract this disgusting enemy. Then as you would expect from previous fights, fire is a great tool to deal big damage here.
- This enemy uses poison to deal slow damage while beating you on the side. So be sure to pack a few Antidotes with you to make this less of an issue.
- This battle is all about speed. You’ll want to go one-handed and use dexterity and movement to keep out of this monster’s attack zones. The only time to retreat is during the poison cloud phase; otherwise, you should be up close and personal with this monster, working those angles until it falls.
The Witch of Hemwick

Rarity: Bronze
Player Earned (%): 54.13%
Now we have the Witch of Hemwick, my vote for the easiest boss in the entire game. Here is a strategy rundown below:
- This Boss isn’t hard, but it is hardy, meaning that it can take a beating. So you might want to upgrade your weapon and do one-handed to deal maximum damage and get as many hits in as possible before this boss teleports away.
- To find the Witch, look for a red ball which is her summoning a minion. However, aimlessly wandering and avoiding the minions will probably have the same level of success.
- Try to avoid the minions completely. You can take one on if you have to, but they will respawn immediately, so there is no place for crowd control here.
Rom, The Vacuous Spider

Rarity: Bronze
Player Earned (%): 50.46%
Here are some tips to beat this Boss:
- Rom uses his spider minions to create distance between them and the player, then attacks from range. You need to close the gap, and to do that; you need to largely ignore his spider pals. So when the fight starts, take off running.
- Always keep moving toward Rom, even when he is using his ranged and Meteor attacks; keep dodging and running in his direction.
- Multiplayer is advised here as a second body can be used as crowd control for the spiders.
Micolash, Host of the Nightmare

Rarity: Bronze
Player Earned (%): 44.88%
Here are some tips to beat this Boss:
- This boss isn’t particularly tricky to fight, but this battle is rather particular in terms of the steps you must take to catch Micolash, and navigating the nightmare can be rather tricky. The key here is to keep running, avoid all normal enemies and chase them into an area where they can’t escape, forcing them to fight.
- Micolash has a long-range on his tentacle attacks. However, they are very obviously telegraphed, so you should be able to dodge them with plenty of time.
- In his second stage, he will take off again. You will need to chase him until he reaches a room where you dropped from a height into. He has now penned himself in. You then backtrack, drop into that room, and then you can finish the fight. Honestly, the biggest challenge in this fight is navigating the area and avoiding the other enemies within.
The One Reborn

Rarity: Bronze
Player Earned (%): 47.41%
Here are some tips to beat this Boss:
- There are several chiming enemies that will use ranged attacks throughout this fight. They will deal low damage, but they will stun you, leaving you open to a pounding from The One Reborn. So take these guys out before taking on the big guy.
- This enemy is weak to bolt damage, so be sure to equip your weapon with Bolt Paper for best results. You might also want to go with an axe here for added range throughout the fight.
- You can stay relatively safe and hack at the enemy’s legs for most of the fight, so keep up close and personal and chain attacks at its lower limbs. Then when you see the enemy glow red, haul ass, as this means that he is about to use a huge area of effect attack that could easily wipe you out if you don’t create some distance.
Mergo’s Wet Nurse

Rarity: Bronze
Player Earned (%): 43.88%
Here are some helpful tricks and tips to make easy work of this boss:
- Lock-on is key throughout this battle. The trick here is to avoid the flurry of scythe attacks she carries out and find a way to get behind them. Once you do, get a strong combo in, and then duck out before the next flurry begins. Don’t get greedy here; she is very strong.
- She will eventually clone herself, and suddenly the battle becomes very tricky. This essentially begins a stage where you must survive and avoid getting hit. Going on the offensive during this phase is not advised. Just ride it out, and when she is alone again, repeat the tip above.
Darkbeast Paarl

Rarity: Bronze
Player Earned (%): 43.37%
Here are some helpful tricks and tips to make easy work of this boss:
- This Beast is a lightning-based attacker, and as you would expect, it moves like lightning too. Plus, it has incredible range, so the best option here is to get up close and dodge his manic attacks, get a few hits in, and repeat.
- His legs are a particular weak spot, and with a few strong attacks, his hulking Beast will crumble, and this will give you a period to hit them with strong charged attacks.
Amygdala

Rarity: Bronze
Player Earned (%): 43.17%
Here are some helpful tricks and tips to make easy work of this boss:
- Using Bolt Paper and Fire Paper is a great option; they aren’t super effective, but they offer a helpful buff.
- The enemy’s legs are pretty much invulnerable, but their tail and hands are fair game. We would suggest taking off the camera lock and swinging for the hands. This limits the monster’s available movesets and is the most consistent area where you can land strikes.
- He will become more mobile after he drops to 25% health and may even jump away from you. This is bad as his moveset becomes much more dangerous at long to mid-range. So take off running and get back into position.
Celestial Emissary

Rarity: Bronze
Player Earned (%): 40.06%
This is another candidate for the easiest enemy in the game. Here are some helpful tricks and tips to make easy work of this boss:
- This boss, with relevance to where you meet them in the game, is a bit of a joke. You’ll have to do some crowd control on their minions, but you could just as easily lead them away from the boss, loop around, get a few hits in, and repeat.
- At 50% health, the boss will be more easily identified as they will grow to an enormous size. However, this isn’t something to worry about. You keep luring minions away, then loop around, get to the back of the Celestial Emissary, get some shots in and repeat. The only difference in this phase is the arcane attacks they can launch at you, but you’ll see them coming a mile away, so don’t panic.
Martyr Logarius

Rarity: Bronze
Player Earned (%): 42.03%
Here are some helpful tricks and tips to make easy work of this boss:
- The steeples are your friend in this fight. When Martyr Logarius uses his Skull cone attack, you can hide behind these and render it useless.
- The best tactic in the first phase is to get up nice and close. He will try to keep his distance from you to keep using magic attacks, but if you continually close the gaps, then he will be forced to use his frankly inadequate scythe attacks.
- The second phase is all melee-based, and he suddenly becomes a proficient melee fighter. The key to beating this phase is using the parry skill to your advantage. All of his melee attacks can be parried, and if you have this down, this fight will be a piece of cake. Otherwise, you will need to be conservative, hitting him between his labored attacks and dodging between each.
- The Sword Tornado attack is a real pain, but to stop his attack, if you attack the source of the attack, the sword wedged in the ground, it will stop chasing you.
Ebrietas, Daugther of the Cosmos

Rarity: Bronze
Player Earned (%): 38.10%
Here are some helpful tricks and tips to make easy work of this boss:
- Ebrietas is a truly imposing foe, so any buff you can get is advised. This monster is weak to blot damage, so be sure to stock up on Bolt Paper.
- The key to success here is playing smart and being conservative. You can find success hitting this enemy from the sides or from behind, but you will probably only have time for 1-2 safe hits before the enemy pivots and begins wailing on you.
- This enemy has a wide variety of attacks, but of the variety available, the close-range attacks are the most manageable. You will just need to keep moving and reacting to their position. If you find yourself face-to-face and up close with this monster, you are in trouble.
The Source of the Dream

Rarity: Silver
Player Earned (%): 46.80%
To unlock this trophy, you will need to find the source of the Hunter’s Dream; this is the Old Abandoned Workshop that actually exists in the main world. You can access this through the Cathedral Ward, and this will involve some rather intricate platforming to descend down to this hidden area. However, if you manage to navigate this path, you’ll have a shiny new silver trophy.
The Choir

Rarity: Silver
Player Earned (%): 41.30%
This is a trophy that will pop when you gain access to The Realm of The Choir. To do this, you will need to get the Upper Cathedral key, kill the Blood Starved Beast and then navigate up through the Cathedral Ward, defeat some moderately tough enemies and then push through the big double doors, allowing the trophy to pop.
Nightmare Lecture Building

Rarity: Silver
Player Earned (%): 49.90%
You will gain this trophy by gaining access to the Byrgenwerth Lecture Building. This is basically a gimme trophy as you will arrive in this area about 30 seconds after defeating the One Reborn after you interact with the item upstairs behind the boss battle area. There are other ways to obtain this through the use of the Tonsil Stone and trudging through the Forbidden Woods, but do yourself a favor, just take on the One Reborn.
Cainhurst

Rarity: Silver
Player Earned (%): 44.68%
This trophy will pop when you enter Cainhurst Castle, an area that can only be accessed by getting your hands on an item from the game’s starting area. You will need to go through the Poison Swamp Cave, allowing you to access a secret area of Isofkas Clinic and get the Cainhurst Summons. Then you must go to Hemwick Charnel Lane, and run full steam ahead until you get a cutscene with a carriage, then interact with it, and bam, a trophy for you, good sir or madam.
Yharnam Pthumerian Queen

Rarity: Gold
Player Earned (%): 22.81%
This is the boss located at the end of the Pthumeru Chalice Dungeons. Here are some helpful tricks and tips to make easy work of this boss:
- This boss mainly does damage through blood attacks, so be sure to wear attire that protects against this style of attack.
- Watch out for the AoE attacks, as these can see her whittle you down to zero health in no time.
- Due to her strong ranged attacks, it’s best to get up in her space. She is equally powerful with her melee attacks, but the difference is that up close, you can stun-lock her and manage the battle much better.
- They will go through a second and third phase, but while their damage and attacks get more impressive, you need to keep doing the same as you were, keep chipping away at her health, and keep a close eye on your own.
- Be aware of the clones that spawn in. They will die in one hit, but if you ignore them, they will almost certainly do something to hinder you later in the fight.
Blood Gem Contact

Rarity: Bronze
Player Earned (%): 67.23%
This is earned by getting your hands on one Blood Gem used to provide stat buffs to your weapons. You will inevitably get this through natural play.
Rune Contact

Rarity: Bronze
Player Earned (%): 59.11%
Runes are items that, when equipped, provide the player with a unique buff or skill of sorts. Again, you will likely acquire a few through natural play, and when you receive your first, this trophy will pop.
Chalice of Pthumeru

Rarity: Bronze
Player Earned (%): 58.80%
This is a trophy that is earned for working your way through all of the procedural dungeons linked to the Pthumeru Chalice. This is unlocked after defeating the Blood Starved Beast.
Chalice of Ailing Loran

Rarity: Bronze
Player Earned (%): 43.19%
This is a trophy that is earned for working your way through all of the procedural dungeons linked to the Ailing Loran Chalice. You can start this when you defeat Amygdala.
Chalice of Isz

Rarity: Bronze
Player Earned (%): 38.10%
This is a trophy that will pop when you complete the Chalice Dungeon related to the Chalice of Isz. This will pop in tandem with the gold trophy, which signals the defeat of Yharnam, Pthumerian Queen. This dungeon can only be accessed after you defeat Ebrietas, Daughter of the Cosmos.
Hunter’s Craft

Rarity: Gold
Player Earned (%): 28.93%
The player will need to find all of the Hunter’s tools in the game. These are as follows:
- Old Hunter Bone
- Beast’s Roar
- Empty Phantasm Shell
- Executioner’s Gloves
- Messenger’s Gift
- Tiny Tontruis
- Choir Bell
- A Call Beyond
- Augur of Ebrietas
Weapon Master

Rarity: Silver
Player Earned (%): 39.23%
This is a trophy that will pop when the player has managed to upgrade at least one of their weapons to the max strength, which is +10. To do this, you will need to find a decent supply of the following items.
- Blood Stone Shard
- Twin Blood Stone Shards
- Blood Stone Chunks
- Blood Rocks
Note that there is only one Blood Rock in the main game proper, located in the Nightmare of Mensis area. However, you can acquire more through the Chalice of Isz dungeons.
Blood Gem Master

Rarity: Silver
Player Earned (%): 33.62
This trophy will pop when you get your hands on a Blood Gem (5), a very rare Blood gem that offers the highest buff available concerning Blood Gems. These are hard to come by in the main game but not impossible. However, if you make your way through the Chalice Dungeons, you will be likely to find one or more of these items.
Rune Master

Rarity: Silver
Player Earned (%): 49.00%
This one isn’t RNG-based like the trophy above. Here you will need to find a precious Caryll Rune, and we know exactly where to get one. On the second floor of the Cathedral Ward, which can only be reached by rolling off a moving elevator, if you wander down this hidden hallway, you will come across a chest, and inside will be the Formless Odeon rune, a precious rune that will pop this trophy.
Yharnam Sunrise

Rarity: Gold
Player Earned (%): 28.45%
This Ending is earned by reaching the end of the game and submitting your life when conversing with Gehrman, the First Hunter. This bypasses the battle with him and ends the game.
Honoring Wishes

Rarity: Gold
Player Earned (%):
This is the opposite ending to the one listed above. The player will refuse to submit to Gehrman, the First Hunter, and as a result, the player will need to defeat them in a battle to signal the end of the game.
Gehrman, the First Hunter is a tricky boss but compared to all others, it’s far from the hardest battle. The key here is to keep moving, dodge frequently, and be conservative with strikes. There is some room for parrying, but in truth, it’s better to just keep on your toes, allowing you to strike and move. The biggest threat here is when he breaks out the gun and sword combo, as he can now stun and visceral attack you. However, if you keep moving and avoid getting greedy, he will eventually die.
Childhood’s Blessing

Rarity: Gold
Player Earned (%):
To trigger this ending, you must refuse Gehrman, the First Hunter, as you have done before, but before you engage him in conversation, you must gather three of the four available umbilical cords. These can be obtained through the following methods:
- Killing Mergo’s Wet Nurse
- Visiting the Abandoned Workshop
- Killing Iosefka after killing Rom, the Vacuous Spider
- Killing Arianna’s Baby
You will then need to kill Gehrman, the First Hunter, and then you will be presented with the true final boss, the Moon Presence. This can be a tricky fight as you will be short on Blood Vials, and truthfully, it’s unlikely that you will avoid taking damage here. They also use a numbing mist attack and an AoE effect that drains you to one HP. However, if you charge at them head-on and swing violently, you can gain all of your health back with no need to heal. They also have some strong spin attacks, so if you can spot them, try to clear out of their path to avoid getting repeatedly knocked back.
Hunter’s Essence

Rarity: Gold
Player Earned (%): 24.14%
Then last but not least, this trophy is obtained by gathering all of the hunter weapons in the game. You can get all of these in one playthrough but one, as it is locked until you play NG+. Here is a complete list:
- Saw Cleaver
- Hunter’s Axe
- Threaded Cane
- Kirkhammer
- Saw Spear
- Rifle Spear
- Stake Spear
- Ludwig’s Holy Blade
- Tonitrus
- ReiterPallasch
- Logarius’ Wheel
- Chikage
- Blade of Mercy
- Beast Claw
- Burial Blade (NG+)
- Hunter Pistol
- Hunter Blunderbuss
- Torch
- Wooden Shield
- Repeating Pistol
- Hunter’s Torch
- Ludwig’s Rifle
- Flamesprayer
- Evelyn
- Cannon
- Rosmarinous
So Begins the Night of the (Trophy) Hunt!
As you can see from the information above, there are a handful of really tricky trophies on this list, as you would expect with a Soulsborne game of this nature. However, with around 21% of all registered PSN Profiles players earning the platinum on this game, you can see that it is one of the more accessible trophy lists within this punishing genre. This game is one of the best of the modern PlayStation era, and if you want a platinum trophy to add to your collection that will help you set yourself apart as a truly dedicated completionist, then this one is a great way to do this. We hope that this guide serves you well, and we hope that the hunt isn’t too grueling for you. As always, thank you for reading Avid Achievers.
FAQ Section
Question: When Was Bloodborne Released?
Answer: Bloodborne is surprisingly over half a decade old at the time of writing, which is incredible as the game still looks phenomenal by all accounts. This game was released on the 24th of March, 2015. There have always been rumors of a sequel since but to this day; we still await any concrete evidence of a new project.
Question: Is Bloodborne a PS4 Exclusive?
Answer: Upon release, Bloodborne was indeed a PlayStation exclusive, and this was a huge coup for Sony, especially with the global success of the Dark Souls series. As of this year, PC players were finally able to play Bloodborne on their respective gaming systems a mere six years after release, but for other console players, this game has always been just out of reach.
Question: What is the Hardest Boss in Bloodborne?
Answer: This is a subjective question as all players will come into these battles with varying skill sets, and one foe may prove more difficult than another. So I can only give you my view, and that would be a toss-up between Ebrietas, Daugther of the Cosmos, and Martyr Logarius.