

- The True Dovakhiin: Skyrim Trophy Guide - December 19, 2022
- Titanfall 2 Speedrun Guide - October 23, 2022
- Majora’s Mask Speedrun Guide - October 23, 2022
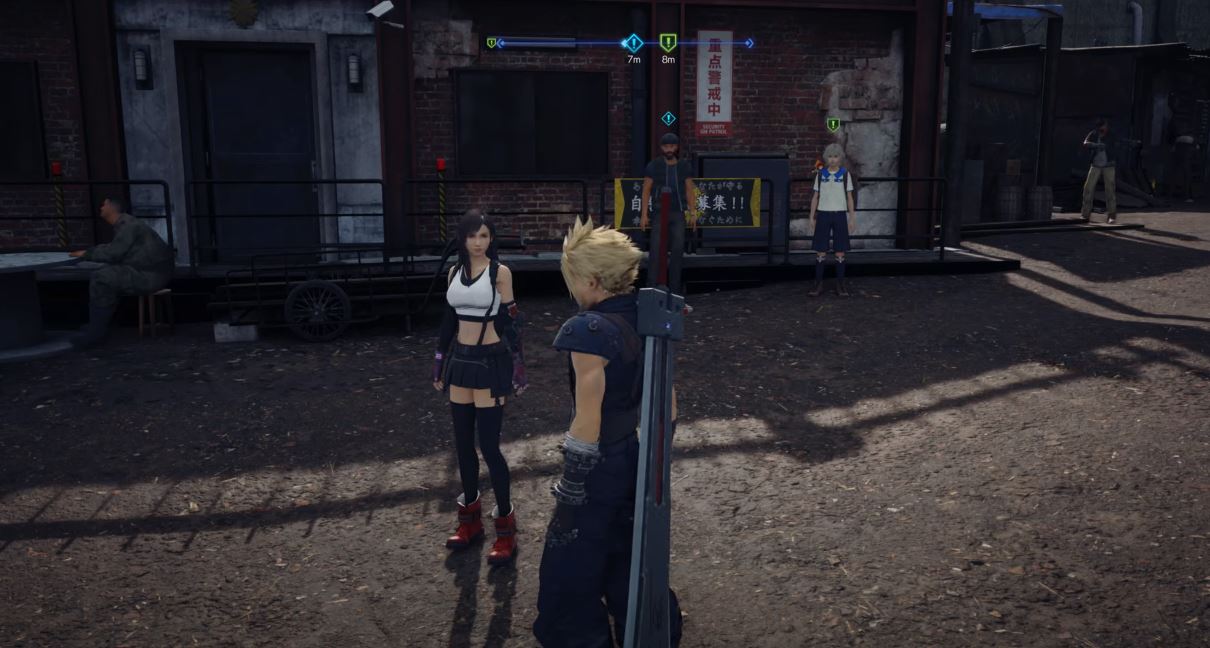
Final Fantasy 7 is one of the most iconic JRPGs ever released. It has been remastered to new platforms countless times, Cloud and his buster sword are instantly recognizable, and its story is revered as one of the best told in the medium. So, it is no surprise that Square Enix decided to reimagine the game with a new take on its combat system and beautiful modernized presentation. However, they also surprised fans by thoroughly mixing up the story to keep them on their toes. This makes the game accessible to new players, fun to discover for dedicated fans, and gives trophy hunters something to think about while tracking their coveted platinum.
Key Info Up Front
Genre: Action JRPG
Difficulty: 6/10
Number of Playthroughs Required: 2
Estimated Time to Complete: Approximately 75 hours
Number of Trophies: 62
Final Fantasy 7 Remake Walkthrough
Before looking at the game’s solid list of trophies you’ll be earning, we need to go over what you should expect before starting this project. This will also ensure that you tackle your completion in the most efficient way possible, so you don’t miss anything or have to do any extra grinding.
Step One: The Story Playthrough
The first step is to play through the game and just enjoy the story how you naturally would. At the start, you’ll be able to pick from three difficulties, so feel free to pick whichever one sounds best to you. Going with Casual will make your playthrough as short as possible while going with Normal will make the jump up to Hard in the next step, not as drastic of a transition for you. Hard will only unlock after you’ve beaten the game once, so no matter what, you’ll have to do two playthroughs here. Most trophies are just for playing through the game, so you’ll get the majority of them without much effort.
However, there are also chapter-specific trophies that you may want to watch, but if you miss them, there is chapter selection, so you don’t have to worry about them too much. As you play, though, you should work on the Disc Jockey and Dressed to the Nines trophies so that you don’t have to worry about them during your Hard playthrough, so make sure to look at those below as you go.
Trophies in this Step:
- Onetime Gig
- Escape Artist
- Mercenary Endeavors
- Night on the Town
- Plan E
- Lights Out
- Trapped Like Sewer Rats
- Reunited
- Never the Bride
- Sewer Survivor
- Paranormal Investigator
- The Collapse
- Broken Dreams
- Picking Up the Pieces
- The Pizza in the Sky
- No Appointment Needed
- Emerging from Chaos
- Destiny’s Crossroads
- Warming Up
- Weakened Resolve
- Bonds of Friendship
- Staggering Start
- Music Collector
- Gotta Start Somewhere
- My First Ability
- My First Summon
- Biker Boy
- Heavenly Dart Player
- Cleanup Crew
- In Lockstep
- Crate Annihilator
- Say It with Flowers
- Summon Slayer
- Sultan of Squat
- Dancing Queen
- Returning Champion
- Snappy Dresser
- Whack-a-Box Wunderkind
- Peeress of Pull-Ups
- Divine Gratitude
- The Johnny Experience
- Disc Jockey
Step Two: The Hard Playthrough
Now that you’re done with the game, you can start your Hard playthrough. This difficulty is a lot more punishing and stops you from using items so that you can’t heal or regain MP during battles. To counter this, you’ll have to keep every character stocked up with Revival Materia and HP Up and MP UP materias. However, you’ll want to be extremely sparing with your MP throughout the playthrough since it is expensive to replenish. This means only using it when you know it will be worthwhile and doing tricks like using Magnify Materia on your Healing Materia so that it heals your entire party with one use.
You should also do as many side quests as you can to get as many resources, experience, and items as possible. This will ensure you are as prepared for the challenges as possible while also giving you some wiggle room in case you overspend on anything and regret it later. During this playthrough, you’ll want to make sure you get more dress options for the Dressed to the Nines trophy to avoid having to play through it a fourth time through chapter selection. During this playthrough, you’ll also be able to finish up the last two quests in Chapter Nine for the Best in the Business trophy, as well as doing the new VR system challenges in Chapter Seventeen to get the That’s The Smell, Master of Mimicry, and Ultimate Weapon trophies.
Trophies in this step:
- Best in the Business
- Disc Jockey
- Building Character
- Staggering Feat
- Intelligence Agent
- Weapons Expert
- Master of Mimicry
- That’s the Smell
- Ultimate Weapon
- Hardened Veteran
Step Three: Chapter Selection
Once you’ve rerun through the game on Hard difficulty, you’ll want to use chapter selection to get any of the trophies you miss. However, you’ll have to replay through Chapters three, eight, and nine to get the remaining three dress options for Dressed to the Nines. Once the base game is finished, you’ll be ready to move on to the INTERmission DLC.
Trophies in this step:
- Dressed to the Nines
Step Four: INTERmission
The INTERmission DLC isn’t very long, but you’ll have to go through it twice like the base game, so expect this step alone to take you around 15 hours. You can complete the first playthrough on any difficulty again, and the second one will have to be on Hard. During your first playthrough, you should get all of the miscellaneous trophies alongside the main story ones, such as Turtle-tastic, Materia Maven, and Game, Set, Master. Once you’re done, move on to your Hard playthrough, where you’ll get the two Hard-related trophies and complete the new Simulation mission Yuffie & Sonon vs. Top Secrets. Finally, once you’re as upgraded as you can be and feel comfortable playing on hard, you’ll have to challenge the secret boss added to the VR Simulation in Chapter Seventeen of the main game, Weiss.
Trophies in this step:
- Takes Two IDs to Tango
- Out of Darkness’s Clutches
- Turtle-tastic
- Game, Set, Master
- Materia Maven
- The Road to Revenge
- Condor Queen
- Ultimate Weapon 2.0
- Corrupter of the Immaculate
Final Fantasy 7 Remake Trophies
Onetime Gig

Rarity: Bronze
Description: This is a story trophy you will get playing naturally.
Escape Artist

Rarity: Bronze
Description: This is a story trophy you will get playing naturally.
Mercenary Endeavors

Rarity: Bronze
Description: This is a story trophy you will get playing naturally.
Night on the Town

Rarity: Bronze
Description: This is a story trophy you will get playing naturally.
Plan E
Rarity: Bronze
Description: This is a story trophy you will get playing naturally.
Lights Out

Rarity: Bronze
Description: This is a story trophy you will get playing naturally.
Trapped Like Sewer Rats

Rarity: Bronze
Description: This is a story trophy you will get playing naturally.
Reunited

Rarity: Bronze
Description: This is a story trophy you will get playing naturally.
Never the Bride

Rarity: Bronze
Description: This is a story trophy you will get playing naturally.
Sewer Survivor

Rarity: Bronze
Description: This is a story trophy you will get playing naturally.
Paranormal Investigator

Rarity: Bronze
Description: This is a story trophy you will get playing naturally.
The Collapse

Rarity: Bronze
Description: This is a story trophy you will get playing naturally.
Broken Dreams

Rarity: Bronze
Description: This is a story trophy you will get playing naturally.
Picking Up the Pieces

Rarity: Bronze
Description: This is a story trophy you will get playing naturally.
The Pizza in the Sky

Rarity: Bronze
Description: This is a story trophy you will get playing naturally.
No Appointment Needed
Rarity: Bronze
Description: This is a story trophy you will get playing naturally.
Emerging from Chaos

Rarity: Bronze
Description: This is a story trophy you will get playing naturally.
Destiny’s Crossroads

Rarity: Bronze
Description: This is a story trophy you will get playing naturally.
Warming Up

Rarity: Bronze
Description: This trophy is for completing your first battle.
Weakened Resolve

Rarity: Bronze
Description: This trophy is for attacking an enemy with an element they are weak to.
Bonds of Friendship

Rarity: Bronze
Description: This trophy is for freeing an enemy that an enemy has bound.
Staggering Start

Rarity: Bronze
Description: This trophy is for giving an enemy the stagger status.
Music Collector

Rarity: Bronze
Description: This trophy is for collecting three music discs.
Tips: See Disc Jockey below.
Gotta Start Somewhere

Rarity: Bronze
Description: This trophy is for doing a side-quest.
Tips: See Best in the Business below.
My First Ability

Rarity: Bronze
Description: This trophy is for reaching maximum proficiency with one weapon.
Tips: A weapon’s proficiency is related to its unique ability, and to raise it to the maximum, you have to keep using that ability in battle. The progress of its proficiency can be checked in the weapon menu.
Materia for Beginners

Rarity: Bronze
Description: This trophy is for leveling up a material.
My First Summon
Rarity: Bronze
Description: This trophy is for using your first summon.
Biker Boy

Rarity: Bronze
Description: This trophy is for getting a compliment from Jessie after completing the motorcycle mini-game.
Tips: The motorcycle mini-game takes place at the start of Chapter Four. To get Jessie to compliment you, you have to have 75% of your health left at the end of the section. If you miss it during your first playthrough, you can always run through the chapter again on an easier difficulty to pick it up.
Heavenly Dart Player

Rarity: Bronze
Description: This trophy is for being at the top of the Seventh Heaven darts leaderboard.
Tips: You can play darts in Chapter Three while waiting for the reunion to end. To get to the top of the leaderboard, you have to finish the game in seven darts, but you can do so in five, giving you some wiggle room. The easiest way is to get the triple 20 for maximum points.
Cleanup Crew

Rarity: Bronze
Description: This trophy is for getting the Chocobo & Moogle materia.
Tips: This materia is found in Chapter Six before going into Mako Reactor 5. Just before you do so, check your map and see an unexplored area to your west. Go there, and enemies will spawn along with a timer. You have to cross the room and activate the generator before the timer reaches zero and then kill the enemies. The materia you need is then in that room.
In Lockstep

Rarity: Bronze
Description: This trophy is for getting past the delta security lock in Mako Reactor 5.
Tips: This trophy can be unlocked during Chapter Seven. Don’t continue down the main path after you complete a lever puzzle to open up a door. Instead, open the second door to the disposal room. You will have to do four more simple lever puzzles to get this trophy.
Crate Annihilator

Rarity: Bronze
Description: This trophy is for finishing all Normal Whack-a-Box challenges.
Tips: This mini-game is unlocked by finishing Chapter Eight’s A Verified Hero quest. Once you have the mini-games open, you have to beat its Pro challenge. To do so, focus on getting the red boxes that give you more time. You’ll get plenty of points while you go for them, and it will make sure you have the necessary time to beat it.
Say It With Flowers

Rarity: Bronze
Description: This is a story trophy you will get playing naturally.
Summon Slayer

Rarity: Bronze
Description: This trophy is for killing a summon.
Tips: The earliest you can do this is by fighting Shiva in the VR Missions from Chadley in Chapter Eight.
Sultan of Squat

Rarity: Bronze
Description: This trophy is for beating the Squatmini-game.
Tips: the Squatmini-game will be unlocked after finishing the Burning Thighs quest in Chapter Nine.
Dancing Queen

Rarity: Bronze
Description: This trophy is for performing exceptionally well during the dance sequence in Chapter Nine.
Tips: The threshold for this trophy is unknown, but players have reported getting it with only 23 Greats and 5 Goods, so it is an easy trophy to pick up. You also will play through the sequence three times to get other trophies, so you’ll have plenty of opportunities to get it.
Returning Champion

Rarity: Bronze
Description: This trophy is for winning in the colosseum.
Tips: You can fight in the colosseum after finishing the Hell House in Chapter Nine, and all you have to do is complete one challenge for this trophy.
Snappy Dresser

Rarity: Bronze
Description: This is a story trophy you will get playing naturally.
Dressed to the Nines

Rarity: Silver
Description: This trophy is for collecting all nine wedding dresses.
Tips: The dresses are earned depending on your choices in Chapters Three, Eight, and Nine. You’ll have to get three of them during your first playthrough, three more on your Hard playthrough, and use Chapter Selection to get the remainder. All of the dresses and how to get them are below.
| Chapter | Dress | How to Get |
| Chapter Three | Blue Dress | Either do not do any side quests in Chapter Three or say “Mature” as your choice when Tifa asks. |
| Chinese Dress | Saying “Sporty” when Tifa asks. | |
| Kimono | Saying “Exotic” when Tifa asks. | |
| Chapter Eight | Simple Pink Dress | Do between zero and two side quests in Chapter Eight. |
| Pink Dress | Do between three and five side quests in Chapter Eight. | |
| Red Dress | Do all six side quests in Chapter Eight. | |
| Chapter Nine | Black Dress with White Ribbons | Do zero side quests in Chapter Nine. |
| White/Black Dress with Tiara | Do the side quests Burning Thighs, The Price of Thievery, and Shears’ Counterattack in Chapter Nine. | |
| Blue/Black Dress with Black Ribbon | Do the side quests Burning Thighs, The Party Never Stops, and A Dynamite Body in Chapter Nine. |
Whack-a-Box Wunderkind

Rarity: Bronze
Description: This trophy is for finishing all of the Hard Whack-a-Box challenges.
Tips: For this trophy, you have to do the Pro challenge unlocked after going to the children’s hideout in Chapter 14. You will again want to focus on getting the time extension crates above all the others, otherwise, you won’t have nearly enough time to finish it.
Peeress of Pull-Ups

Rarity: Bronze
Description: This trophy is for doing every pull-up challenge.
Tips: The pull-up mini-game is unlocked by doing the Wavering Heart quest in Chapter 14. Then, just beat the Pro pull-up challenge to get this one to pop.
Divine Gratitude

Rarity: Bronze
Description: This trophy is for completing every side quest through Chapter 14.
Tips: The exact requirements to get this trophy to unlock are widely debated by the game’s community, so doing all of the side quests is the safest bet to make sure you get it. Then, once you come out of the sewers at the end of Chapter 14, a letter will be waiting for you in front of the Chocobo fast travel that will unlock this trophy when you collect it.
The Johnny Experience
Rarity: Bronze
Description: This trophy is for seeing all four of Johnny’s incidents.
Tips: To see each incident with Johnny, you have to do the following:
- Incident One: Witnessed in Chapter Three during a story quest.
- Incident Two: Complete his side quest in Chapter Nine and say “yeah” whenever possible.
- Incident Three: Complete the side quest The Party Never Stops in Chapter Nine.
- Incident Four: Complete the side quest Tomboy Bandit in Chapter 14.
Best in the Business
Rarity: Silver
Description: This trophy is for doing every side quest in the game.
Tips: There are 26 side quests in Final Fantasy 7 Remake, but two of them can only be done during your second playthrough. Luckily, the quests are labeled on your map, or you’ll come across them as you play, so make sure to do any you know of before progressing. All of the quests required to do in Chapter Three are:
- Chadley’s Report
- Lost Friends
- Rat Problem
- On the Prowl
- Nuisance in the Factory
- Just flew in from the Graveyard (after finishing Nuisance in the factory)
All of the quests in Chapter Eight are:
- The Mysterious Moogle Merchant
- Weapons on a Rampage
- Paying Respects (after finishing Weapons on a Rampage)
- Kids on Patrol
- A Verified Hero (after completing Kids on Patrol)
- The Angel of the Slums (after finishing A Verified Hero)
The quests in Chapter Nine get tricky, as they are split into two sets depending on your choices throughout the chapter. The decisions for each set are:
| Quest Set 1 | Quest Set 2 |
| Say “She’s in great shape” about Tifa | Say, “She’s great handling the books” about Tifa. |
| Complete Johnny’s Discovery Event and say “Yeah.” | Ignore Johnny’s Discovery Event |
| Select “Heads” when playing Heads or Tails | Select “No Deal” when playing Heads or Tails |
| Say “No thanks” to the man in front of Wall Market’s Hotel | Say “How much?” to the man in front of Wall Market’s Hotel |
| Select “Poor Man’s Course: 100 G” at Madame M’s parlor | Select “Luxury Course: 3,000 G” at Madame M’s parlor |
| Say Aerith’s outfit is “Alright.” | Say, “It matter what I think?” about Aerith’s outfit |
| Drink the mystery drink in the colosseum | Ignore the mystery drink in the colosseum. |
The quests in Chapter Nine are:
- Burning Thighs
- The Party that Never Stops (Set One)
- A Dynamite Body (Set One, after finishing The Party that Never Stops)
- The Price of Thievery (Set Two)
- Shears’ Counterattack (Set Two, after finishing The Price of Thievery)
The quests in Chapter 14 are:
- The Power of Music
- Malicious Goons
- Wavering Heart
- Chocobo Search
- Missing Children
- Tomboy Bandit
- Secret Medicine
- Subterranean Menace
- Corneo’s Secret Stash
Disc Jockey

Rarity: Silver
Description: This trophy is for collecting every music disc in the game.
Tips: The location of each music disc is below:
| Chapter | Music Disc | Location |
| Chapter Three | The Prelude | Purchased from the Item Shop vendor. |
| Tifa’s Theme | Found in Seventh Heaven’s Jukebox. | |
| Barret’s Theme | Sold at a food stall at the Sector 7 train station. | |
| Hip Hop de Chocobo | Given by a DJ behind Seventh Heaven. | |
| Chapter Five | Stamp | In a vending machine in a room, after you defeat the flamethrower soldiers and sentry guns. |
| Chapter Six | Electric de Chocobo | Found in a vending machine in the area for the Cleanup Crew trophy above. |
| Chapter Seven | Bombing Mission | In a vending machine, after you complete the lever puzzle. |
| Chapter Eight | Costa del Sol | Sold by the Meria Vendor. |
| Gold Saucer | Is available at the Moogle Emporium in the Slums once you can do side quests. | |
| Cait Sith’s Theme | In a vending machine at the far end of the slums after you meet Aerith. | |
| Descendant of Shinobi | Found in the Sector 5 Train Station by where Turk comes from. | |
| Tango of Tears | In the jukebox inside the Slums community center. | |
| Chapter Nine | Under The Rotting Pizza | In a jukebox in the alley behind the hotel. |
| Honeybee Inn | Bought from the Wall Market Item Shop. | |
| Don of the Slums | In the Vending Machine, after you wake up from the sleeping gas. | |
| Farm Boy | Given by a cowgirl upstairs and to the north of Chadley in the Wall Market. | |
| Cosmo Canyon | In a vending machine, straight ahead from the second robot arm puzzle. | |
| Let the Battles Begin! – REMAKE | Reward for getting 10 Greats when practicing dancing at Honeybee Inn. | |
| The Midgard Blues | Given by the man singing karaoke in the bar during the side quest with Johnny. | |
| Chapter Ten | The Oppressed | In a Vending Machine by where you defeat Abzu. |
| Chapter Eleven | Let the Battles Begin! | In a vending machine just before you reach the generator room of the Train Graveyard. |
| Chapter 13 | Main Theme of FFVIII | In a vending machine at the end of the Underground Test Site. |
| On Our Way | Purchased from the Item Store on the playground. | |
| Chapter 14 | Turk’s Theme | Give by an NPC next to the pond north of the Wall Market. |
| The Chase | In a Vending Machine in Corneo’s Hideout. | |
| Wutai | Given by a worker in the urban advancement district next to Corneo’s mansion. | |
| Fight On! | Purchased from the souvenir shop in the Wall Market colosseum. | |
| Good Night, Until Tomorrow | Given by a man with a mustache in the Wall Market Hotel. | |
| Stand Up | Found in the alley to the left of the Honeybee Inn. | |
| Chapter 15 | Lurking in the Darkness | Found in a Vending Machine, you can’t miss. |
| Chapter 16 | Scarlet’s Theme | Found in a Jukebox by the Shinra VR facility. |

Rarity: Bronze
Description: This trophy is for getting a character to level 50.
Tips: You will get this trophy during your Hard mode playthrough.
Staggering Feat

Rarity: Bronze
Description: This trophy is for doing 300% damage to a staggered enemy.
Tips: The easiest boss to do this on is the Fat Chocobo in the VR Missions. However, you have to do it on Normal or Hard difficulty. Otherwise, it will die on you too early. To do this, follow the steps below:
- Use Unbridled Strength twice to charge Tifa’s Omnistrike
- Prepare Rise and Fall to charge two ATB bars
- Prepare Aerith’s Ray of Judgement
- Then, stagger it, use Rise and Fall
- Use Ray of Judgement
- Hit the Fat Chocobo with Tifa’s Square Attack
- Then use True Strike three times when you can
Intelligence Agent

Rarity: Silver
Description: This trophy is for finishing all battle intel reports
Tips: Battle intel reports can be done by visiting Chadley during Chapters Three, Eight, Nine, Fourteen, Sixteen, and Seventeen. You have to do a total of 20 missions for him, and they are changed by difficulty, so if any of them give you trouble, you can do them in chapter selection on an easier difficulty. The list of challenges are below:
- Monster Bio Pt. 1
- Magic Elements Pt. 1
- The Stagger Effect Pt. 1
- The Stagger Effect Pt. 2
- Combat Simulation: Shiva
- Monster Bio Pt. 2
- Magic Elements Pt. 2
- The Manipulation Technique
- Monster Variants Pt. 1
- Combat Simulation: Fat Chocobo
- Monster Bio Pt. 3
- The Stagger Effect Pt. 3
- Refocus Analysis
- The Stagger Effect Pt. 4
- Combat Simulation: Leviathan
- Monster Bio Pt. 4
- Weapon Abilities
- MP Consumption
- Monster Variants Pt. 2
- Combat Simulation: Bahamut
Weapons Expert

Rarity: Silver
Description: This trophy is for getting every weapon’s proficiency to 100%.
Tips: To do this, you’ll have to switch between all of the weapons in the game with each character and use their unique abilities in combat enough to get the trophy to pop. The weapons needed and where to find them are all below.
| Character | Weapon | Location |
| Cloud | Buster Sword | Default weapon. |
| Iron Blade | Obtained during Chapter Three during the story. | |
| Nail Bat | Reward for the quest Kids on Patrol in Chapter Eight. | |
| Hardedge | Purchased from the Weapon Shop in Chapter Nine. | |
| Mythril Saber | Purchased from the Weapon Shop in Chapter 14. | |
| Twin Stinger | In a purple chest next to the staircase after Red XIII helps you cross the pods in Chapter 17. | |
| Tifa | Leather Gloves | Default weapon. |
| Metal Knuckles | Obtained during Chapter Five during the story. | |
| Sonic Strikers | Found in a purple chest in Mako Reactor 5 during Chapter Seven. | |
| Feathered Gloves | Found in a purple chest in Aqueduct 1 after the water is drained in Chapter Ten. | |
| Mythril Claws | Obtained during Chapter 13 during the story. | |
| Purple Pain | In a purple chest in Chapter 16. When you play as Tifa and fall, don’t climb up the car to the ladder. Instead, go to the bars to your right to find it. | |
| Barret | Gatling Gun | Default weapon. |
| Light Machine Gun | Obtained during Chapter Six during the story. | |
| Big Bertha | Purchased from the Weapon Shop in Chapter 13 or 14. | |
| Steel Pincers | Purchased from the Moogle Emporium in Chapter 14. | |
| Wrecking Ball | Rewarded for finishing the quest Subterranean Menace in Chapter 14. | |
| EKG Cannon | Talk to Hart outside after talking to the Mayor in Chapter 16 to purchase it. | |
| Aerith | Guard Stick | Default weapon. |
| Silver Staff | Purchased from the Moogle Emporium in Chapter Eight. | |
| Arcane Scepter | Rewarded for completing either A Dynamite Body or Shears’ Counterattack in Chapter Nine. | |
| Mythril Rod | In a purple chest on the other side of the fence by the vending machine at the start of Chapter 11. | |
| Bladed Staff | Obtained by stealing it from Eligor during the boss fight in Chapter 11. You will fail your steal attempt many times, but keep trying, and you will get it eventually. | |
| Reinforced Staff | Found in a purple chest in plain sight at the start of Chapter 17. |
Master of Mimicry

Rarity: Silver
Description: This trophy is for learning every enemy skill.
Tips: Learning enemy skills is a reward for completing Report #16 (see Intelligence Agent above). This will reward you with the Enemy Skill Materia that you can then use to learn four different moves. The skills and where to find them are listed below.
| Skill | Enemy (Move) | Found In |
| Spirit Siphon | Phantom (Essence Drain) | Chapter 14 quest Missing Children |
| VR Simulations “Cloud/Tifa/Barrett/Aerith vs. SOLDIER trainees.” | ||
| Self-Destruct | Varghidpolis or Proto Trypapolis (Apoptosis) | Random encounters in Chapter 14 |
| VR Simulations “Three-Person Team vs. Team Ragbag” | ||
| Bomb (Apoptosis) | Colosseum “Two-Person Team vs. Team Payback” challenge | |
| Hard mode VR Simulations “Three-Person Team vs. Monsters of Legend.” | ||
| Smogger (Self Destruct) | Random encounters in Chapters 8 and 14 | |
| VR Simulations “Three-Person Team vs. Team Ragbag” | ||
| Algid Aura | Cerulean Drake (Icy Aura) | Chapter Three quest Just Flew in from the Graveyard |
| Story path in Chapter 11 after defeating the Phantom | ||
| Colosseum “Two-Person Team vs. Team Payback” challenge | ||
| Bad Breath | Malboro (Bad Breath) | Hard mode VR Simulations “Three-Person Team vs. Monsters of Legend.” |
That’s the Smell

Rarity: Silver
Description: This trophy is for defeating Malboro.
Tips: Malboro is only found in the “Three-Person Team vs. Monsters of Legend” Shinra VR Simulation challenge that can only be accessed in hard mode.
Ultimate Weapon

Rarity: Gold
Description: This trophy is for beating Pride and Joy.
Tips: These enemies can only be found in the Shinra VR challenge “Three-Person Team VS Top Secrets.” This one is only unlocked after you’ve done all colosseum and previous Shinra VR challenges. This challenge must also be tackled in Hard mode, so make sure that your party is well stocked and equipped with the best weapons and skills. It is a tough fight, but you will get the extremely useful Gotterdammerung item alongside this trophy if you complete it.
Hardened Veteran

Rarity: Gold
Description: This trophy is for beating the game on Hard.
INTERmission Trophies
Takes Two IDs to Tango
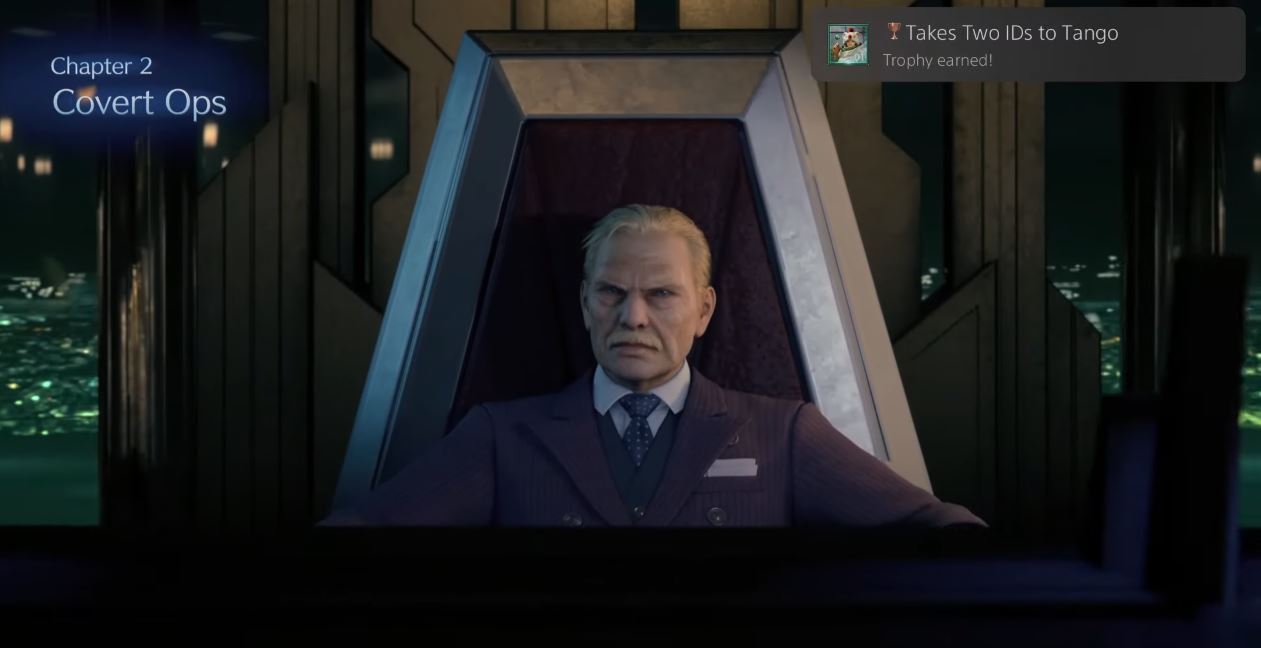
Rarity: Bronze
Description: This is a story trophy you will get playing naturally.
Out of Darkness’s Clutches
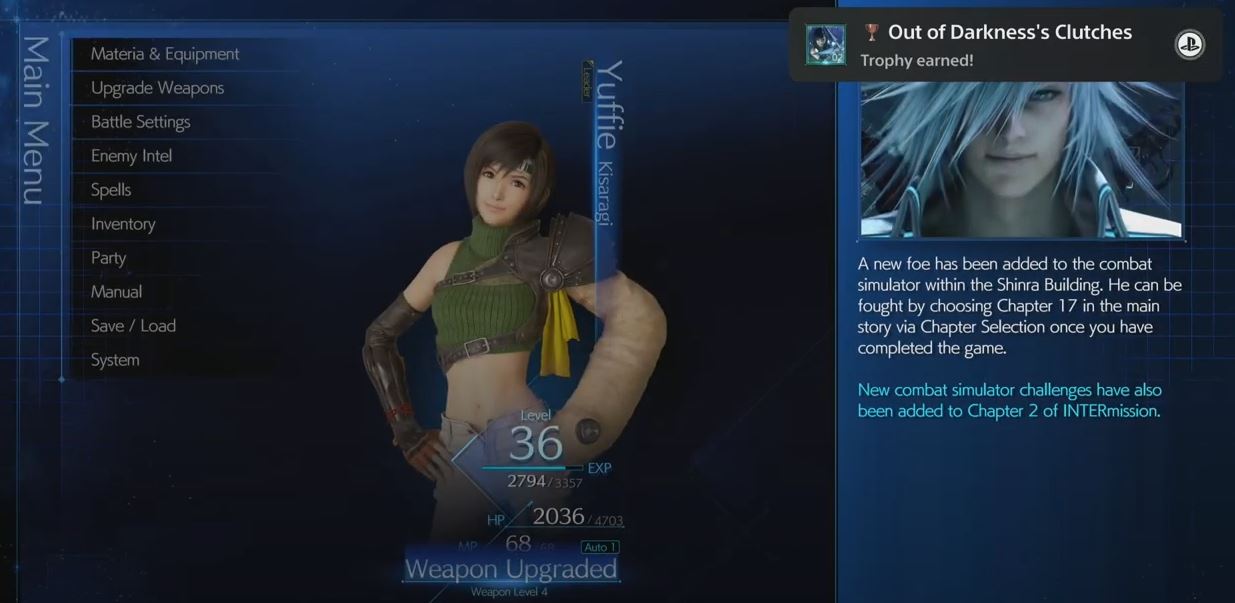
Rarity: Bronze
Description: This is a story trophy you will get playing naturally.
The Road to Revenge
Rarity: Silver
Description: This trophy is for finishing INTERmission on Hard.
Tips: Hard mode is much easier in INTERmission than in the base game, but you’ll still want to keep Yuffie and Sonon well equipped and do as much side content as possible to make sure its challenges are manageable.
Turtle-tastic
Rarity: Bronze
Description: This trophy is for finding all six Happy Turtle flyers.
Tips: These flyers can only be found as long as you have access to the Slums, so make sure you get them out of the way before you get too far in the story. The locations of each flyer are below.
- At the bottom of the map where you find Wedge to play Fort Condor.
- In the playground in the southwest part of the map, behind some cardboard boxes, you have to push aside.
- You have to sneak past on the second floor of the Stargazer Heights Apartment Complex guarded by a sleeping dog.
- Carried into the junkyard by a cat you have to follow.
- Posted to a bulletin board where you play Roche in Fort Condor.
- Near the entrance to the factory in a plain view of a wall.
Game, Set, Master
Rarity: Bronze
Description: This trophy is for getting the title of Fort Condor grandmaster.
Tips: Fort Condor can only be played in Chapter 1, so get this trophy before you move on. Just buy the Grandmaster Board from Old Snapper to use during your Hard playthrough. To get this trophy, you have to play the following NPCs:
- Rank One
- Kyrie – bring plenty of defense units to deal with flying enemies and your Helitroopers, and this match will be easy.
- Johnny – Play aggressively with Guard Dogs and other fast units to pressure through Johnny’s defenses.
- Shinra Middle Manager – Apply pressure with Vanguard units and take advantage of Helitroopers that he doesn’t have the resources to deal with.
- Rank Two
- Jessie – Bring tons of low-cost units and spam them steadily to pressure through her horde of units.
- Roche – Equip the Slug Ray Facility and Sentry Guns from Old Snapper to counter his flying units. Place a Sentry Gun in at least one corner, and focus his Cutter and MOTH units whenever they are played.
- Rank Three
- Wedge – Use the Battalion Board II and attack him as quickly as possible with low-cost units. Then, place one or two bigger units and use all your resources to keep them alive. Once you get one tower down, spam all your units as close to their base as possible.
- Grandmaster
- Chadley – Restart the match until you get the perfect loadout, and use the Battalion Board III. Then, use Riot Barracks and use low-cost units as far across the board.
Condor Queen
Rarity: Silver
Description: This trophy is for becoming the Fort Condor grandmaster on Hard.
Tips: This time around, you’ll play all the same players with the same loadouts, but they will each play much more aggressively. You will want to use the Grandmaster board and start matches by playing two facilities or barracks with your ATB for all of these matches. Then, keep those buildings up as long as possible while using other units to exploit each player’s weaknesses (see Game, Set, Master above). Then, you’ll be ready to tackle Chadley, which requires his strategy to beat. First, place a Grenadier Barracks as far up on the left side of the board as you can. When you place that, he will either play a Helitrooper or Barracks, but you’ll want just to restart if he doesn’t play a Helitrooper. By then, you’ll have a Grenadier. Once that gets across the board, spawn a Shock Trooper on the right side as far as you can. He will then spawn a Slug-Ray Facility right in front of his base. Once your Grenadier reaches the Slug-Ray Facility, place a Guard Dog right next to his facility. Once the Guard Dog reaches his base, place a Shock Trooper next to it and use Thunder and Aero to attack his base. Then, use another Guard Dog before your Shock Trooper is killed, and that should be enough to take him down.
Materia Maven
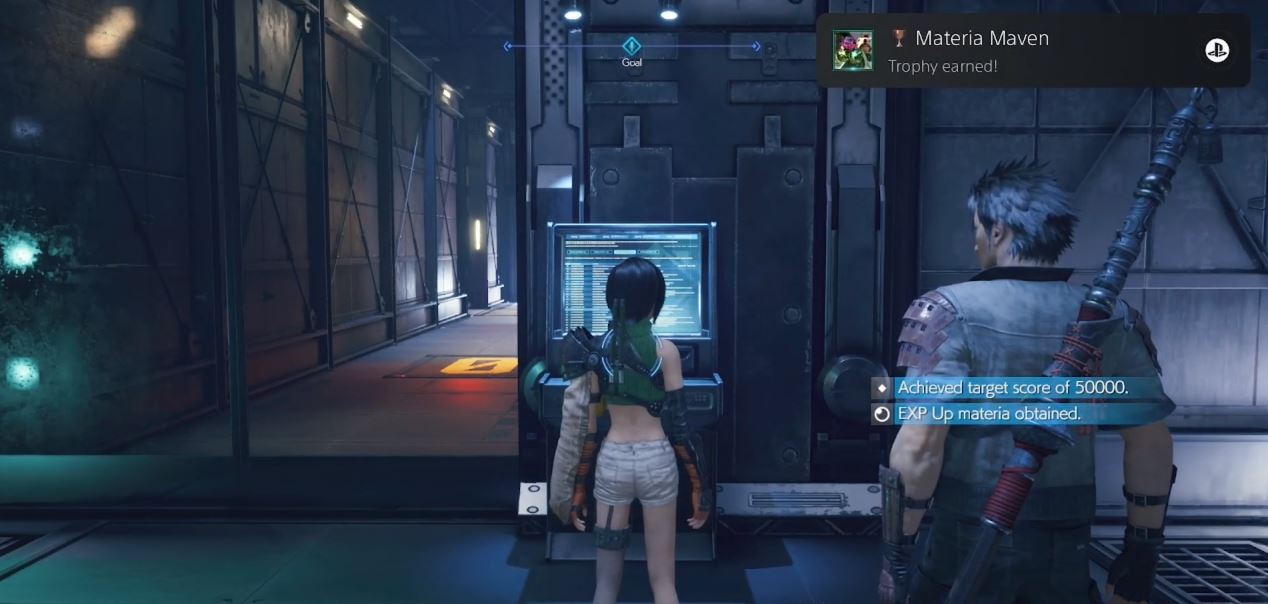
Rarity: Bronze
Description: This trophy is for collecting every materia from Box Buster challenges.
Tips: These challenges can only be played for a brief window in Chapter Two, so make sure to do them right when they become available. There are only two challenges you have to do, and they are both found on the 14th floor of the Shinra building. To help make them more manageable, make sure to move across the map more quickly by throwing your Shuriken and retrieving,g it, and using that to destroy boxes. You should also use Art of War on the 1,500 point boxes to get them killed quickly. It will likely take some tries for you to beat them, but enough practice, and you’ll get it.
Ultimate Weapon 2.0

Rarity: Silver
Description: This trophy is for defeating Pride and Joy Mk 0.5.
Tips: Pride and Joy can only be faced on Hard after completing the two previous Shinra Combat Simulations, and you should not even bother attempting it until you have your characters up to level 50. The easiest way to beat the bosses inside the challenge is to repeatedly perform air combos and dodge while synergized and continue to spam your Square attack to stagger the bosses as quickly as possible.
Corrupter of the Immaculate
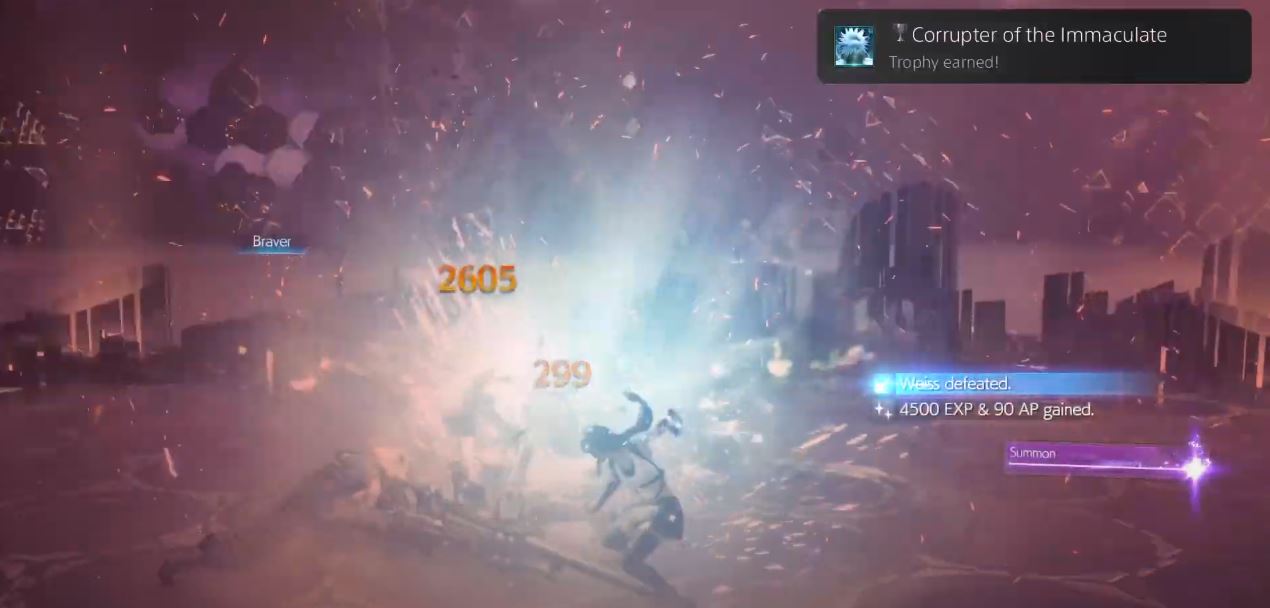
Rarity: Silver
Description: This trophy is for defeating Weiss.
Tips: Weiss is only unlocked in the base game after finishing Chapter Two of INTERmission. It is found by talking to Chadley in Chapter 17 and doing the challenge called Three-Person Team vs. The Immaculate One. This fight is the hardest in the game and is meant to be the final test of your skill. You need to have Cloud, Tifa, and Aerith up to level 50 before considering this fight and get every materia in your loadout fully leveled up. You can use any loadout that you like, but I recommend equipping the characters with plenty of revival and healing materia and elemental damage. The fight is divided into the following three stages:
- Stage One – For this stage, you will want to play Cloud and focus on blocking Weiss’ attacks. While doing so, you need to parry his Stab and Crosswise Cleave/Evisceration attacks to trigger cutscenes until you get him staggered. You’ll also want to have Tifa perform Unbridled Strength twice before moving to Stage Two.
- Stage Two – Now that Weiss is staggered, you should use Tifa’s True Strike twice and then Omnistrike. At the same time, use Cloud’s Limit Break and cast Ray of Judgement with Aerith. Then, spam Thundaga with Cloud and Aerith and have Tifa spam True Strike. If you do all of this quickly enough, it should get Weiss to his second phase.
- Stage Three – Once Weiss gets into his second phase, cast Lustrous Shield and Arcane Ward with Aerith and get your characters inside. Inside, continue to spam Thundaga and Firaga for doubled spell output. This will stagger him again, and you can repeat the same rotation of attacks as before and do any Limit Break attacks you still have available. This will allow you to entirely skip Weiss’ third phase and kill him before he comes out of getting staggered. Just avoid the puddles he makes with his minigun, as these will silence you and stop your characters from casting spells.
FAQs
Question: Are Any Trophies in Final Fantasy 7 Remake Missable?
Answer: No trophies are missable because you can go back to any chapter with chapter selection and get any missing trophies.
Question: Does Final Fantasy 7 Remake Have a Difficulty Trophy?
Answer: Yes, you’ll have to play through the base game and the INTERmission DLC on Hard difficulty to get all trophies.
Question: Is INTERmission a Free DLC for Final Fantasy 7 Remake?
Answer: The INTERmission DLC is only available for free to players who purchased Final Fantasy 7 Remake Intergrade for the PlayStation 5. Players who upgraded their PlayStation 4 version of Final Fantasy 7 Remake will have to purchase the DLC separately.