
- The True Dovakhiin: Skyrim Trophy Guide - December 19, 2022
- Titanfall 2 Speedrun Guide - October 23, 2022
- Majora’s Mask Speedrun Guide - October 23, 2022
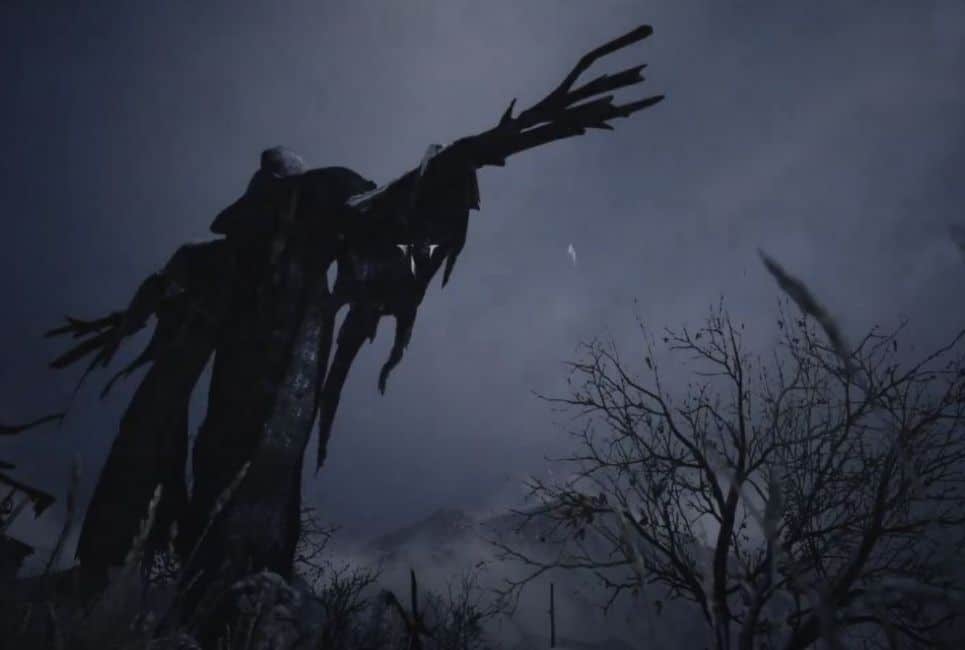
Resident Evil is one of the most iconic video game franchises out there. Over the years, it has pioneered the survival horror genre, supported a series of films, and has gone on to support multiple series of video game titles. The most recent mainline release was Resident Evil Village, the eighth mainline game. The game sought to return to the blend of survival horror and action found in the iconic Resident Evil 4, and it was both a critical and commercial success by doing so. The title is one of the biggest horror releases in recent years and has an excellent platinum trophy for players to hunt down.
Key Info Up Front
Genre: Survival Horror
Difficulty: 7/10
Playthroughs Required: 3
Number of Trophies: 60
Time Required: Approximately 40 hours
Resident Evil Village Platinum Walkthrough

Before we get into the details of each trophy you’ll grab throughout the game, we’ll go through a comprehensive walkthrough. This will give you a good overview of what to expect if you are debating whether or not to tackle this challenge and help make your attempt as efficient as possible.
Step One: It Takes a Village
For your first playthrough, you’ll be getting all of the game’s story trophies, collectibles, and random missable ones out of the way. You can play on any of the three difficulties available right away: Casual, Standard, or Hardcore for this playthrough. However, I highly recommend playing on casual to get through this stage as quickly as possible and to allow you to gather as many resources as possible to make getting some of the upcoming trophies less of a headache.
Regardless of which difficulty you play on, you’ll also want to try and accumulate as much Lei as possible. You can still buy inventory upgrades and the recipe to craft either shotgun or sniper rifle ammo, depending on which you prefer, but you should try to spend as little as possible besides those. This is because the subsequent two playthroughs will be New Game+ runs, and carrying your Lei over will help you a lot moving forward. After you beat the game, yyou’llalso wants to save your completed save file in a new slot that you can use for your New Game+ run.
Trophies in this Step
- Not Lycan This…
- Four Lords
- That Sucked!
- Got No Strings
- Fish Out of Water
- Up Urs!
- Temporary Measures
- Iron Giant Down
- The Root of the Matter
- Great Dad
- Crafter
- Patron
- Petty Thief
- Repairer
- Hunter
- Get the Ball Rolling
- Goooaaal!
- Squawk Shot
- When You Gotta Go…
- Hooligan
- Quit Hanging Around
- Push Comes to Shove
- Trick Shot
- Strategist
- Medium Rare
- Fast Reflexes
- Leader of the Pack
- Photographer
- Lucky Number 7
- Mapmatician
- Cynic
- Heretic
- Gunsmith
- Bookworm
Step Two: Knife to Meet You

This playthrough will focus on getting a small handful of the more challenging trophies out of the way in one New Game+ run. Before you start your playthrough, you’ll have to go to the Extra Content Shop to unlock the Karambit Knife. This will open Chris RRedfield’s faster knife for purchase from the Duke in all of your save files for only 100 Lei. Then, you can start this playthrough, but you’ll definitely want to do so on Casual difficulty this time. Then, from the start of your playthrough, only use melee attacks until you first meet the Duke before entering Castle Deimitrescu. Purchase the Karambit Knife from him and only use that for the rest of your playthrough.
During this playthrough, you should also try and get three other trophies out of the way. The first of these is for completing the game in under three hours. This can be difficult, but the Casual difficulty will help make it so that you can sprint through most encounters as fast as possible, especially since you should know where you are going and what to do at any point in the game from your first playthrough. Secondly, after purchasing the Karambit, you should spend as little Lei as possible to help you get the trophy for spending less than 10,000 Lei in one playthrough. Finally, you’ll also be going for another trophy that requires you to finish the playthrough without using more than four healing items. Even on casual, this will likely need you to be very smart with your healing items to make sure you get as much out of each one you use as possible.
Again, yyou’llalso wants to make sure to save your completed game file in a new save slot to use for your final playthrough.
Trophies in this Step
- Don’tTrust That Snake Oil
- Dashing Dad
- Frugal Father
- Knives Out
Step Three: The Hard Part

For your third playthrough, you’ll again want to start it in New Game+ while also playing it on the Village of Shadows difficulty unlocked after your first playthrough. This difficulty is challenging and may take you quite a while to work through it. I highly recommend purchasing two more things from the Extra Content Shop to make this easier. These are the Infinite Ammo – GM79 and Infinite Ammo – S.T.A.K.E. Of these two, the Infinite Ammo – S.T.A.K.E. is by far the most important for playing on this difficulty. However, before you can purchase that, you have to fully upgrade it in one of your playthroughs. To do this, you’ll need to have amassed a total of 2,100,000 Lei between your first two playthroughs, which is why you shouldn’t spend them too much up to this point. Then, you can jump into your save file just before you finish your playthrough to purchase the gun, its attachments, and all of its upgrades to unlock the Infinite Ammo unlock.
Trophies in this Step
- Best Dad Ever
- World’s Best Dad
- Universe’s Best Dad
Step Four: Mercenaries and Leftovers

After your first playthrough, you’ll also unlock the Mercenaries mode. The mode is much more action-focused than the story and features players tackling stages to get as many points as possible without dying. You may also have some trophies leftover that require you to unlock more content in the Extra Content Shop at this point, which you should have enough resources to afford now that you’ve completed the game three times.
Trophies in this Step
- Timber
- Veteran Gunsmith
- Tinkerer
- Artisan
- Combo King
- Legendary Cowboy
- Doll Collector
- Art Collector
Resident Evil Village Trophies

Not Lycan This…
Rarity: Bronze
Description: This is a story-based trophy you will unlock naturally.
Four Lords
Rarity: Bronze
Description: This is a story-based trophy you will unlock naturally.
That Sucked!
Rarity: Bronze
Description: This is a story-based trophy you will unlock naturally.
Got No strings
Rarity: Bronze
Description: This is a story-based trophy you will unlock naturally.
Fish Out of Water
Rarity: Bronze
Description: This is a story-based trophy you will unlock naturally.
Up Urs!
Rarity: Bronze
Description: This is a story-based trophy you will unlock naturally.
Temporary Measures
Rarity: Bronze
Description: This is a story-based trophy you will unlock naturally.
Iron Giant Down

Rarity: Bronze
Description: This is a story-based trophy you will unlock naturally.
The Root of the Matter
Rarity: Bronze
Description: This is a story-based trophy you will unlock naturally.
Great Dad
Rarity: Bronze
Description: This trophy is for beating the game on at least Casual difficulty.
Best Dad Ever
Rarity: Bronze
Description: This trophy is for beating the game on at least Standard difficulty.
World’s Best Dad
Rarity: Silver
Description: This trophy is for beating the game on at least Hardcore difficulty.
Universe’s Best Dad
Rarity: Gold
Description: This trophy is for beating the game on Village of Shadows difficulty.
Crafter

Rarity: Bronze
Description: This trophy is for crafting your first item, which you will do naturally.
Patron
Rarity: Bronze
Description: This trophy is for purchasing something from the Duke, which you will do naturally.
Petty Thief
Rarity: Bronze
Description: This trophy is for picking a lock with a lockpick, which you will likely do multiple times throughout your playthroughs.
Repairer
Rarity: Bronze
Description: This trophy makes a complete treasure by combining different parts.
Tips: Creating and selling these treasures is also a great way to make some extra Lei, so you’ll likely want to do every single one throughout your playthroughs. All of the craftable treasures are:
| Treasure | Part | Location |
| Azure Eye Ring | Silver Ring | Special Chamber in Castle Dimitrescu |
| Azure Eye | Hall of Pleasure in Castle Dimitrescu | |
| Wooden Goat | Wooden Animal (body) | In the house to the right of the Maiden of War statue in the village |
| Wooden Animal (head) | In the well outside of the house with the wooden body in the village | |
| Miss Madalina | Madalina (body) | In the small house on the southern side of West Old Town |
| Madalina (head) | In a house to the north just after you leave BBeneviento’s’Garden | |
| DDimitrescu’s’Necklace | Necklace with Two holes | In the well by the Church in the village |
| Pigeon Blood Ruby | In the western part of East Old Town up the ladder after using a crank to open the mechanical door | |
| Large Pigeon Blood Ruby | In the well to the left of the Riverbank Treasure House in the village | |
| HHeisenberg’s’Hammer | Mechanical Part (Cylinder) | Behind a breakable wall in Factory B4 that is marked with a yellow “””” |
| Mechanical Part (Shaft) | In HHeisenberg’s’Quarters within Factory MB4 |
Hunter
Rarity:
| Treasure | Part | Location |
| Azure Eye Ring | Silver Ring | Special Chamber in Castle Dimitrescu |
| Azure Eye | Hall of Pleasure in Castle Dimitrescu | |
| Wooden Goat | Wooden Animal (body) | In the house to the right of the Maiden of War statue in the village |
| Wooden Animal (head) | In the well outside of the house with the wooden body in the village | |
| Miss Madalina | Madalina (body) | In the small house on the southern side of West Old Town |
| Madalina (head) | In a house to the north just after you leave BBeneviento’s’Garden | |
| DDimitrescu’s’Necklace | Necklace with Two holes | In the well by the Church in the village |
| Pigeon Blood Ruby | In the western part of East Old Town up the ladder after using a crank to open the mechanical door | |
| Large Pigeon Blood Ruby | In the well to the left of the Riverbank Treasure House in the village | |
| HHeisenberg’s’Hammer | Mechanical Part (Cylinder) | Behind a breakable wall in Factory MB4 that is marked with a yellow “””” |
| Mechanical Part (Shaft) | In HHeisenberg’s’Quarters within Factory MB4 |
Hunter
Rarity: Bronze
Description: This trophy is for hunting an animal during the story.
Tips: All you have to do for this trophy is kill any of the various animals you will come across during one of your playthroughs, which you should do anyway to make the helpful recipes available at the Duke.
Get the Ball Rolling

Rarity: Bronze
Description: This trophy is for finishing any of the four Labyrinth puzzles in the game.
Tips: Each main area of the game has its Labyrinth puzzle, which you should do in each playthrough to get as much Lei as possible. They are small puzzles where you have to guide a metal ball through an obstacle course, which should be pretty easy for you to solve.
Goooaaal!
Rarity: Bronze
Description: This trophy requires you to move a small yellow ball from RRose’sroom into the study during the game’s prologue.
Squawk Shot
Rarity: Bronze
Description: This trophy is for shooting five crows that are flying.
Tips: There are crows at multiple story points that you have to shoot to get this trophy to unlock. However, if you want to farm it out quickly, you can do so by killing a crow and reloading it to do it again, as it will count each time.
When You Gotta Go…
Rarity: Bronze
Description: This trophy opens all ten Outhouses in the VVillagein a single playthrough.
Tips: The ten outhouses are below.
| Outhouse Number | Area | Location |
| 1 | Village (first visit) | On the other side of the first house, you can open. |
| 2 | To the right of the gate by the house, you get the pistol and knife. | |
| 3 | Village (second visit) | In the front yard of LLuiza’s’House. |
| 4 | In the backyard of the CCraftsman’s’Hut. | |
| 5 | Behind the large house. You can reach it by going out the back door to get past the locked gate. | |
| 6 | You get to an alley behind the small livestock pen by pushing a cabinet. | |
| 7 | In the front yard of LLuthier’s’Home. | |
| 8 | In the back yard of the house with the red chimney. | |
| 9 | House Beneviento | On the far side of the GGardener’s’Shack on the road to House Beneviento, but can only be accessed after completing the area. |
| 10 | MMoreau’s’Reservoir | Down the path leading away from the Gatehouse that powers the gate. |
Hooligan
Rarity: Bronze
Description: This trophy is for shooting a Soldat on the production line in Factory MB4.
Tips: As you go through the factory, you will see Soldats dangling from production lines in the distance. To get this trophy, shoot one to fall and die below.
Push Comes to Shove
Rarity: Bronze
Description: This trophy is for pushing an enemy away after blocking, which you should do naturally.
Trick Shot

Rarity: Bronze
Description: This trophy is for killing an enemy with a sniper rifle.
Strategist
Rarity: Bronze
Description: This trophy is for killing three enemies with one attack.
Tips: The easiest way to do this is to get more than three enemies to group up and follow yous in the village. You can then hit the group with an explosive barrel, mine, pipe bomb, or explosive rounds in the grenade launcher to take them down.
Medium Rare
Rarity: Bronze
Description: This trophy is for setting a Moroaica on fire.
Tips: To get this trophy, you have to push one of the flaming braziers in Castle DDimitrescu’sdungeon into a Moroaica.
Fast Reflexes
Rarity: Bronze
Description: This trophy is for hitting a flaming arrow out of the air with a melee weapon.
Tips: When you leave the Reservoir to go to the Stronghold, you will be attacked by Lycans that shoot flaming arrows at you. At that point in the game, stand still and swing your knife rapidly until they shoot at you and you hit the arrow away.
Leader of the Pack

Rarity: Bronze
Description: This trophy is for killing the Varcolac Alfa.
Tips: The Varcolac Alfa is a hidden boss that will appear in the Fallow Plot after you finish the Reservoir. However, it is a mighty enemy, so you’ll want to be well equipped when you face him and should not attempt the fight on your second playthrough.
Timber
Rarity: Bronze
Description: This trophy is for killing Urias during the first Lycan attack in the village
Tips: Urias is the giant with the large hammer that appears at the very start of the game. The easiest way to kill him before the cutscene triggers is to start a Casual New Game+ with the infinite ammo upgrade for the S.T.A.K.E. This will let you burn through his health quickly and should only take you a few minutes to do.
Photographer
Rarity: Bronze
Description: This trophy is for using Photo Mode.
Lucky Number 7

Rarity: Bronze
Description: This trophy is for having a total of 777, 7,777, or 77,777 Lei at any point.
Tips: It is doubtful that you will get this amount of Lei naturally while playing, so when you want to get this trophy, you’ll want to go to the Duke and alternate between buying and selling ammo until you get the required amount.
Mapmatician
Rarity: Bronze
Description: This trophy is for visiting every place on the map to fully reveal it, which you should get from getting all of the collectibles in your first playthrough.
Cynic
Rarity: Bronze
Description: This trophy is for destroying a goat of warding.
Tips: See the trophy Heretic below.
Heretic
Rarity: Bronze
Description: This trophy destroys all 20 Goats of Warden collectibles in the game.
Tips: The location for each Goat of Warden is:
| Goat of Warding Number | Area | Location |
| 1 | Village (first visit) | This goat is on the main path of the VVillagewithin a shrine surrounded by lit candles. |
| 2 | This goat is on the top of the roof of the Church. | |
| 3 | This goat sits on top of a roof in the corner of the Fallow Plot. | |
| 4 | Castle Dimitrescu | In the vineyard to the east of the castle’s entrance, a goat is obscured just off the path in its northeast section. |
| 5 | There is one to the west of you when you take the ladder down into the Distillery from the Hall of Ablution. | |
| 6 | The final goat in this area can be found in the Attic accessed by going up the ladder after solving the puzzle in the Atelier. | |
| 7 | Village (second visit) | Underneath the stairs at the bottom landing in the Lone Road area. |
| 8 | In the graveyard by the Church beyond, the gate opened with the Iron Insignia Key. | |
| 9 | Past the blue gate with the shootable lock where the armored Lycan first appears. The goat is to your left after going through the gate. | |
| 10 | House Beneviento | At the entrance, go to the left side of the porch and into the garden. There, you can find a goat just beyond the iron gate. |
| 11 | As you cross the suspension bridge, turn to your right to see one on a parallel suspension bridge. | |
| 12 | Reservoir | When completing the puzzle on the rooftops in the flooded area, look to the northwest of the switches to see the goat at the top of a pole. |
| 13 | After ziplining from windmill two to windmill one go to your right to find a goat next to a woodpile. | |
| 14 | After you get the Six-Winged Unborn Key, go back to the boathouse and follow the new path to your left through a broken windmill. Go past the windmill and turn left to find the goat on a pile of rubble. | |
| 15 | Stronghold | The first goat in this area is kept in a shrine under OOtto’s’Mill. |
| 16 | At the bottom of the spiral stairs, you find after fighting an armored Lycan, and you can find a goat on a short wall. | |
| 17 | HHeisenberg’s’Factory | As you wait for the DDuke’s’Elevator to arrive on floor B3, look up the shaft to see a goat among the metal. |
| 18 | On floor B2, you are overlooking the grinder shaft on the south end of the Ventilation Duct. | |
| 19 | There is a duct in the northeast corner of the office overlooking the cargo bay. Crawl through it to find the goat on a barrel in the corner of a small room. | |
| 20 | Underground | After you reach the Megamycete and see a cutscene turn to your right, the goat is amongst the misty roots near the feet of the statue there. |
Gunsmith
Rarity: Bronze
Description: This trophy is for equipping a gun with a customizable part, which you should do naturally.
Veteran Gunsmith

Rarity: Bronze
Description: This trophy is for equipping every gun with every customizable part.
Tips: There are a total of 22 customizable parts in Resident Evil Village that you will have to equip to their respective gun for this trophy. There are five customizable parts that you will find during your playthrough, while the other 17 must all be purchased from Duke. However, you do not have to have all of the guns in your inventory at the same time to get the trophy, so you are free to purchase a gun and its attachments, equip all of it and then sell it all back to the Duke to buy the next one.
Tinkerer
Rarity: Bronze
Description: This trophy is for crafting one of every type of item.
Tips: You will start with some crafting recipes and will get more than enough materials across your playthroughs to craft all of them at least once. See the Artisan trophy below to see the recipes you will have to find.
Artisan
Rarity: Bronze
Description: This trophy is for collecting every crafting recipe in the game.
Tips: There is a total of 11 recipes. How to get each one is listed below.
| Crafting Recipe | Obtained By |
| First Aid Med | Reaching the VVillagefor the first time |
| Handgun Ammo | |
| Shotgun Ammo | Purchased from Duke as you progress |
| Sniper Rifle Ammo | |
| Mines | |
| Pipe Bombs | |
| Explosive Rounds | |
| Flashbangs | |
| Magnum Ammo | Purchased from Duke once the associated weapon is unlocked |
| Rifle Ammo | |
| Rocket Pistol Ammo |
Bookworm
Rarity: Bronze
Description: This trophy is for reading every file in the game.
Tips: There are 47 files yoyou’llave to collect for this trophy. Their locations are below.
| File Name | Area | Location |
| Fridge memo | Prologue | On the fridge in the kitchen |
| Old News Clipping | On the desk in the spare bedroom on the second floor of the house | |
| Ethan’s Diary | In the room just past the room where you put Rosie to sleep on a desk | |
| Medical Checkup Report | To the right of Ethan’s computer in his office inside of a drawer | |
| Mission Briefing | Amongst the wreckage of the car crash next to a dead body | |
| Scribbled Note | Village (first visit) | In the first house to your left when you first enter the Village |
| Goat of Warding Placard | Just below the goat shrine just past the Maiden of War statue | |
| Dangerous Creature | On the small chair in the corner of Luiza’s home | |
| Guest Book | Castle Dimitrescu | On the table in the entrance hall of Castle Dimistrescu |
| The Labyrinths | Just to the right of the Duke in the Merchant’s Room of Castle Dimistrescu | |
| Winemaking History | On a table inside the wine room on the second floor | |
| A Maid’s Diary | In the dungeons on a shelf in the room, you crash into to escape the daughters. | |
| Treatment Candidates | In the prison area of the castle on top of a table blocking a hallway | |
| Observation Report | On a table in a small cell across from the table holding Treatment Candidates. | |
| A Cook’s Diary | On a wooden shelf in the castle’s kitchens | |
| Alcina Dimitrescu’s Diary | Sitting on the oversized white couch in Lady Dimitrescu’s private chambers | |
| Grand Chambermaid’s Notice | On a cupboard with a red cover in the hallway leading to the upper opera hall by some windows | |
| Further Observations | On a cabinet on the upper floor of the opera hall just before you reach the balcony. | |
| Insect Observations Journal | On the first floor of the opera hall, on top of a table near the piano | |
| Rumors of a Dagger | In the Attic accessed by solving the five bells puzzle on top of a table on the far side of the space | |
| Craftsman’s Note | Village (second visit) | Next to the save point outside of the tower |
| Leonardo’s Message | On top of a green table inside the large house just south of the Maiden of War statue. | |
| Note on Luthier’s House | Next to the locked door of a house behind the locked gate with an armored lycan behind it | |
| Eugen’s Diary | Right next to an item you grab from the house with the red chimney | |
| Church Computer | On top of some metal cases in the village church | |
| Gardener’s Diary | House Beneviento | Next to the save point is the small building on the hill above the gardens of House Beneviento. |
| Vasile’s Final Testament | Village (third visit) | In the hand of a corpse inside of the building the Varcolac Werewolf throws into you |
| The Reservoir and Giant Fish | Reservoir | On an old table inside of the house by the boat, you need a key to use |
| Changing the Cranks | After you first escape Moreau, it is inside the ruined truck on the path from the Gatehouse to windmill one. | |
| Moreau’s Diary 1 | After draining the Reservoir, there is a newly drained shack with a shelf holding this file. | |
| Moreau’s Diary 2 | On a small wooden stool in front of a static-filled T.V. in Moreau’s room just before you take the life to leave the Reservoir. | |
| Moreau’s Diary of Experiments | At the top of the mountain outside of the Reservoir, there is a small house with both the file and the M1851 Wolsbane Revolver. | |
| Analysis Results | Village (third visit) | Use the crank on the drawbridge below the Lone Road and take the boat there to the south to reach a tunnel entrance under the ceremony site. The file is on a crate next to a computer. |
| Ernest’s Diary | After killing the miniboss to the left of the Stronghold entrance by the mill, go to the storehouse and find the note on a table by the one covered in meat. | |
| Officer’s Diary | Stronghold | On the floor in the dark by some barrels next to a save point in the caves underneath the Stronghold. |
| Experiment Notes | Go down the stairwell to your left once you get off the boat with all of the flasks. The file is on a wooden table with a light on past all of the cells. | |
| Development Note 1 | Factory | On a metal table in the same room where you find the design for the cog |
| Development Note 2 | In the room with multiple tables, when making your way through the giant grinder fans towards the wind tunnel. | |
| Sturm | Go through the first door to a supply room on floor B1 as Heisenberg starts taunting you to find the note on a cabinet to your right | |
| Heisenberg’s Diary | On a desk in the far corner of the room after the Sturm boss fight | |
| Chris’ Computer | On the laptop next to the save point, you reach after talking to Chris | |
| Moreau’s Medical Report | Miranda’s Lab | A book on top of the table just as you enter the area |
| Dimitrescu’s Medical Report | ||
| Heisenberg’s Medical Report | ||
| Donna’s Medical Report | ||
| Spencer’s Letter | On a table along the left wall just past the four above files | |
| Miranda’s Diary | On the far side of the room at the end of the first sequence in the area on top of a table |
Don’t Trust the Snake Oil

Rarity: Gold
Description: This trophy is for finishing the game only using four or fewer recovery items, which you should attempt during your second playthrough.
Dashing Dad
Rarity: Silver
Description: This trophy is for finishing the game in less than 3 hours, which you should attempt during your second playthrough.
Tips: This may seem like a challenging goal, but if you play on Casual and know where to go, you should be able to get through the game pretty leisurely in about 2.5 hours.
Knives Out
Rarity: Gold
Description: This trophy is for beating the game, except boss fights, only using melee weapons.
Tips: Once you get the knife and the pistol, when you first enter the Village during your second playthrough, you’ll have to only use the knife from there on out, including not using flashbangs. However, you can use guns to complete puzzles, get treasures, and during boss fights where you have to use a gun to deal damage to them. This also means that you cannot use the laser gun in the battle against Urias Strajer when playing as Chris.
Combo King
Rarity: Bronze
Description: This trophy is for getting a combo of 30 or more in The Mercenaries mode.
Legendary Cowboy
Rarity: Silver
Description: This trophy is for getting S rank on all stages in The Mercenaries.
Tips: A run through the mode includes eight stages that players are tasked with getting as many points as possible. The number of points players get is based on their combo, how long it took them to complete the stage if they killed all of the enemies, and how much Lei they have. To make doing so as easy as possible, you’ll likely want to play through the mode a few times to familiarize yourself with the enemies you can expect to come across and their positions. Then, attempt a run mainly using the sniper rifle accompanied by a pistol to switch to if you need to reload so that you can keep your combo going and get it as high as possible.
Doll Collector

Rarity: Silver
Description: This trophy is for viewing every character and weapon model.
Tips: To get this trophy, you have to purchase all 76 figures in the Extra Content Shop before viewing them in the figures menu within the bonuses section of the menu.
Art Collector
Rarity: Silver
Description: This trophy is for viewing every piece of concept art.
Tips: To get this trophy, you must purchase all 120 concept arts from the Extra Content Shop. Then, you can view them in the concept art menu within the bonuses section of the menu.
FAQs
Question: Do you get Anything for Beating Resident Evil Village on Village of Shadows Difficulty?
Answer: Yes, beating the game on this difficulty will reward you with the fun rocket pistol weapon as well as 100,000 CP to spend in the Extra Content Shop.
Question: Is Resident Evil Village Very Scary?
Answer: It is most definitely a horror game, but it is not as scary as some previous entries in the series. Instead, it has a lot more action in it similar to the likes of Resident Evil 4.
Question: Do I Need to Play Resident Evil 7 Before Resident Evil Village?
Answer: Most of the information that connects the two games will be explained in Resident Evil Village, but if you play the previous game first you’ll have a better understanding of some of the relevant lore and characters.