
- The True Dovakhiin: Skyrim Trophy Guide - December 19, 2022
- Titanfall 2 Speedrun Guide - October 23, 2022
- Majora’s Mask Speedrun Guide - October 23, 2022
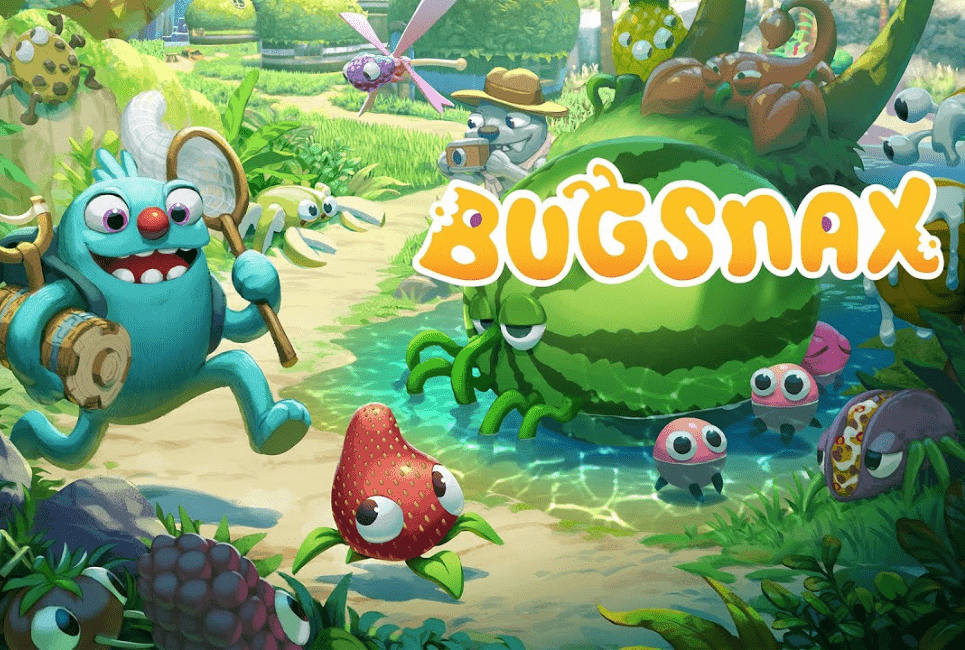
Bugsnax was a surprise hit as one of the earliest exclusives for the PlayStation 5.
Its charmingly cute aesthetic and laidback gameplay struck a chord with players who just wanted a laidback experience to play through, while the modest challenge of collecting the Bugsnax with various traps and treats was just enough to suck in those looking for a light puzzle to solve as well.
It also has pretty easy and brief platinum for players to get their hands on, which helps make it worth checking out.
Key Info Up Front
- Genre: Adventure
- Difficulty: 2/10
- Number of Playthroughs: 1
- Number of Trophies: 22
- Time Required: Approximately 13 hours
Bugsnax Trophy Walkthrough
Before we dive into each of the individual trophies that you’ll be hunting down through your playthrough, we must look at the steps you should take while getting the platinum.
Not only will this help ensure that your playthrough is as efficient as possible, but it will also let you know exactly what you are getting into before you decide to start.
Step One: The Story

The first step to your playthrough is to experience the game’s story naturally. You can play through it naturally and go through it at a leisurely pace. There are no difficulty settings in the game at all, so you dodon’tave to worry about tackling a hard mode or anything like that.
As you play, you will likely get some of the trophies not listed until step two, depending on how much you like exploring. It can also help cut down on your grinding later in the playthrough if while you play through the story, you take advantage of whenever it rains to catch any nearby Bugsnax that only appear in the rain near you.
Once you finish the story and the credits roll, you’ll be able to hit continue to jump back into the world and wrap up anything else that you want to, so you’ll have as much time as you need to get the rest of the trophies.
Trophies in this Step
- VaVacation’snd
- Survivor
- Know Thy Neighbor
- Everybody Gets One
- Gone Home
- Wonderfalls
Step Two: The Other Stuff
Once you jump back into the game, you’ll want to start tackling all of the random trophies scattered across the map. As you do this, you should be catching any Bugsnax that you see but haven’t caught already since you’ll have to catch all of them eventually anyway, which can end up being a bit of a grind.
Most of these trophies require you to complete a side quest hidden somewhere on the map or some interaction with a particular Bugsnax.
These are a great way to grow to appreciate the game’s world and detail as you travel across it and interact with the smaller parts that many players tend to miss once you have these out of the way, you’ll have your platinum trophy nice and accessible.
Trophies in this Step

- Got To Catch Them All
- Sidetracked
- Feeding Frenzy
- Bossy Bugs
- Documentarian
- In The Arms of the Gramble
- Halfway There
- I’I’mtuffed
- Candid Cryptid
- Sundae Best
- TrTrippin’all
- Grab Bag
- Combo Meal
- Launch Party
- Midnight Snak
- That Reminds Me of a Puzzle
- Double Trapper
- Say Cheese!
- Perf Dirt
- Quartermaster
Bugsnax Trophies
VaVacation’snd

- Rarity: Gold
- Description: This trophy is for finishing the story
Got To Catch Them All
- Rarity: Gold
- Description: This trophy is for catching all 100 different Bugsnax species
Tips: This is the most significant grind of this platinum trophy and will likely take your entire playthrough. However, one way to make it easier is to complete the main story and all of the game’s side quests. The vast majority of them have you catching a Bugsnax, so you should have around 80 or so just by doing that.
A complete list of all the Bugsnax in the game, where to find them, and how to catch them is below. If the Bugsnax requires specific weather, make sure to check your map for the weather timetable to plan when you need to be in the location to catch it.
| Area | Bugsnax | Location | Time and Weather | How to Catch |
| Flavor Falls | Strabby | In the middle section of the area. | Any time and weather | Lure it into a trap with some chocolate. |
| Pinkle | In the middle section or lower cave. | Any time and weather | Stun it by placing the Tripwire in its walking path. | |
| Rootle | On the side on your way to Garden Grove. | 6 PM to 4 AM, any weather | Walk close to make it burrow underground. Place your trap next to where it burrowed and close it when it returns to the surface. | |
| White Rootle | Near the path to Garden Grove. | 6 AM to 4 PM, any weather | Walk close to make it burrow underground. Place your trap next to where it burrowed and close it when it returns to the surface. | |
| Green Lollive | In the area on the outer border. | Any time and weather | Use the Tripwire. | |
| Inchwrap | In the lower cave with water or on the upper ridge. | Any time and weather | Use Ranch Dressing to get it to go on some rock. Then, when it tries to burrow, it will stun itself. | |
| Sandopede | It walks around the outer rim. | Any time and weather | Use the Tripwire. | |
| Sub Sandopede | It walks around the outer rim. | Any time and weather | Use the Tripwire. | |
| Ruby Peelbug | Inside the hole in the middle of the ridge. | Any time and weather | Use the Buggy Ball to drive it out of the hole and capture it. | |
| Caramel Poptick | The lower cave is filled with water. | Any time when it’s raining | Catch the Inchwrap to get it out of the way and then catch the Poptick in a trap when it jumps into it. | |
| Twisty Snakpod | Next to the map, transition to Garden Grove | Any time and weather | Just walk up to it and pick it up. | |
| Wee Mewon | In a large room on the other side of the bridge. | Caught during the side mission Throw Down | Lure it into the trap with Chocolate or let it walk towards you into the trap. | |
| Mama Mewon | In a large room on the other side of the bridge. | Caught during the side mission Throw Down | Catch some Wee Mewons to make it rage and have it run into the frog statues to stun it. Then, grapple down the stalactites and hurt them a few times to capture them. | |
| Garden Grove | Bunger | By the creek in the lower section. | Any time and weather | Use Ketchup to get both Bungers to headbutt each other to stun them. |
| Fryder | Hanging in a small cave. | Any time and weather | Place a trap beneath them and hit it with Ketchup to make it crawl down the wall. | |
| Shishkabug | By the creek in the lower section. | Any time and weather | The Shishkabug will permanently hide if you get too close, so be careful. If it hides, use a Bunger to get it out. Place a trap between the two bushes it could hide in and use a Bunger to chase it into the trap and catch it. | |
| Sweetiefly | Flying in the lower area. | 4 AM to 4 PM, only when it’s sunny | Use a tripwire on one of its resting spots. | |
| White Strabby | Upper section in the backside of the pen. | Any time and weather | Place the trap and wait for it to come out of hiding. | |
| Dr Sodie | Swimming in the creek. | Any time and weather | Place the trap in front of it down the creek. | |
| Weenyworm | Upper section in thepen. | Any time and weather | Place the trap and lure it with Ketchup if you have to. | |
| Cobhopper | Jumping from tree to tree. | Any time and weather | Place a tripwire in between the trees to catch them. | |
| Crispy Snakpod | On the wall in BeBeffica’save. | Any time and weather | Just pick it up. | |
| Simmering Springs | Kweeble | Close to the water on the beach. | Any time and weather | Place a trap in front of it as it walks. |
| Crapple | In the sea or on the beach. | Any time and weather | Place a trap in front of it as it walks. | |
| Pineantula | Burrowed in the sand. | Any time and weather | Shoot its top piece with Chocolate to make a crapple dig it up, and throw it away. This will stun it so that you can grab it. | |
| Orange Peelbug | In a tree trunk or the hole in the center of the plateau. | Any time and weather | Use your Buggy Ball to push it out and capture it. | |
| Razzby | Near the water on the beach. | Any time and weather | Place a trap in front of it for it to walk into. | |
| Green Rapeskeeto | Flying near the water. | 4 PM to 4 AM | Use a Tripwire from the rocks to the palm tree to fly into. | |
| Snaquiri | On the middle plateau and in the sea. | Any time and weather | Place a Tripwire across its jumping path. | |
| Tropicabug | In the upper section. | Any time and weather | Place a trap and lure it with Chocolate. | |
| Lovely Sweetiefly | In the area right by the entrance to the region. | 4 AM to 4 PM when it is sunny | Use a Tripwire at its resting place to catch it while it sleeps. | |
| Baja Tacroach | Right next to the hanging triangle. | 6 PM to 4 AM in any weather | Place a trap and lure with Cheese Sauce. | |
| Waffstackarak | Coming out of the sea. | 4 AM to 11 AM in any weather | Ring the hanging triangle to bring it out of the water and have it run into a Tripwire. | |
| Grumpy Snackpod | In the pond to the right of the area’s entrance. | Any time and weather | Just walk up to it and pick it up. | |
| Boiling Bay | Green Crapple | In the water. | Any time and weather | Place a trap in its walking path. |
| Grapeskeeto | Near the entrance to the cave. | 4 PM to 4 AM and any weather | Use a Tripwire from the trees to the poles or rocks. | |
| Golden Kweeble | Close to the water. | Any time and weather | Place a trap in its walking path. | |
| Greater Cocomite | Around the palm trees. | Any time and weather | It will come down from the tree when you break a coconut. Then, use a Tripwire to stun it as it moves to investigate. | |
| Lesser Cocomite | Around the palm trees. | Any time and weather | It will come down from the tree when you break a coconut. Then, use a Tripwire to stun it as it moves to investigate. | |
| La Sodieux | In the water. | Any time and weather | Place a trap in its walking path. | |
| Noodler | In the lava within the cave. | Any time and weather | Stun it and lure a Paletoss into it to cool it down and capture it. | |
| Paletoss | All over the area. | Any time and weather | Heat it with fire or lava and then stun it with a Tripwire. | |
| Paletoss Grande | All over the area. | Any time and weather | Heat it with fire or lava and then stun it with a Tripwire. | |
| Red Banopper | Jumping from tree to tree. | Any time and weather | Place a Tripwire between the trees. | |
| FlFlamin’heepoof | Inside the lava section of the cave. | Any time and weather | Use your Lunchpad to throw a trap on the Cheepoof and have it land on solid ground. Then, use a Paletoss to cool it down and capture it. | |
| Sherbie | On the peninsula. | Any time and weather | Stun it with a Tripwire by where it comes out of where it burrowed and heat it with the lava. | |
| Fruity Snakpod | Hanging from the top of the shipwreck. | Any time and weather. | Just walk up and pick it up. | |
| Minimaki | Inside the sea. | Caught during the side mission Dance with the Dragon. | Use a Tripwire between the poles to make the Megamaki split into small parts and pick those parts up. | |
| Megamaki | Inside the sea | Caught during the side mission Dance with the Dragon. | Use a Tripwire between the poles to make the Megamaki split into small parts and pick those parts up. This will weaken him and has to be repeated until you capture him. | |
| Scorched Gorge | BBQ Bunger | On the plateau in the center of the area. | Any time and weather | Place a Tripwire in its path. |
| Sweet Fryder | On the plateau by the Windmill. | Any time and weather | Stun with the Tripwire. | |
| Ribblepede | On walls in the shade. | Any time and weather | Place a trap and lure them with Hot Sauce if you have to. | |
| Poptick | Close to map transitions out of the area. | Any time and weather | Hit them with Hot Sauce to make a nearby Scorpenios shoot them to make them big enough to catch. Then, place a trap in their walk path. | |
| Spuddy | All over the area. | Any time and weather | Stun it with a Tripwire. | |
| Scorpenyo | On the walls near the transitions out of the area. | Any time and weather | Use a Tripwire to make them fall off the wall and then cool them off with some water. | |
| Shy Weenyworm | In the small room next to the Windmill, you can open with a charging Spuddy. | Any time and weather | Place a trap in its walking path. | |
| Cheepoof | Flying around in the gorge. | 6 AM to 4 PM and any weather | Throw a trap at the Cheepoof using your Lunchpad. | |
| White Cheepoof | Flying around in the gorge. | 6 PM to 4 AM and any weather | Throw a trap at the Cheepoof using your Lunchpad. | |
| Crystal Sweetiefly | On the wall in the entrance area. | 4 AM to 4 PM and any weather | Place a Tripwire through its flying path. | |
| Green Peelbug | Inside of tiny rooms throughout the area. | Any time and weather | Push it out of the hole with the Buggy Ball. | |
| Puffy Snakpod | On top of the column of rocks, visible from the nearby plateau. | Any time and weather | Reach it and grab it. | |
| SiSizzlin’ands | Tacroach | By the oasis after a Preying Picantis explodes. | Any time and weather | Use a Tripwire to stun it. |
| Preying Picantis | On top of smaller rock formations. | Any time and weather | Make it follow you into the oasis to cool it off, and then stun it with the Tripwire. | |
| Black Lollive | Near the oasis. | Any time and weather | It has a low spot in its flight path around the oasis that you can place a trap at and catch it. | |
| Loaded Spuddy | All around the area. | Any time and weather | Stun it with a Tripwire and collect it. | |
| Buffalocust | Flying around by the palm trees. | Any time and weather | Lure into a Tripwire with Ranch Dressing. | |
| Eggler | On the pyramid. | Any time and weather | Crack the egg by throwing it into a flaming Snak and then collect the Eggler with a trap. | |
| Flapjackarak | All over the area. | 5 AM to 6 PM and any weather | Place a Tripwire across its walk path. | |
| Scorpepper | On the large boulder. | Any time and weather | Lure into the oasis with Cheese Sauce and stun with a Tripwire once cooled off. | |
| Incherrito | The underground cave system by the pyramid opened by making a Buffalocust run into it with Ranch Dressing. | Any time and weather | Span a Tripwire over the rocky sections it has to crawl over but cacan’turrow into. | |
| Black Razzby | The underground cave system by the pyramid opened by making a Buffalocust run into it with Ranch Dressing. | Any time and weather | Lure into a trap with Chocolate. | |
| Sodie D | In the oasis. | Any time and weather | Place a trap in its walk path. | |
| Cheezer | In the area surrounding the oasis. | Any time and weather | Span a Tripwire in its walk path. | |
| Meaty Snakpod | On a column in front of the pyramid. | Any time and weather | Walk up to it and grab it. | |
| Bombino | In the area surrounding the pyramid. | Caught during the side mission A Slice of Heaven | It is stunned by its explosion and can then be picked up. | |
| Mothza Supreme | In the area surrounding the pyramid. | Caught during the side mission A Slice of Heaven | Put Bombinos on the middle platform of the pyramid and launch them at the Mothza Supreme with your Lunchpad. | |
| Sugarpine Woods | Kwookie | All over the area. | Any time and weather | Place a Tripwire in its walk path. |
| Charmallow | Near the bodies of water in the area. | 4 PM to 4 AM and any weather | Place a Tripwire over the water so that it is stunned and falls in the water, and is cooled off. | |
| Cinnasnail | On the rocks or plateaus on the outer rim of the area. | Any time and weather | Place a Tripwire or lure it into a trap with Chocolate. | |
| Hunnabee | Flying near the lower treelines. | 5 AM to 6 PM and any weather | Stun it with a Tripwire or throw a trap at it with the Lunchpad. | |
| Sprinklepede | On the side of the watchtower. | Any time and weather | Lure it down with Chocolate and place a Tripwire in its path. | |
| Yellow Peelbug | Inside of small holes. | Any time and weather | Drive them out with the Buggy Ball and into a Tripwire. | |
| Bopsicle | All over the area. | Any time and weather | Needs to be cooled off and can then be picked up. | |
| Big Bopsicle | All over the area. | Any time and weather | Stun it with a Tripwire over a body of water to cool off and stun it. | |
| Rainbow Sweetiefly | In the lower treelines or on the side of the Basketball court. | 4 AM to 4 PM when it is sunny | Stun it with a Tripwire. | |
| Nutty Snakpod | Behind the brittle wall on the lower level of the area. | Any time and weather | Walk up to it and pick it up. | |
| Frosted Peak | Banopper | Jumping back and forth between trees. | Any time and weather | Place a Tripwire in its jumping path. |
| Scoopy | Left of the entrance in the lower section of the mountain. | Any time and weather | Lead a Stewdler from inside the mountain to the Scoopy using the Buggy Ball with Hot Sauce to heat it and stun it. | |
| Cheery | Lower section of the mountain. | Any time and weather | Place a trap in its walking path. | |
| Scoopy Banoopy | Lower section of the mountain. | Any time and weather | Lead it into the campfire to heat it and then stun it with a Tripwire to pick it up. | |
| Aggroll | Inside the lower level of the mountain. | Any time and weather | Melt the ice block with a Tripwire in your torch and then stun it with a Tripwire and grab it. | |
| Chippie | Running around the mountain. | Any time and weather | Place a Tripwire in its walking path. | |
| Chillynilly | Running around the mountain. | 4 PM to 4 AM and any weather | Lure into a Stewdler with Chocolate to stun it. | |
| Flutterjam | Flying around the mountain. | 4 AM to 4 PM and any weather | Shoot with Peanut Butter to knock it down and stun it. | |
| Mt Sodie | Inside of the pond at the base of the mountain. | Any time and weather | Place a Tripwire in its path. | |
| Stewdler | Inside of the mountain. | Any time and weather | Lure the Chillynilly into the Stewdler with Chocolate to stun them both. | |
| Melty Snakpod | On the outside of the tent at the top of the mountain. | Any time and weather | Walk up to it and grab it. | |
| Instabug | Inside of the bushes in the area. | Any time and weather | Place a trap and make it leave the bush using your camera. | |
| Baby Cakelegs | Inside of the mountain. | Caught during or after the side mission Cake Boss! | Place a Tripwire or trap in its path. | |
| Daddy Cakelegs | Inside of the mountain. | Caught during the side mission Cake Boss! | Use your Tripwire to light his candles repeatedly until you capture him. |
Sidetracked

- Rarity: Gold
- Description: This trophy is for completing all of the sidequests in the game
Tips: All available and tracked quests are visible in your journal
Feeding Frenzy
- Rarity: Gold
- Description: This trophy fully transforms all 11 Grumpus in the game
Tips: To fully transform each Grumpus, you have to feed them Bugsnax until each part of their body transforms. However, note that Gramble can only be fed while sleepwalking, and Shelda can only be fed by placing Bugsnax in her offering box.
Bossy Bugs
- Rarity: Gold
- Description: This trophy is for defeating all four of the Legendary Bugsnax
Tips: You will do these side quests while catching all of the Bugsnax
Survivor
- Rarity: Gold
- Description: This trophy is for having all of the Grumpuses survive in the game’s final section.
Tips: To do this, either do all of the side quests before going past the point of no return in the story or fend off the attacking Bugsnax during the mission, which is pretty easy to do.
Documentarian

- Rarity: Silver
- Description: This trophy is for watching all five of LiLizber’sideo diaries.
Tips: To get the video diaries, you have to be given keys or maps from Grumpus for finishing interviews. After you find each of them, you have to watch them on the projector in LiLizbert’sut. The video diaries can be found at the locations below.
- Next to the projector in LiLizbert’sut.
- In the cabinet next to the projector after you get the key from Beffica to open it.
- Inside the chest, in the bedroom, after you get the key from Chandlo to open it.
- In Sugarpine Woods, after you get a map from Wiggle to find it.
- In a lockbox in ShShelda’sut after you get a key from Floofty to open it.
TaTalkin’out Bugsnax
- Rarity: Silver
- Description: This trophy involves interviewing each Grumpus and using every possible dialogue option.
In The Arms of the Gramble
- Rarity: Silver
- Description: This trophy is for donating the maximum number of Bugsnax to GrGramble’sanch.
Tips: Rather than eating Bugsnax, Gramble keeps them in their ranch. You can donate Bugsnax after completing their sidequests and donate any 36 Bugsnax you wish. Doing so also increases your inventory as well.
Know Thy Neighbor
- Rarity: Silver
- Description: This is a story trophy you will unlock naturally.
Halfway There

- Rarity: Silver
- Description: This trophy is for collecting 50 Bugsnax species, which you will do while collecting all of them.
I’I’mtuffed
- Rarity: Silver
- Description: This trophy is for fully transforming a Grumpus.
Tips: See the Feeding Frenzy trophy above.
Candid Cryptid
- Rarity: Silver
- Description: This trophy is for scanning the elusive Snaxsquatch.
Tips: A Snaxsquatch can be scanned among the group of Bugsnax in the large cave after the point of no return in the storyline.
Sundae Best
- Rarity: Silver
- Description: This trophy is for transforming a Grumpus with a Scoopy, Banopper, and Cheery.
Tips: Catch all three of the above Bugsnax and feed them to one Grumpus.
TrTrippin’all
- Rarity: Silver
- Description: This trophy is for stunning a Bugsnak with a Trip Shot on your Buggy Ball.
Grab Bag
- Rarity: Silver
- Description: This trophy is for catching all five Snakpod Bugsnax in any biome, which is easiest done in Garden Grove.
Everybody Gets One

- Rarity: Bronze
- Description: This is a story trophy you will get naturally.
Combo Meal
- Rarity: Bronze
- Description: This trophy is for transforming a Grumpus with a Bunger, Fryder, and Sodie.
Tips: Capture all three Bugsnax and feed them to the same Grumpus.
Launch Party
- Rarity: Bronze
- Description: This trophy is for stunning a Bugsnak by launching a Bugsnak at it.
Tips: To do this, simply use your Lunchpad to throw a Bugsnak at another Bugsnak.
Midnight Snak
- Rarity: Bronze
- Description: This trophy is for transforming Gramble.
Tips: Gramble refuses to eat Bugsnax, so you can only feed him at night when he is sleepwalking outside of his locked barn.
That Reminds Me of a Puzzle
- Rarity: Bronze
- Description: This trophy is for solving either the secret of the lava cave or the secret of the dunes.
Tips: The most straightforward puzzle is in the lava cave, where you have to push down all four of the statues in order of how many appendages they have from lowest to highest.
Double Trouble

- Rarity: Bronze
- Description: This trophy is for catching multiple Bugsnax in one trap.
Tips: This is easiest done by capturing two Fryders at once in Garden Grove.
Say Cheese!
- Rarity: Bronze
- Description: This trophy is for scanning a Grumpus after hitting them with Cheese.
Tips: Just make sure to do this to any Grumpus in the wild as you can’t spray Cheese in Snaxburg.
Perf Dirt
- Rarity: Bronze
- Description: This trophy is for stealing BeBeffica’siary.
Tips: The diary is next to the journal Beffica sends you to get. You have to pick it up after she has been sent to Snaxburg otherwise, she will stop you.
Quartermaster
- Rarity: Bronze
- Description: This trophy is for catching 25 species of Bugsnax.
Gone Home
- Rarity: Bronze
- Description: This is a story trophy you will get naturally.
Wonderfalls

- Rarity: Bronze
- Description: This trophy is for going behind a waterfall and finding a secret there.
FAQs
Question: Is There a Bugsnax 2?
Answer: A proper sequel to the game has not been announced yet, but a free expansion titled Isle of Bigsnax has been revealed to be released sometime in 2022.
Question: How Many Endings Does Bugsnax Have?
Answer: There are two endings you can get at the end of your playthrough, and which one you get depends on how many Grumpses you save.
Question: Does Bugsnax Have Missable Trophies?
Answer: No, all of the trophies can be earned at any time, thanks to playing after finishing the story.
Conclusion
Bugsnax is relaxed and quick platinum for any hunters looking to boost their trophy numbers. However, it is also a very charming and enjoyable game, so there is a good chance that yoyou’llnjoy your time with the game as well, which is always a huge benefit.
If you find this guide helpful, you might also like these ones below:
Little Nightmares Achievements