

Anthony enjoys deep diving into strategies and explaining them to people whilst they blankly stare back, and is also a big fan of cosplay and creating assets for Cons and events in his spare time.
- Evil Dead Achievements Guide - May 30, 2023
- Just Cause 3 Speedrun Guide – How to Liberate Medici at Breakneck Speed. - May 18, 2023
- Dishonored Speedrun Guide – Corvo’s On The Clock - May 13, 2023
I can’t think of many games that achieved cult status as quick as Undertale! Whether it’s because of the humour, unique fighting mechanics, the ability to spare your foes or the toe-tapping soundtrack, Undertale has captured the hearts of countless gamers across the world.
Toby Fox created a masterpiece in Undertale that has left a lasting impression on countless fans. It should be no surprise at all, then, that Undertale has a large and thriving Speedrunning community. At the time of writing, it has almost 5000 recorded runs on Speedrun.com spanning a ton of different categories. If you love Undertale and are looking to dip your toes into the wonderful world of Speedrunning, you’d be hard-pressed to pick a better game!
In this Undertale Speedrun Guide, I’ll be guiding you through the game step by step and showing you ways to fly through to the end in record-breaking time. This guide is aimed at brand new runners as I will be keeping some of the more complex strategies (like Wrong Warping) to a minimum.
Although not strictly required, I recommend you beat Undertale at least once before Speedrunning it. Beating it even a single time will give you a rough idea of where you’re going and you can experience the incredible story first-hand.
Bottom Line Up Front
Undertale is a fantastic game to Speedrun, thanks to many flashy tricks and skips that enhance the run without breaking it entirely. If you’re willing to put the time in to learn the ins and outs of Undertale, it makes for one of the most rewarding Speedruns out there!
Before You Begin
Picking A Category
There are a dizzying number of ways you can speedrun Undertale! This guide will focus on a category called ‘Neutral Any%’.
Neutral Any% is the most popular and hotly contested Undertale leaderboard. There’s a lot to learn and memorize, but it’s a fun run with a generous helping of speedrunning tricks.
Downgrading Your Version
Nowadays, most games will receive several updates throughout their lifetime, and Undertale is no exception. The issue with this for speedrunners is these updates can affect what tricks we can use through a run.
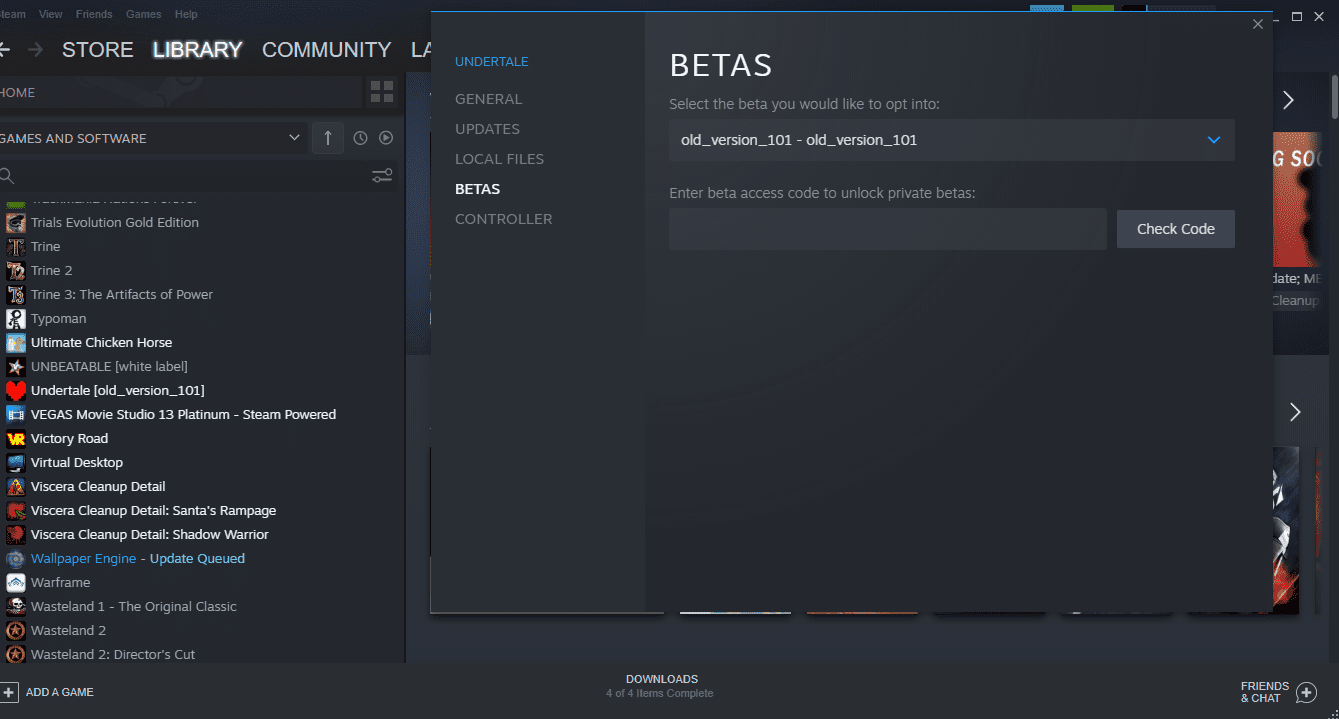
I will be using version 1.001 for this guide, and if you’re on Steam, it’s effortless to downgrade. All you need to do is ‘Right Click’ Undertale in your Steam library, go to ‘Properties’, ‘Beta’s’ and scroll down to ‘old_version_101’. This will download the earlier version of the game.
I’m usually a big fan of running games on their latest version, but not with Undertale. Currently, PC, PS4 and Nintendo Switch all run different versions. Running on version 1.00 or 1.001 gives you access to many game-breaking tricks that simply won’t work on anything else.
Timing Your Speedrun
The most popular tool for timing Speedruns is a program called LiveSplit. You can find a download link in this guide’s ‘Useful Resources’ section. Livesplit is excellent because it’s easy to use and it’s free!
Core Mechanics
Mashing
Mashing simply means pressing buttons as fast as possible, and its primary use will be to race through dialogue as quickly as possible. Unless expressly stated, it’s good to mash through all text that appears the moment it comes up. In Undertale, you can use the ‘Z’ ‘X’ ‘Shift’ and ‘Enter’ keys to do this.
Random Encounters
Whenever possible, you want to flee from encounters in an Any% Undertale Speedrun. Fleeing almost always saves time over fighting, and I’ll point out any exceptions to this in the ‘The Run’ section of the guide.
Pause Buffering
In other games, the term ‘Buffering’ usually means holding a button-down before whatever it would activate goes live. Buffering an input like this makes your input work at the earliest time possible.
In Undertale Speedrunning, it means something entirely different. Tapping a direction and the pause button together will move Frisk a single pixel in the chosen direction. Doing so lets you position yourself with perfect accuracy for tricks throughout the Speedrun.
Wrong Warping
Wrong Warping is an exploit that allows you to travel further into a new screen during an area transition than usual. This trick uses the Punch Card item, and when used correctly, it can send you further into areas than just walking through the door. I won’t be covering Wrong Warps in this guide as a messy one can soft-lock the game. If you’re looking to take Undertale Speedrunning more seriously, this is worth looking into.
Text Overflowing
Text Overflowing is a glitch you can pull off with the Punch Card whilst standing near something you can interact with (like an item box).
Text Overflowing can break the game, allowing you to skip cutscenes and entire gameplay sections! It’s not easy to pull off and will require practice. To do it, stand facing an item you can interact with, go into your menu, select the Punch Card and hover over ‘Use’. Then, press ‘Z’ followed by ‘Enter’ as fast as possible.
‘Enter’ needs to be pressed on the frame after ‘Z’, and as Undertale runs at 30 frames per second, that should give you an idea of how fast you need to be.
If you do it correctly, you’ll be able to wander about with a text box still on the screen. If you’re struggling with the input, rapidly Mashing ‘Z’ and ‘Enter’ can help! As this is tricky, I’ll keep its use to the bare minimum in this guide, but it’s mandatory for a massive time saver called ‘Lab Skip’ near the middle of the run.
The Run
If you’re timing, your time starts when you confirm your name. Speedrunners will only use a single character as their name to save a tiny bit of time throughout the run (it’s barely a second!) and with that, let’s begin!
Flowey
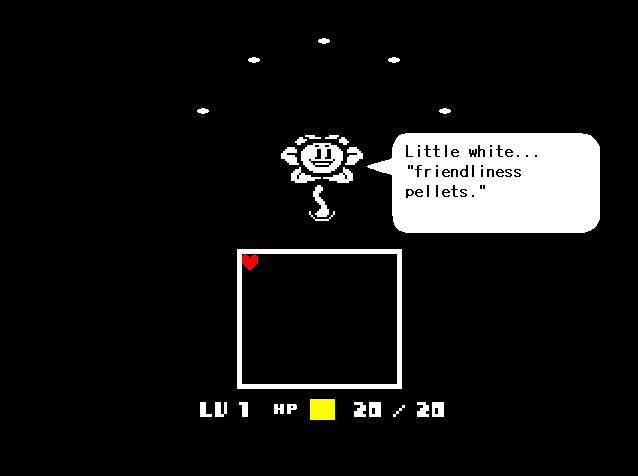
The optimal strategy in this encounter is to get hit as fast as possible! Move to the top left of the box, get hit by a ‘friendliness pellet’, then move to the bottom left. Mash through dialogue when it appears and when Toriel shows up.
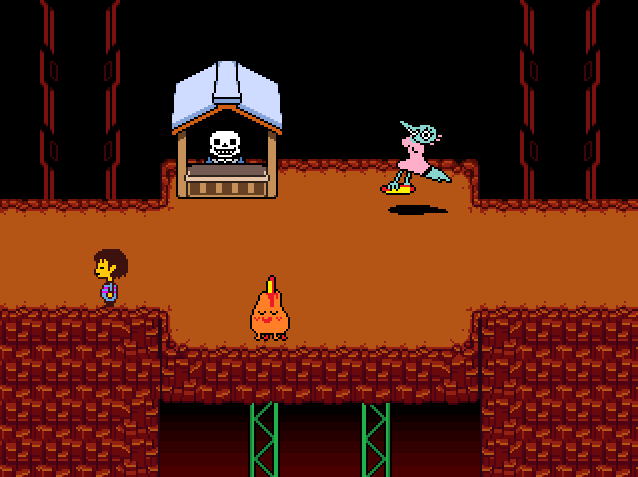
Napstablook
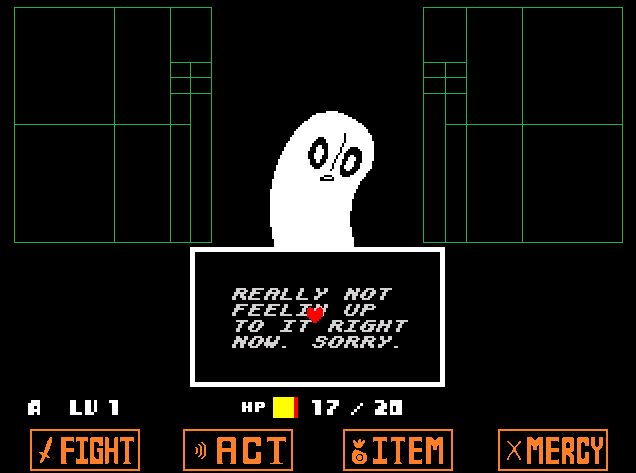
This is a strange encounter. Simply ACT and CHEER four times. Napstablook will only attack once, do your best to avoid it and try and race through the prompts as fast as you can. After the fight, head north to exit the area.
Toriel’s House
There’s a ton of text to skip in here! Follow Toriel into the house, and she will take you down the hall to the right. Skip all of her dialogue, then head left and talk to Toriel again while she’s sitting in her armchair.
There is a lot of dialogue, but race through it until ‘How to exit the RUINS’ becomes an option; select it when it does and head downstairs.
Toriel Fight
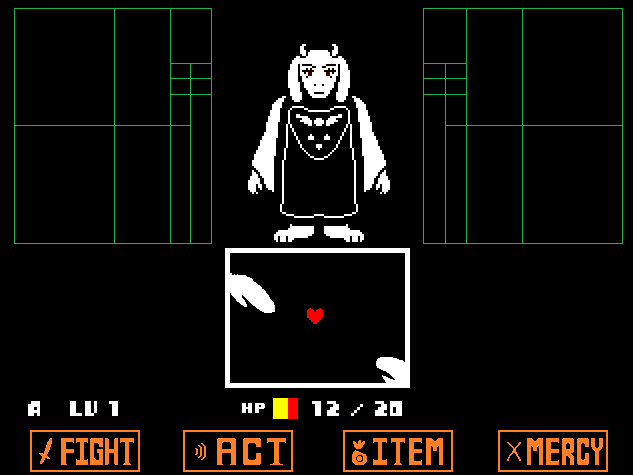
This fight is easy but demonstrates what’s expected of you moving forward. ‘Spare’ every single time against Toriel. Avoid her attacks until you see the finger attack (pictured). You want to get hit by this one every time it happens as it ends the fight faster.
When you’re down to 2HP, Toriel will start missing you on purpose. Continue to ‘Spare’ every opportunity you get; before you know it, the fight will be over. You’re free to proceed after the battle and a hug from Toriel.
Meet Sans and Papyrus
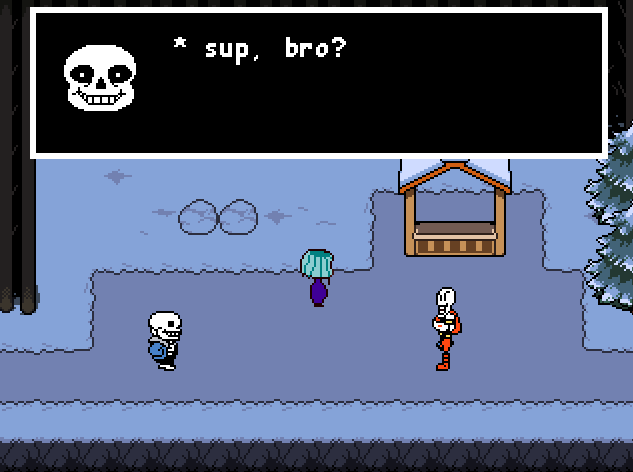
I love these guys! But love them or not, most of this section will be mashing through their dialogue as fast as you can. When Papyrus leaves, follow him out of the screen and feel free to save on the next screen.
There is a box in here with a TOUGH GLOVE inside, quickly take it out and equip it. With the glove equipped, exit this screen to the right.
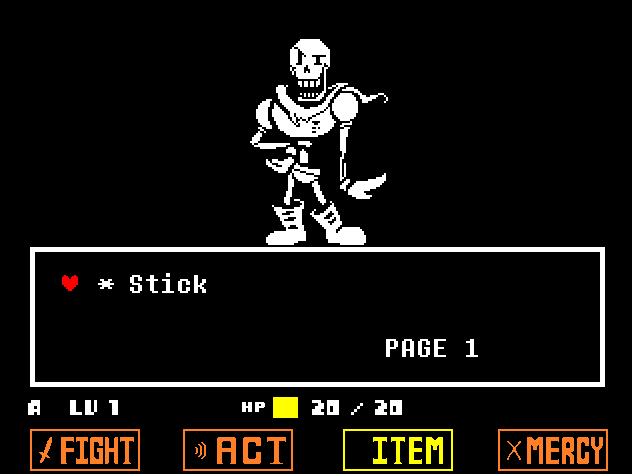
The Doggo Fight
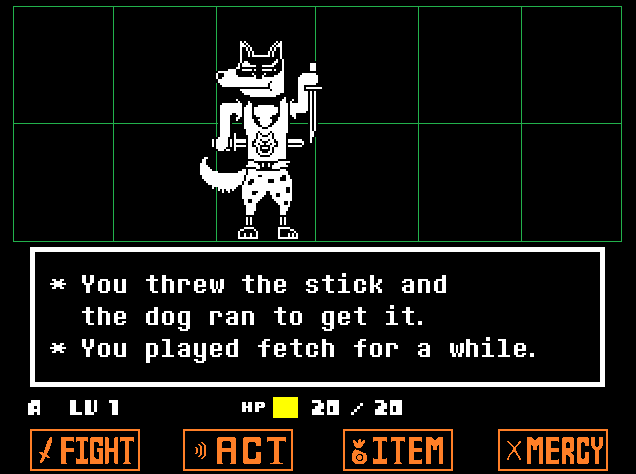
You want the Tough Glove equipped because it puts a stick in your inventory. The Stick is excellent in this section and lets you finish fights fast! Select the Stick from your inventory (under ITEM), don’t move when the dog attacks; Spare twice to finish the fight.
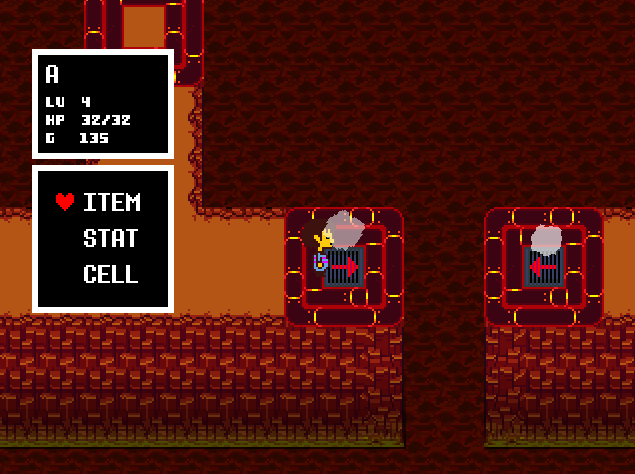
A Secret Switch
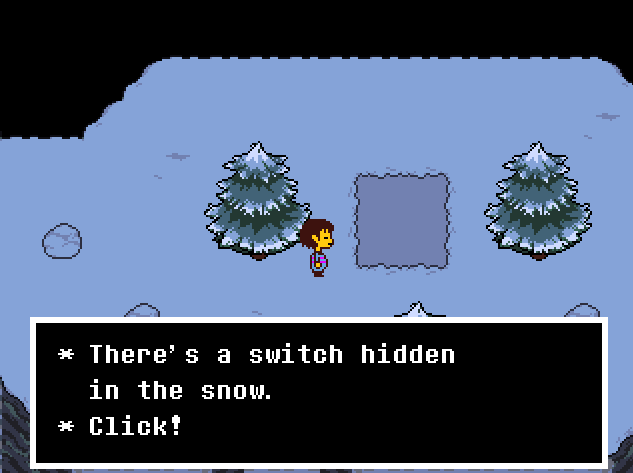
There’s a switch you need to activate in the box in this area (pictured). After that, you will always trigger a fight immediately afterwards. As with most encounters so far, Spare them and move on.
Dogamy & Dogaressa

Who would have thought that glove was so important? Just like the Doggo fight, use the Stick. Avoid their attack, and then Spare for a quick finish.
Another Secret Switch
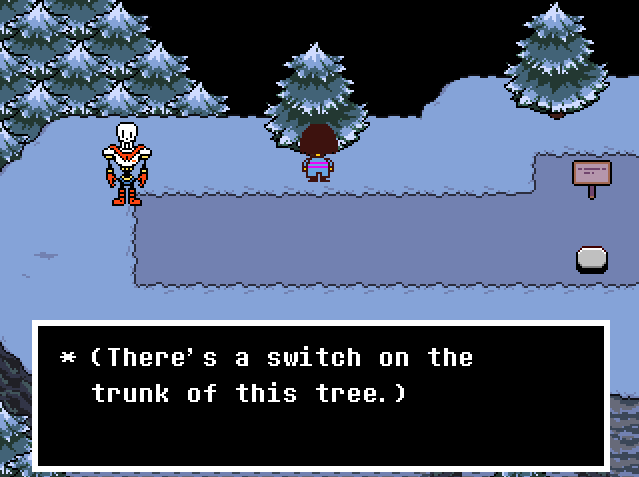
Maybe Papyrus’s traps would be better if there weren’t instant win switches hidden about the place! In the tree next to Papyrus is a switch for you to activate. Once you’ve done so, step on the button on the path, and the puzzle will immediately solve itself.
The Disco Floor
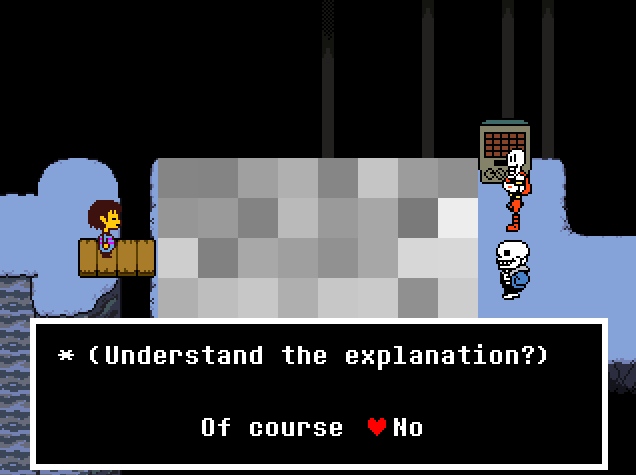
Be careful mashing through the text on this screen, as when you’re asked if you understand, you need to select ‘No’. The next time you can respond, select ‘Even less’. Doing this skips the scene where Papyrus turns the machine on, saving some time!
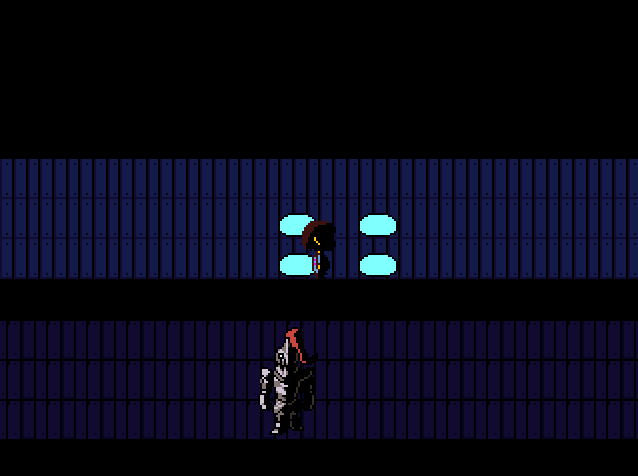
Ice Puzzle Skip
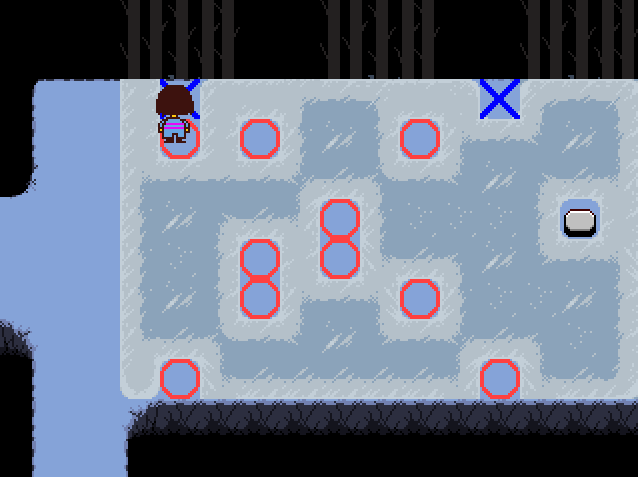
You can do a clever trick to save a few seconds here, but it requires a little setup and Pause Buffering. Hold ‘down’ the moment you enter this area, and you will bump into the wall beneath you.
Once you reach the position I’m standing (pictured), Pause Buffer upwards until you activate the tile above you. Then, hold ‘right’ followed by ‘right’ and ‘down’ together. When you hit the last tile, let go of down, and you’ll glide into the next screen. This trick only saves a few seconds over just doing the puzzle normally, so don’t worry if you can’t do it.
Greater Dog Fight
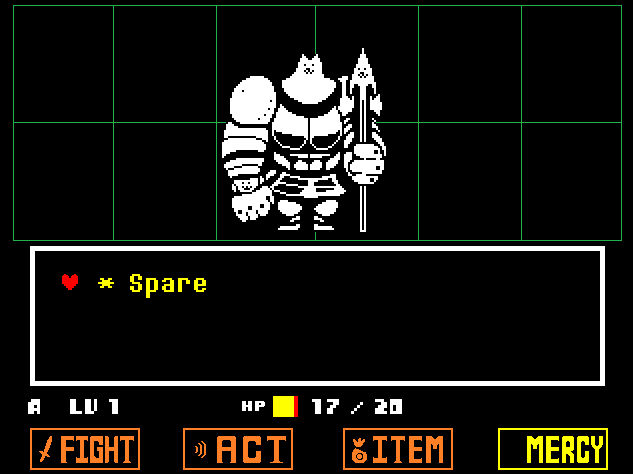
Even this scary foe will fall to the power of the Stick! This enemy has two attacks, a spear you can avoid when it turns blue or a small dog you can bump into to skip the attack quickly. After the attack, you can spare and end the encounter.
Welcome to Snowdin
In this Speedrun, you don’t have much to do in Snowdin but feel free to save. Enter the Igloo next to the Save Point, and it will quickly transport you to the other side of the town. From here, you can move to the right into your first proper battle.
Battle with Papyrus
This strategy may sound tedious, but it’s the quickest way to end the fight. You want to lose to Papyrus three times. The fastest way to do this is to use the Stick and run into all his attacks. Each time you lose, you’ll wake up in a garage on the outskirts of the town.
After the third loss, you can go back to Papyrus, and a dialogue box will appear in the conversation which says (Fight Papyrus?) You can select ‘No’ and skip the battle. Mash through the remaining text and head right to the next screen.
Spear Gauntlet (Spears 1)
Spears will rain from the sky in this section, and if any hit you, they will force you into a short attack sequence that costs time. The most important thing to understand here is how the spears actually work. The spears aren’t random and will target your position.
You can reduce the chance of being hit by moving diagonally up and down as you’re running right. If you can see the spears are about to hit you, briefly backtracking will usually save more time than getting hit.
After the gauntlet, you’ll be chased into the tall grass and two cutscenes. Mash through the dialogue and head to the save point in the next room.
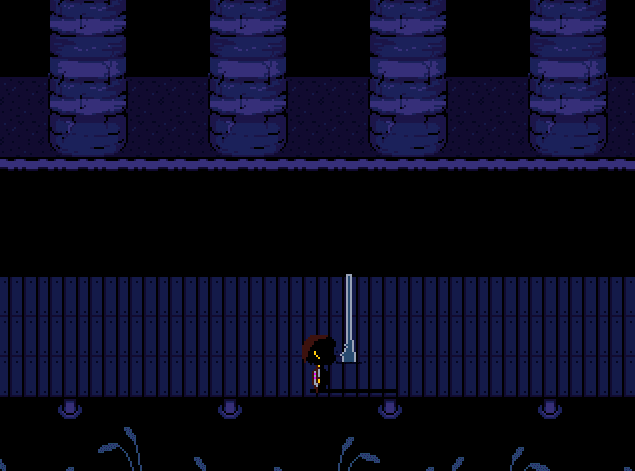
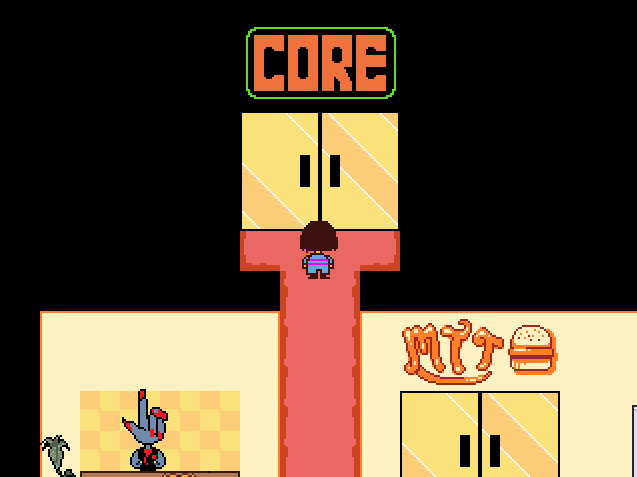
This Room Changes Everything!
The room pictured contains the most broken item in Undertale Speedrunning, the Punch Card! This item lets you ‘Wrong Warp’ (explained in the Core Mechanics section) as well as other incredibly broken exploits like ‘Text Overflowing’.
Speedwalking

If your keyboard lets you input three directions simultaneously (some older ones only allow 2), you can hold up, down and right as you transition from the room I’m in (pictured) into the next. Entering this way makes you walk at double speed for this section and is one of the only places this works in the game.
Spears 2
There are a couple of advanced strategies for this section, but as they don’t save much time, I will focus on how you can make the flurries of spears a lot less random. If you press against a wall any time you hear the sound cue for the spears to fall, they will only land against the wall where you’re standing. Knowing this allows you to manipulate the spears and make traversing this section much more straightforward.
Mad Dummy Fight

A lot is going on in this fight, so check the box on the ground just before. It contains Astronaut Food which will bring you back to full health if things get tricky!
The idea is to Spare every time and get the Dummies (the enemies in the attack box with you) to hit Mad Dummy. They will start by throwing cotton balls at you first. Move to the top of the box just under Mad Dummy, let one ball hit you and avoid the rest. You want to do this because he won’t start moving immediately for the next attack, making him a bit easier to hit. After this, you want to try your best to avoid attacks and direct them at him instead.
His 2nd phase isn’t as hard as it looks. Your opponent has upgraded his attacks to missiles now, but no matter what you do here, the same amount of missiles will hit Mad Dummy regardless. You don’t have to worry about your positioning, so focus on not taking damage.
His final phase also is easy once you know where to position yourself. Avoid the knife attack, then stay just underneath Mad Dummy. The tears falling into the area won’t hit you if you’re here, as Mad Dummy will block them for you.
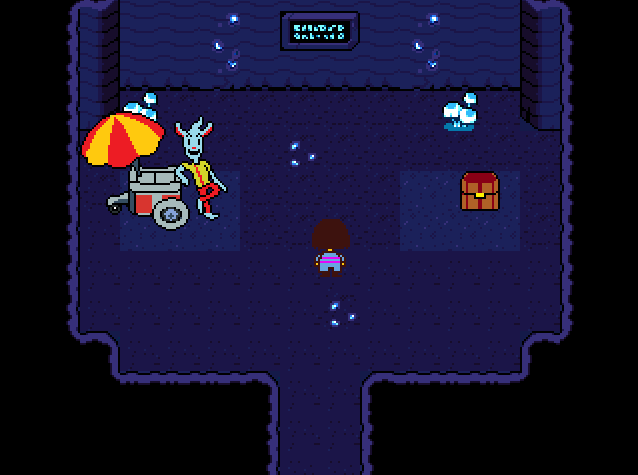
Lanterns
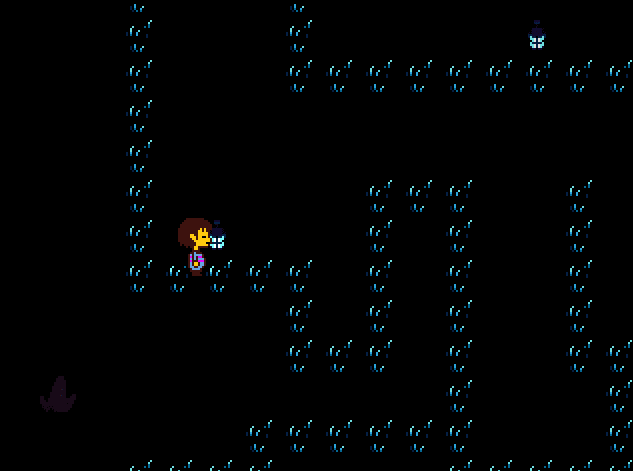
This area isn’t too tricky, but it’s easy to get lost. Remember to activate the lanterns as you pass so the path doesn’t get too dark to see. I recommend repeating this section a few times to memorize the route just in case you miss triggering a Lantern in the future.
Undyne
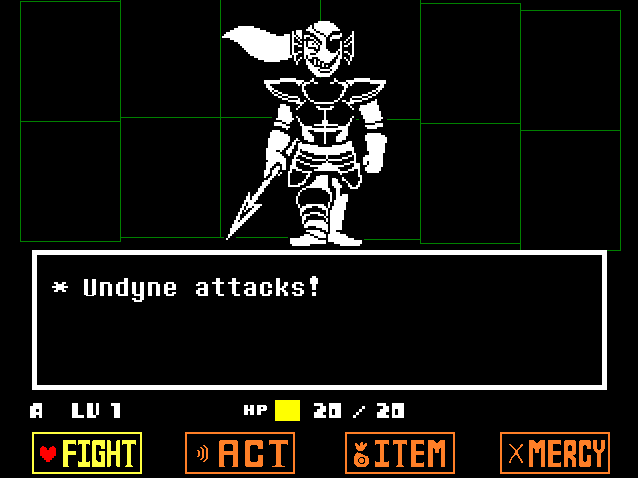
You’ll have to face Undyne multiple times here, but once you know her attacks, she isn’t too bad! To speed up encounters, you can ‘Challenge’ Undyne four times. This will make her attacks faster but shorter. When your heart goes red, you can select Flee.
The most optimal strategy for dealing with Undyne is a skip known as ‘Onedyne’ as you only fight Undyne once. This technique is very flashy and saves a lot of time, but as it includes multiple Punch Card tricks, pixel-perfect positioning and Text Overflowing, I will not include it in this guide.
Lab Skip
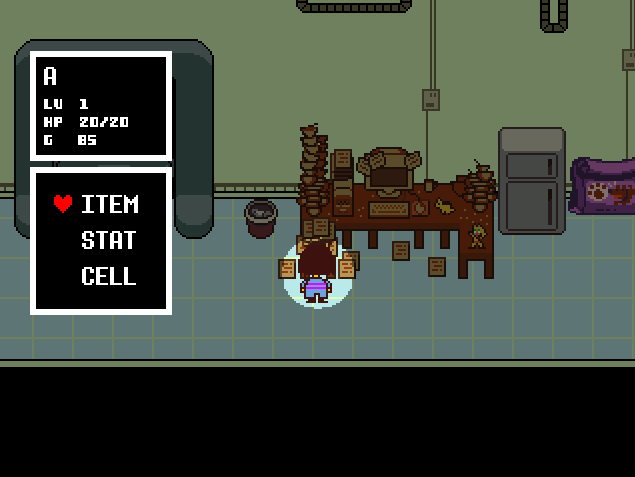
This trick is HUGE as it skips the entire area, including the Mettaton fight. The issue is that you need to use Text Overflowing (explained in Core Mechanics) to do it.
First, you want to stand where I am (pictured), facing the table. Text Overflow and walk to the right; don’t interact with anything else; just walk to the door! If you can do it, you’ve just pulled off a crazy bit of speedrun tech!
Don’t beat yourself up if you can’t do this yet. Come back to it! Go through the Labs as usual and know that you have a powerful 5-minute time save waiting when you learn the trick.
Kill Vulkin
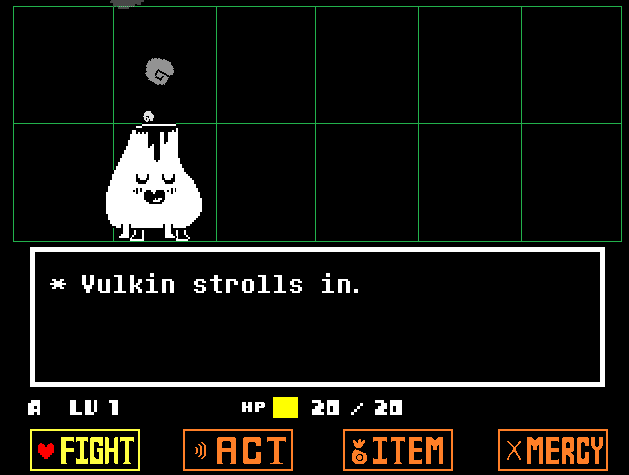
You will encounter a Vulkin around the Hotlands area. Kill one to increase your ‘Love’ to 4. It saves a few seconds in the Asgore fight much later.
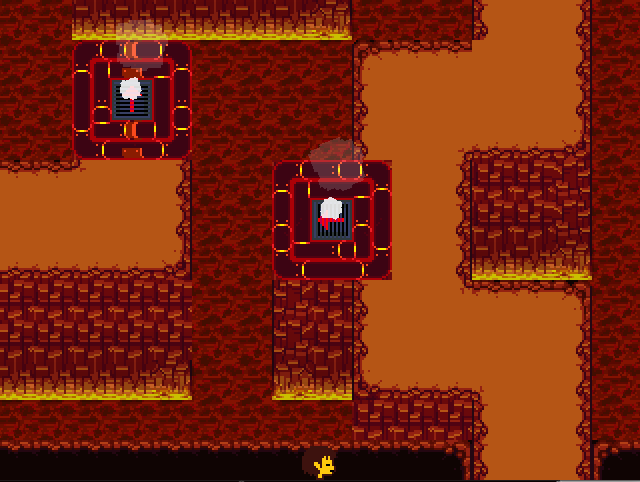
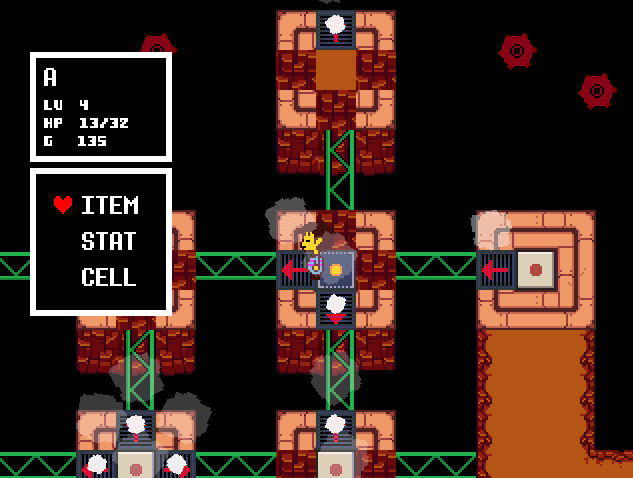
Hotlands Out of Bounds
You can do a cool little trick here that kicks you out of bounds!
If you stand where I am (pictured above), open your inventory, hold ‘down’ and ‘left’, then use the Punch Card, you’ll leap out of bounds into the Lava!
From here, you’ll want to walk right along the bottom of the screen to the platform and hold ‘up’ and ‘right’. This gives easy access to the ‘Burnt Pan’ you’ll need later on.
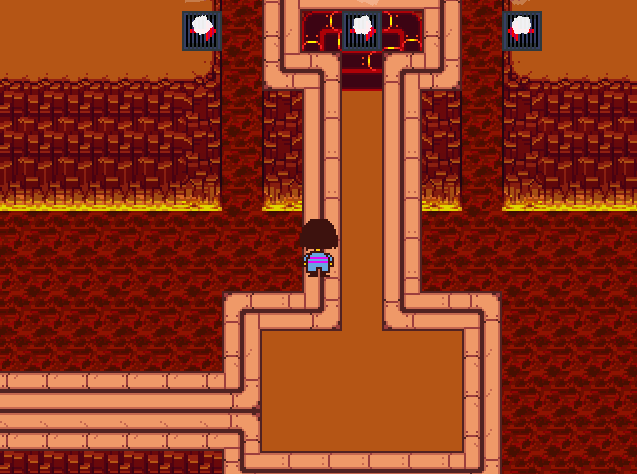
East-West Skip
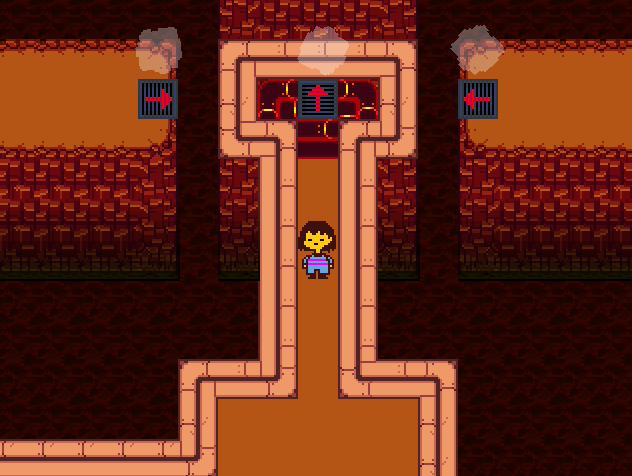
This trick lets you skip two puzzles, making it an excellent time-saver! It will require practice, though. First of all, you need to get into position. You need to clip into the wall on the left slightly. You can do this simply by approaching the wall from the bottom. Pause Buffering may help, but if you’re in the same position as the picture below, you’re in the right spot.
Once you’re here, walk up until you’re next to the vent. Pause Buffer ‘right’ once, so you’re also a pixel closer to the vent. From here, you need to open your menu, select the Punch Card and mash ‘Z’ whilst holding up. If you can do this when the arrow on the vent is also pointing up, you’ll get launched through the locked door saving a ton of time.
Jetpack Skip

I debated including this in the guide because it’s complicated to pull off. It saves time and skips both the Cooking Show and Jetpack minigame.
Jetpack Skip is mandatory in a proper run. I’ll explain what to do, but only attempt this if you know the area, as you’ll be doing this in the dark!
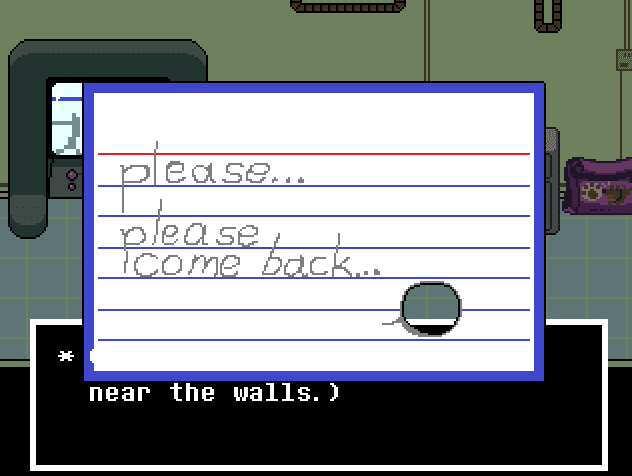
In this pitch-black room, you want to stand EXACTLY where I’m standing (pictured), Text Overflow and immediately open the Punch Card again and mash through it. If you’ve got the text box that says “(It’s too dark to see near the walls.)” still on your screen, you can navigate to the right and into the next area.
It’s also important to know that if you do this skip, you’ll have to take the elevator to ‘Left Floor 1’ in the next section and make your way to the wooden bridge. If you don’t, you won’t be able to use your menu button!
Right Floor 2
This one barely saves time, but it’s a funny time skip, and it’s simple! From the location pictured, walk along the bottom of the path when you head into the leftmost screen. There’s a cutscene trigger here that doesn’t quite reach across the entire path; if you’re low, you’ll miss it!
Jump Tile Puzzle Skip
A much quicker way to beat the Tile Puzzle is to make your way to the tile I’m standing on in the picture. You will need to Pause Buffer to get to the exact same pixel as me, but once you’re there, open your menu, hold ‘left’ and mash ‘Z’ to use your Punch Card. Doing this will give you enough extra distance to clear the puzzle. You will actually land inside a wall doing this, but simply holding ‘up’ will free you.
Royal Guard Skip

I love skips like this because they look flashy AND they are straightforward to do. To skip the Royal Guard fight, stand exactly where I am (pictured). You may need to Pause Buffer, but from here, go into your menu, select the Punch Card, hold ‘left’, then mash ‘Z’. This skips the trigger for the fight so you can move along uninterrupted.
Muffet Skip
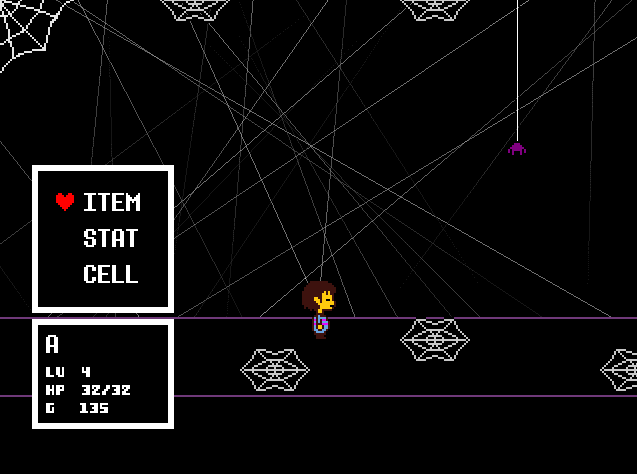
Muffet Skip is functionally the same as Royal Guard Skip; you’ll just be holding ‘right’ instead of ‘left’. Doing this allows you to skip the entire Muffet fight, which is huge for your Speedrun.
You can do this trick in a few places, but I like this one right at the start. Pause Buffer until the back of Frisk’s foot is in line with the cobweb (pictured). Then select Punch Card in the menu, hold ‘right’ and mash ‘Z’. If the skip has worked, it will leave a text box on the screen, and Muffet will never show up!
‘The Musical’ Skip
This skip is exactly the same as the last two. If you can line up with where I am (pictured) and use the same Punch Card trick as before whilst holding ‘right’, you’ll skip both ‘The Musical’ and the dungeon section.
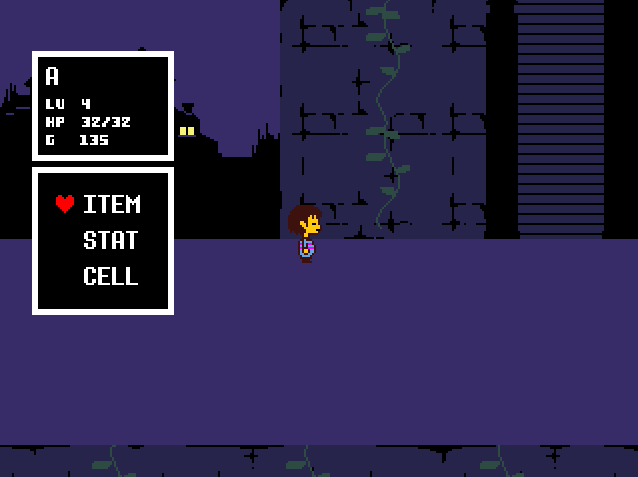
Losing Your Menu
If you did ‘The Musical Skip’, Undertale gets confused and won’t let you open your menu anymore. To fix this, you’ll need to find this door (pictured) in the nearby building with Sans standing outside. Walk through enough, and you’ll trigger a cutscene. When that cutscene finishes, make your way to the elevator and floor ‘Left Room 1’. In this area, if you walk onto the wooden bridge and back, it restores your menu.
Mad JickX Skip

This is, once again, the same process as the last few skips. If you stand where I am (pictured), you can do the Punch Card trick whilst holding ‘up’ to skip the Mad Jick fight.
Disable The Lasers
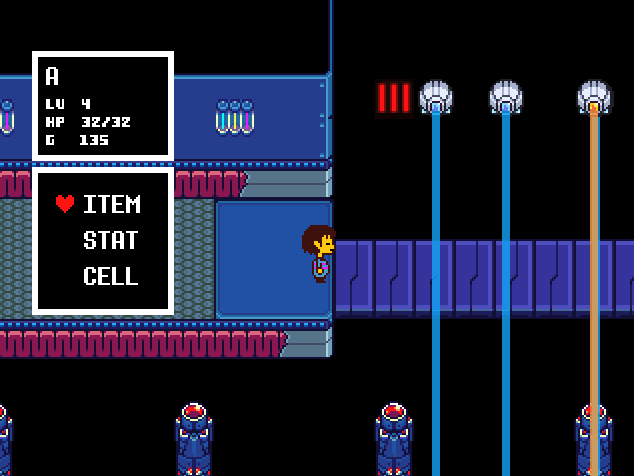
The easiest way to clear this hall of lasers is to ensure they don’t appear full stop. If you stand where I am (pictured), do the Punch Card trick, then open and close the Punch Card once more. This will stop the lasers from turning on, making this section much more manageable.
Mettaton Skip
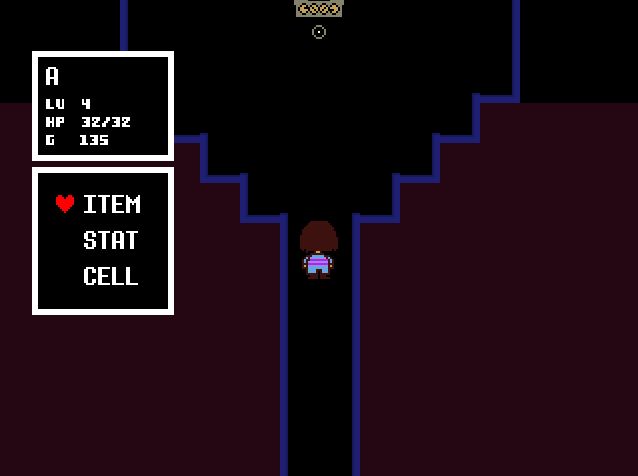
You’re probably an expert at these by now! This skip is the same as all the rest, stand where I am (pictured), do the Punch Card trick whilst holding ‘up’ to Skip the Mettaton boss battle.
Castle Cutscenes
There are a lot of cutscenes in the castle with slow-moving text. Although you have been skipping plenty of them through Undertale so far, there is no way to do that with these. Just be ready to keep going after they play out.
Asgore Fight
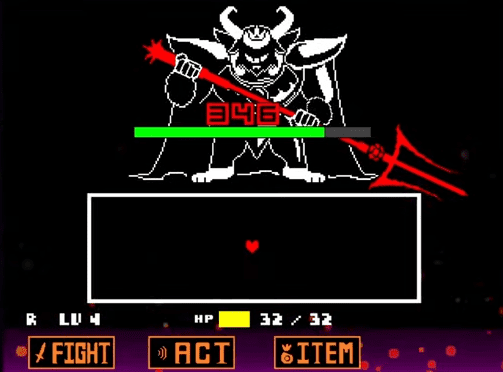
With a Speedrun full of clever exploits and tricks, you may be sad to learn there’s no real way to make this fight any easier. Asgore is a formidable opponent, and you’ll only get good at beating him with practice.
Remember the Burnt Pan you picked up way back in the Hotlands? You will want that equipped for this fight. There isn’t anything I can explain to make this fight quicker, but try focusing on getting your attacks as accurate as possible for maximum damage.
When you beat Asgore, select ‘Fight’ instead of ‘Spare’ as it’s the faster of the 2 (and he dies anyway!).
Flowey Fight
As with Asgore, there are no flashy ways to beat Flowey other than just mastering the fight. That’s easier said than done, as Flowey can throw a ton of attacks your way. Once you get a feel for the attacks, it helps to memorize where the ‘FIGHT’ and ‘ACT’ buttons appear during the battle so you can trigger them immediately.
The battle with Flowey can feel like a real war of attrition, so pay close attention to your health and prioritize healing items over everything else!
When you beat Flowey, hit the ‘Fight’ button, and the moment you reach the door behind, that’s where you can stop your Speedrun timer!
Useful Resources
If you want to start timing your runs with LiveSplit, you can download it for free here.
There are some fantastic tools you can use to help practice specific parts of an Undertale Speedrun. You can find them here.
I strongly recommend watching top-rated runs. You will learn a ton from them, including Wrong Warp locations. The Leaderboards, complete with videos, can be found here.
Frequently Asked Questions
Question: What is the World Record for an Undertale Speedrun?
Answer: At the time of writing, the Neutral Any% World Record is held by a runner called mrlink2k with a staggering 52mins 32seconds.
Question: What is RNG?
Answer: RNG is shorthand for ‘random number generation. It’s a well-known term in gaming generally and is used to describe something as having a random outcome.
Question: How can I practice speedrunning Undertale?
Answer: Nothing beats just running the game over and over, but if you’re after tools to aid that, you can look into accessing the game’s Debug Mode. This is for PC only and is a little complicated. It can also break your game if you do it wrong. If you’re still interested, I’d recommend looking for a video guide so you can see what you need to download and alter.
Question: Why did you miss ___ skip in this guide?
Answer: I want this guide to be approachable to fledgeling Undertale Speedrunners. There are incredible nuances and tricks in an Undertale Speedrun but I have focused on the most impactful ones to make the run less insurmountable.
Conclusion
Undertale Speedrunning is well documented, and there are strategies for almost every screen in the entire game. Tricks range from the simple stuff like just avoiding fights to brutal frame-perfect exploits.
This mix makes the game approachable to new runners whilst still being great fun for veterans, and you simply don’t find that in many games. Undertale is a game I can confidently recommend trying if you have any interest in speedrunning at all!