

Anthony enjoys deep diving into strategies and explaining them to people whilst they blankly stare back, and is also a big fan of cosplay and creating assets for Cons and events in his spare time.
- Evil Dead Achievements Guide - May 30, 2023
- Just Cause 3 Speedrun Guide – How to Liberate Medici at Breakneck Speed. - May 18, 2023
- Dishonored Speedrun Guide – Corvo’s On The Clock - May 13, 2023
If I had to summarise Jump King in a few short words, I’d have to go with Sadistic and Soul Destroying. Jump King is a ruthlessly tricky game, but it certainly doesn’t look like it from the outside.
The premise is simple, get to the top of the tower and reach the ‘Smoking Hot Babe’ (Jump King’s words, not mine!) at the top. You only have to press three buttons throughout the game: Left, Right, and Jump. How hard could it be?
Well, if you’ve sat down with Jump King for more than 5 minutes, you know it’s tough, and I mean, really tough! Beating this game at any speed takes the patience of a saint. Doing it fast is another beast entirely.
This type of obnoxious difficulty would be enough to dissuade your average player from even trying to beat the game, but this is the sort of challenge that Speedrunners love. Considering the World Record for beating Jump King is under 5 minutes, it’s safe to say they have got very good at it!
If you’ve got more patience than you know what to do with, this Jump King Speedrun guide will have you at the top of that tower in no time!
Before You Begin
When you start speedrunning Jump King, you first need to decide which category you want to compete in. The most popular by far is ‘Any%’, where you time the original game (Main Babe route) from start to finish. This guide will focus on the Any% category, but other categories like ‘All Maps’ are also available.
Timing Your Run
Jump King has an In-Game Timer (IGT) that you can see upon beating the game. As IGT eliminates any hardware advantages, this is what the community uses for timing runs. The rules for submissions are surprisingly relaxed for Jump King, as any run over 10 minutes only requires a screenshot of the end screen.
Any run breaking that 10-minute barrier requires video proof. As you improve and your runs start creeping up on 10 minutes, I recommend you record ALL of your runs just in case you end up on something special.
Patience is EVERYTHING
Patience is essential in any speedrun, but I feel this is especially important in Jump King. If you get frustrated, take a break and return with a more positive mindset. Precision jumping and frustration don’t mix and are usually a recipe for disaster.
Core Mechanics
You will have to take advantage of most of these mechanics, even for a casual run of Jump King. It’s still important to know what you’re dealing with, and you’ll want to become proficient at everything here.
Repositioning
Jump King demands some of the most precise jumps in gaming full stop. Don’t be afraid to hop forwards or backwards to line up those perfect jumps. You can skip across flat ground quickly by briefly tapping the jump button and a direction. Lining up those perfect jumps will always be faster than trying the risky leap and falling.
Jumping
It may seem silly to include ‘jumping’ as a core mechanic, but it’s at the heart of everything you do in Jump King. In this game, you jump when you release the jump button instead of when you press it.
The longer you hold the button before that release, the higher the jump. You’ll usually be jumping either left or right. Holding either direction when you release the jump button will launch you that way.
The part that will take the longest to learn in Jump King is committing how this all feels to memory. You will know how long you need to hold the jump button to clear specific distances with practice. Until then, you’ll be failing and falling over and over.
There are no tricks, and this really is like bashing your head against a wall until you end up on the other side!
Wall Bouncing
Wall Bouncing is a necessity at all levels of play. If these are your first steps into the world of Jump King, this is an essential one to learn and practice.
Jumping into a wall will cause you to bounce off it, and your trajectory is based on your angle and speed. There are a few places in the game where a tricky Wall Bounce makes obstacles more manageable, and I encourage you to throw yourself at walls from time to time to get a feel for this mechanic.
The Run
Welcome to the real meat and potatoes of this guide! I will be going through a complete run in detail, and I’ll be picking apart some of the trickier jumps.
I can’t stress this enough; your ability to get to the top of the tower quickly depends entirely on your mastery of the jumping mechanics. You will need to practice a ton, but you’ll see results quickly if you put the time in!
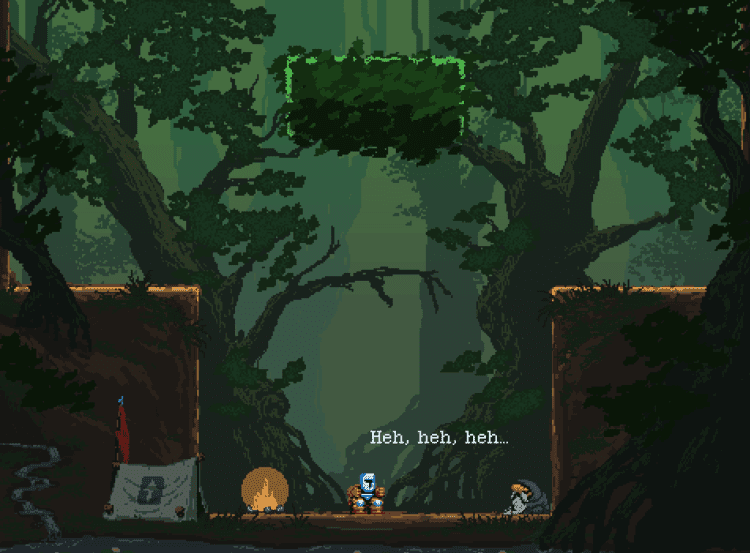
Redcrown Woods
Redcrown Woods is an excellent part of the game to practice on as it introduces concepts you’ll be putting into full effect later on.
Wall Bounce #1
I won’t be including every single Wall Bounce in this guide, but this simple one at the start of the game highlights what you need to be able to identify. Most of these optional bounces save very little time, but they do add up.
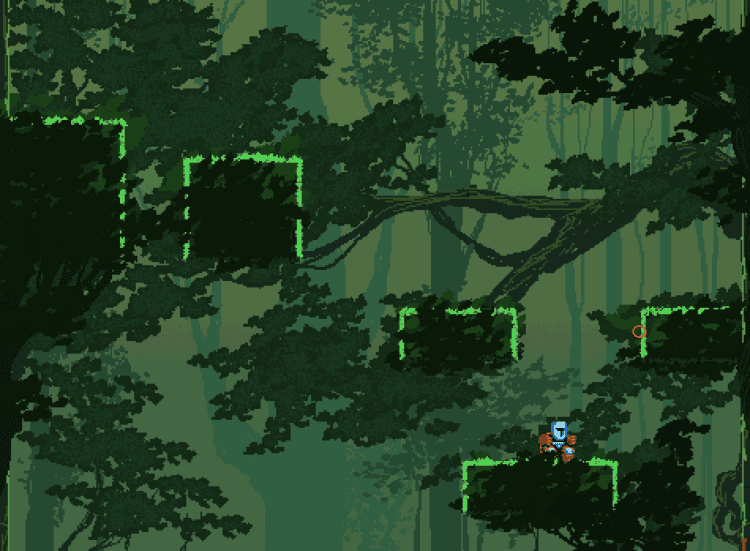
Big Jump #1
I won’t cover every jump like this as they are so frequent, but many platforms are more like ‘suggestions’ in Jump King. You can jump from both positions pictured in a single jump, completely ignoring the platform in the middle. As with the Wall Bounces, these add up through a run.
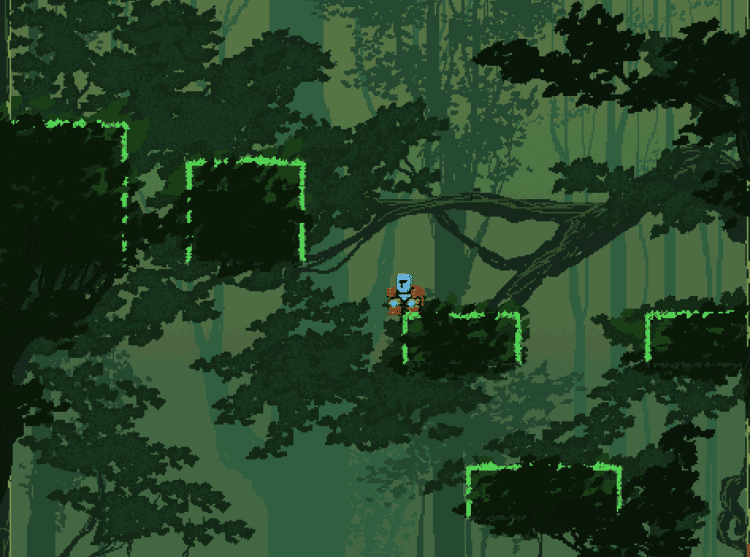
Big Jump #2
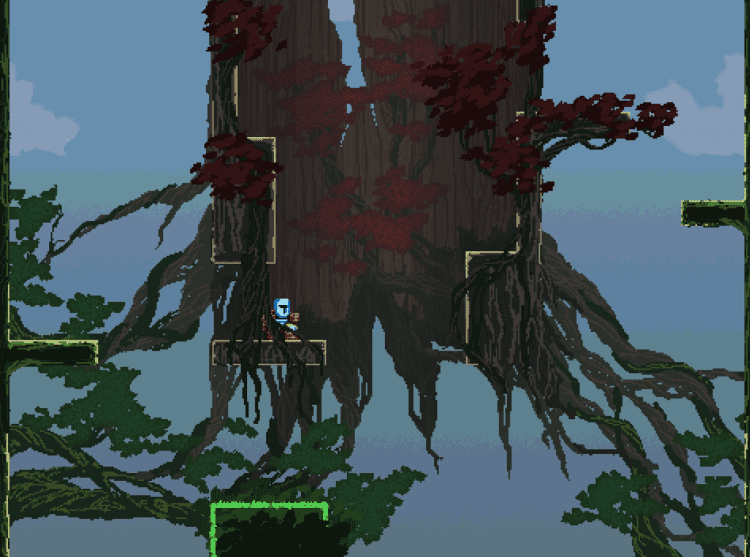
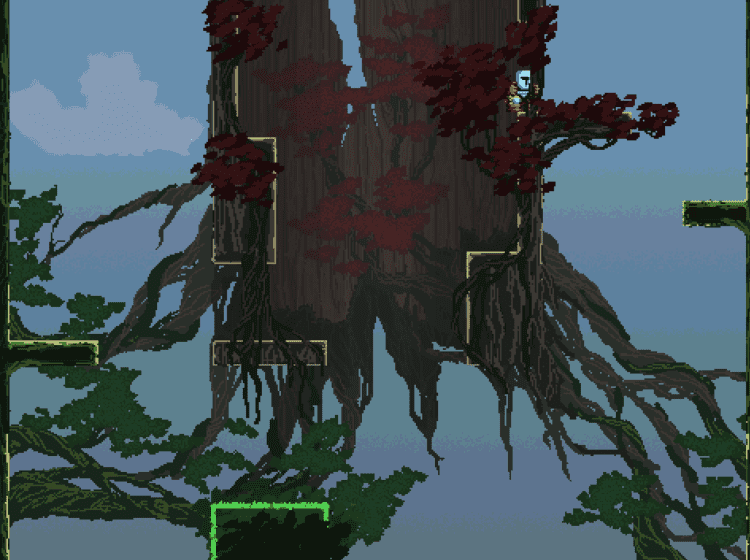
You can jump to the ledge pictured in one go. A full-power jump to the left from here will get you to the top of the tree trunk. There are no tricks in the screen following this jump. Upon completing it, congratulations, you just beat the first area of Jump King!
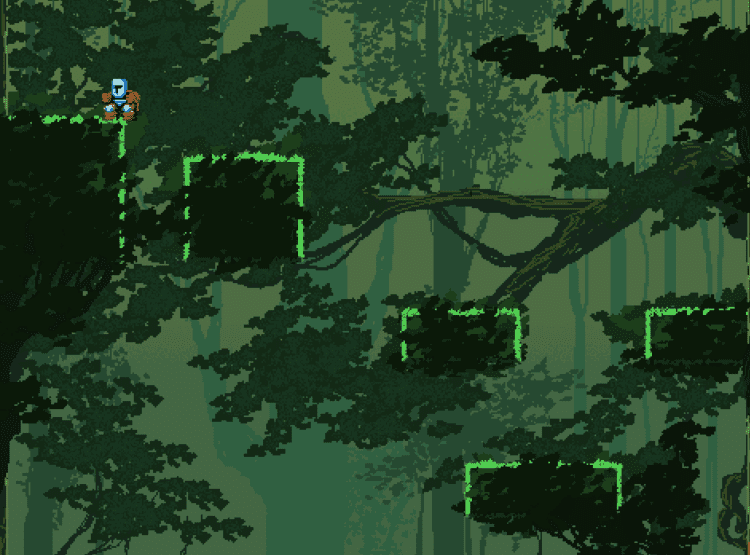
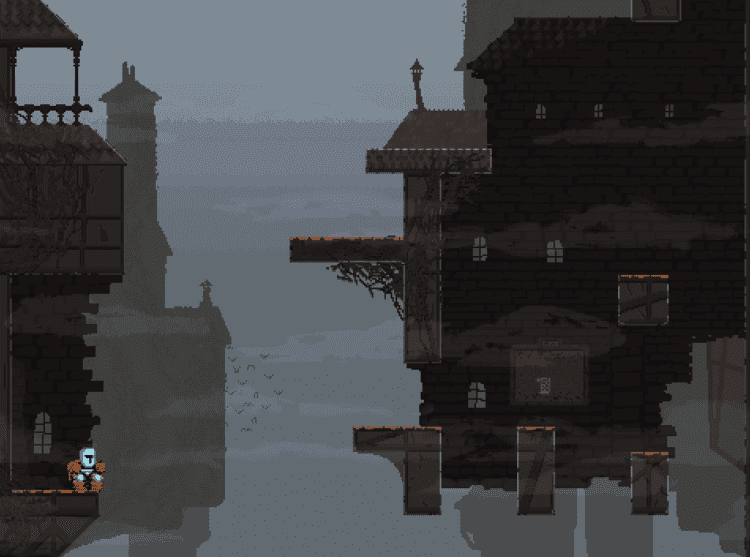
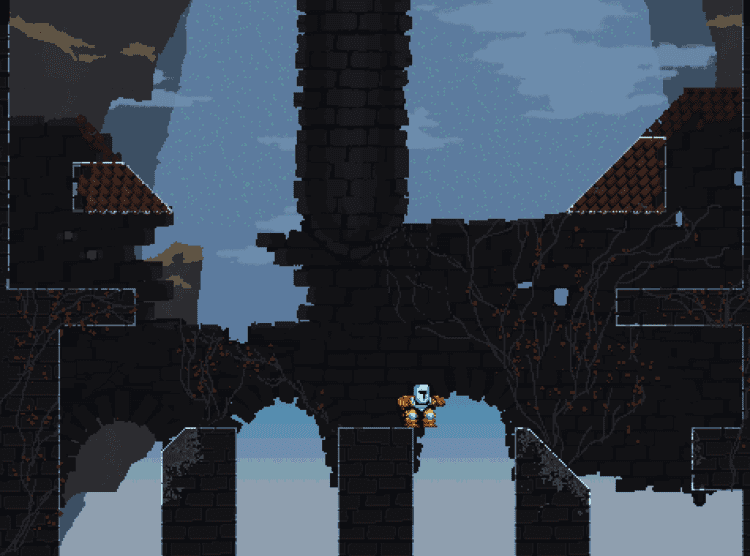
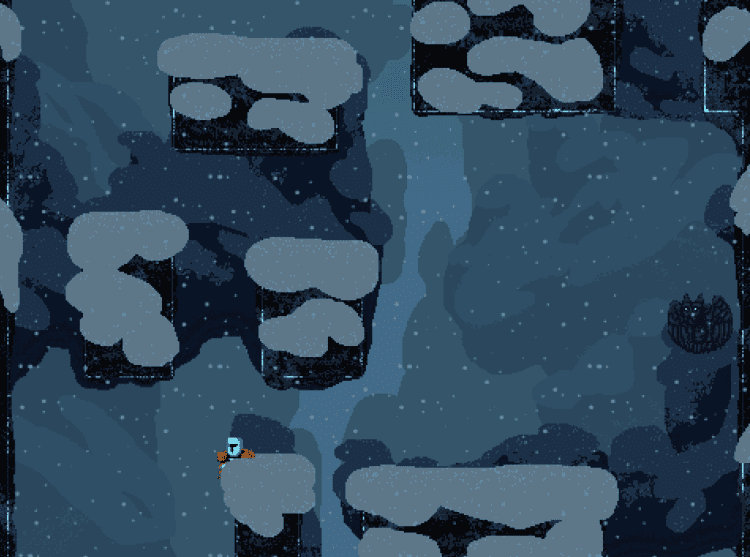
Colossal Drain
To get through Colossal Drain quickly, you can take advantage of a hidden passageway that only reveals itself if you accidentally stumble upon it! Many narrow areas force you to use Wall Bounces to keep your pace up.
Hidden Passageway
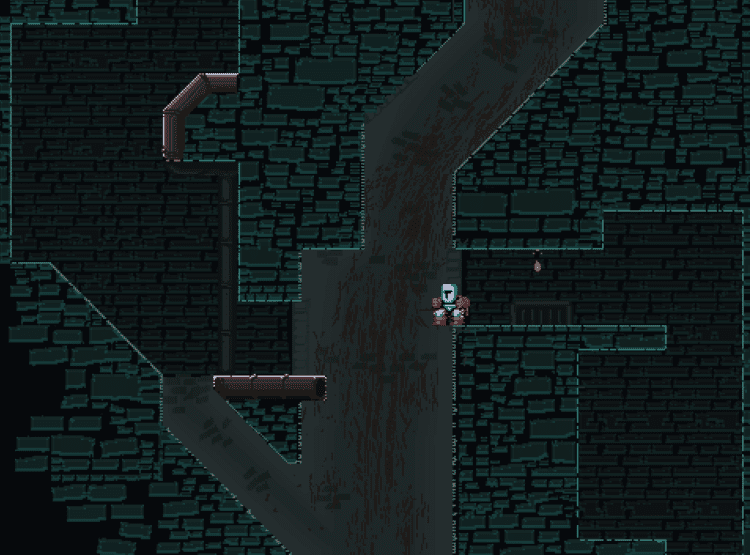
Play through this section as usual until you end up where I am in the picture above. Make sure you’re right at the edge, then do a full power jump to the left. If you’ve done it correctly, you’ll end up in the hidden passageway just above where you started.
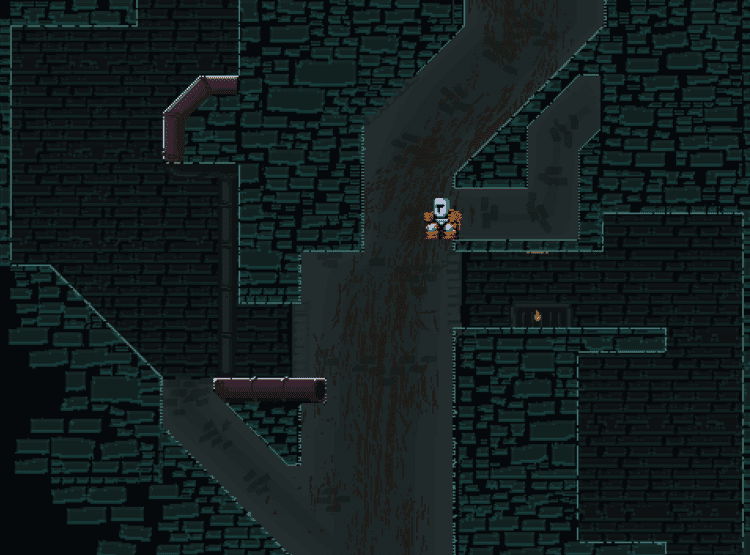
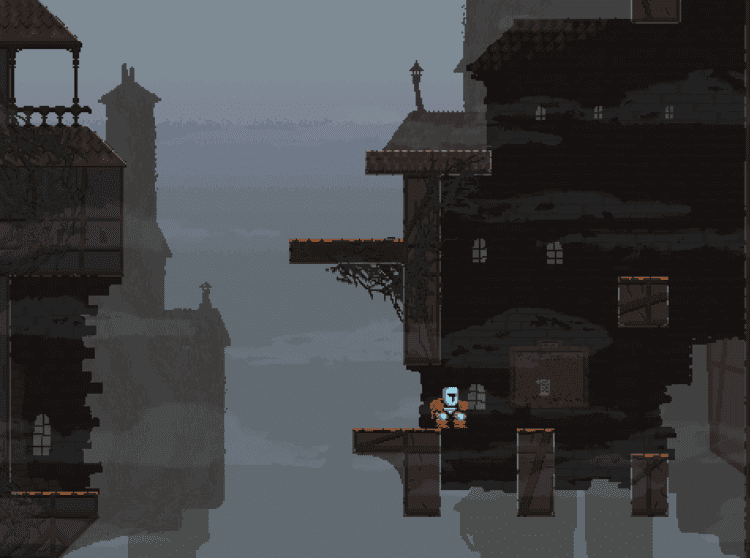
Big Jump #3
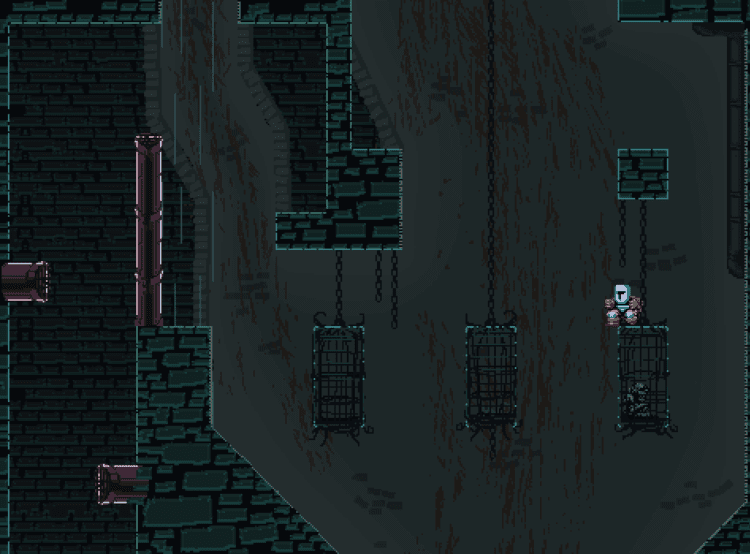
Jump from the cage (pictured) to the platform to the left. This jump saves you from having to go around.
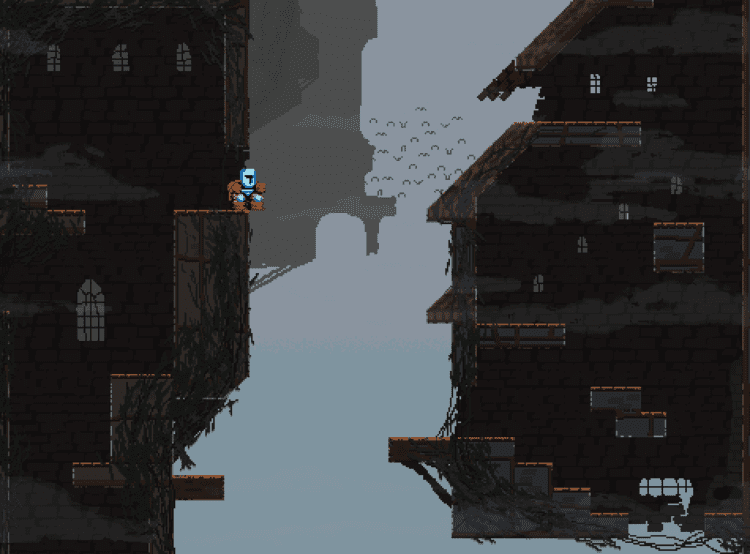
False Kings Keep
Speedrunning sometimes makes certain parts of a game more straightforward, and that’s definitely the case here.
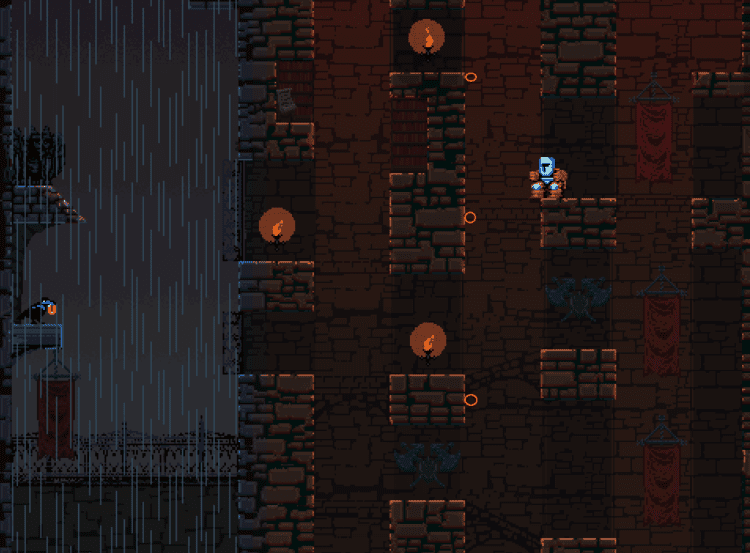
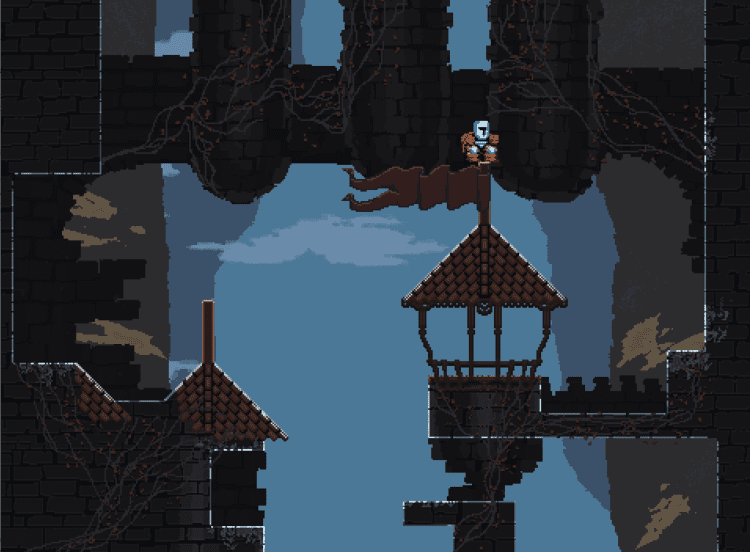
Wall Bounce Gauntlet
Before entering the False Kings Keep, you can stand where I am (pictured), then do a full-powered jump to the left. This will Wall Bounce you up to the next screen, and you can repeat that Wall Bounce several times. I have marked where you need to Wall Bounce in the picture below.
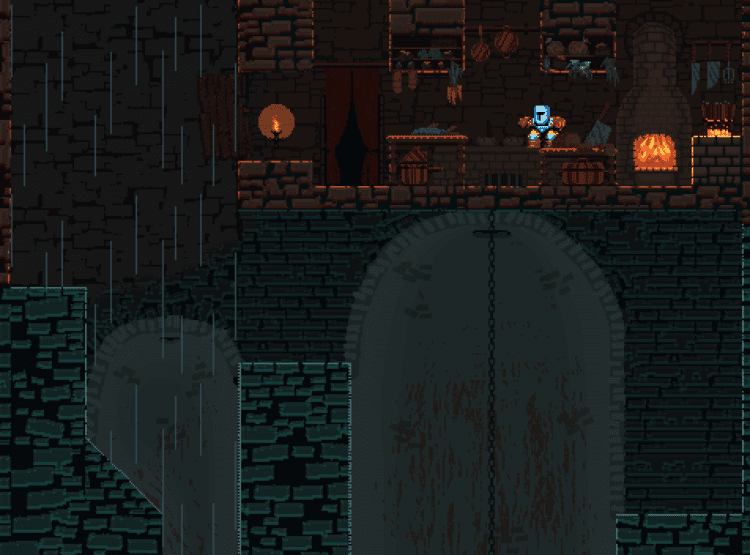
Heading Into The Rain

You don’t have to head outside in this section until you reach where I am (pictured). From here, jump to the right and keep heading up into Bargainburg
Bargainburg
Bargainburg is tough thanks to its claustrophobic hallways, many of which require precise wall Bounces to navigate. Fortunately, the route is straightforward as the area is relatively linear.
Unreachable Ledge
Don’t waste your time trying to reach that inviting ledge (pictured). Its only purpose in life is to trick you! You have to go through the house to the right here, and there is no way around it.
Simplify the Route
You can jump from where I’m standing (pictured) straight to the box to the right. Make sure you stand right on the edge so your head doesn’t clip the ceiling.
Another Tease
Remember the ledge from earlier? The hatch you can see is just like that. You need to jump down from here (pictured) to the house on the right. If you try to reach that inviting opening above, you will miss (I’ve tried at least 200 times, trust me!) and fall a very long way down.
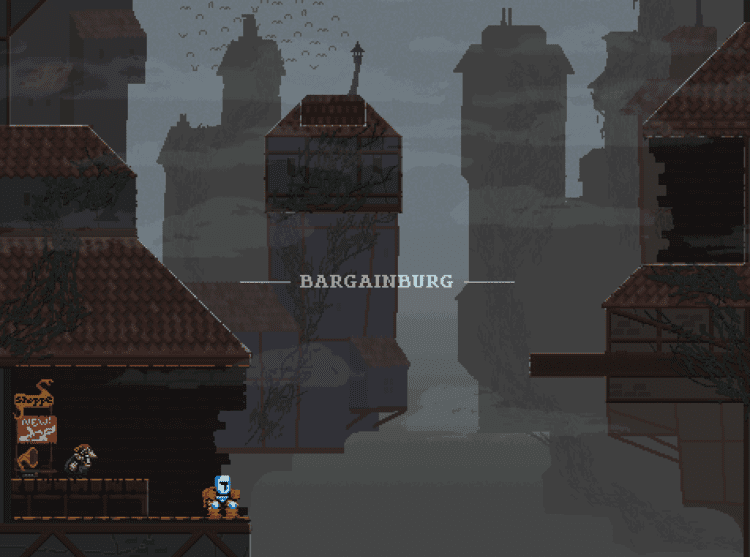
Farewell Bargainburg!
Once you’ve made your way to the platform pictured, A full power jump to the right will land you in the following area, the Great Frontier.
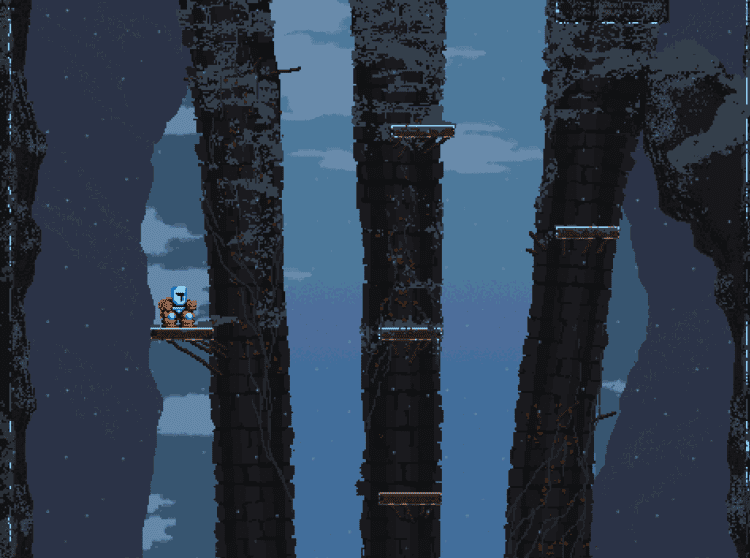
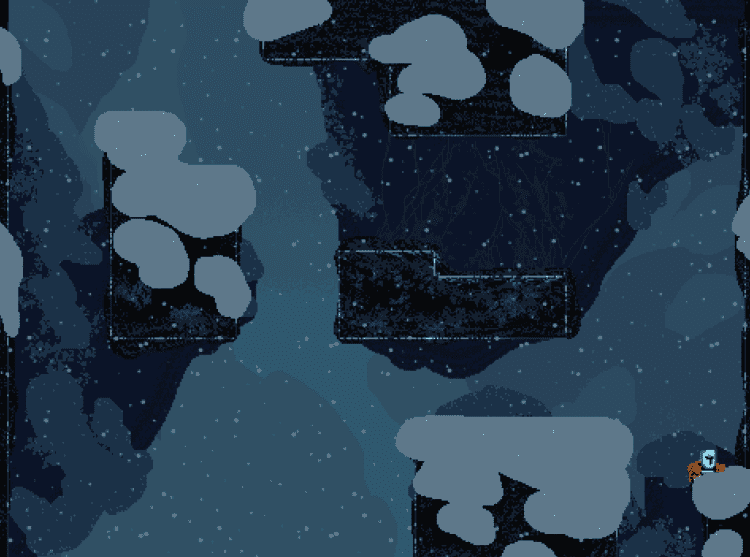
Great Frontier
The Great Frontier will test your accuracy like nothing you’ve seen before. You’ll be jumping across flag poles and trying to land on tiny ledges so expect to be repeating this area a lot! Much of the difficulty in this short section comes from the penalty for falling. You can drop a very long way if you miss a single jump.
Precision Jumping
Even the very first screen has deceptively demanding jumps. You can jump from the edge of where I’m standing (pictured) to reach the platform to the right. Too much power will make you hit your head and fall, so be careful!
Flagpole Jump
When you reach the top of the Flagpole (pictured), do a full-power jump to the left, and you will land on a safe platform on the screen above.
The Penalty for Falling
You can fall a VERY long way from here, so be careful! You can jump from where I’m standing (pictured) to the platform at the top of the screen. This jump ignores the platform in the middle and the one on the right.
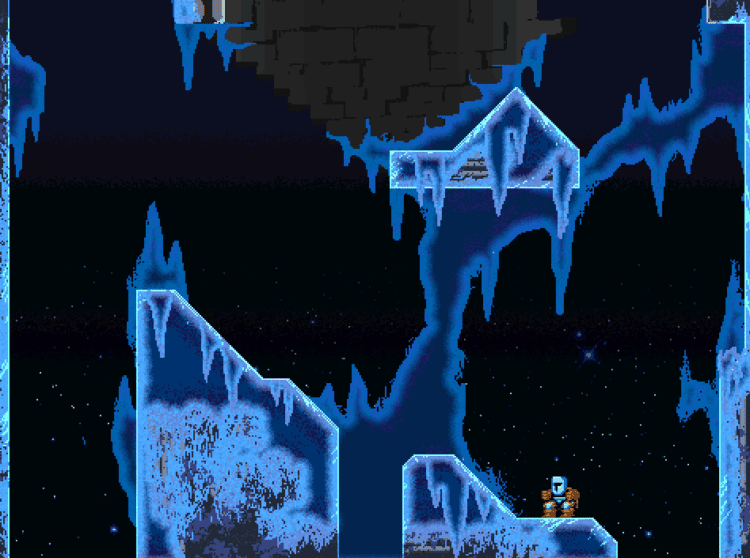
Windswept Bluff
The Windswept Bluff is more of a transition screen, slowly easing you into what is arguably the most challenging area in the game.
Wind-Powered
The introduction of wind is an interesting mechanic, but one that will take many attempts to get a feel for! From where I’m standing (pictured), wait for the wind to blow to the left and full-power jump three times without pressing a direction. The wind will do all of the work, and you will end up in the Stormwall Pass.
Stormwall Pass
This entire area is brutal and is the place where world records are made. Stormwall Pass is also where many runs go to die, so keep your wits about you! Mastery of the wind and how quickly you can take advantage of it will significantly affect your final time.
You’ll want to practice here more than anywhere else in the game. You can’t walk too much around here because of the heavy snow, so you’ll need to jump to get around!
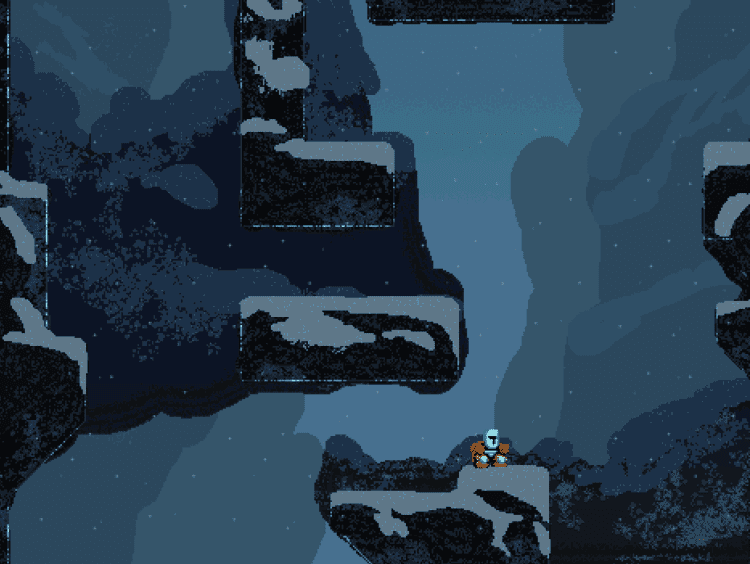
Even the First Screen is Tricky!
From where I’m standing (pictured), wait for the wind to switch to the right and do a full-power jump without pressing a direction. This jump will get you to the platforms above. Carefully use the wind for each jump until you reach the platform at the top of the screen.
Wind Catapult
From the top platform in the first screen, wait for the wind to go right and do a full-power jump to the right. If you do this correctly, you’ll end up in the corner of the next screen (pictured). From this position, the jumps aren’t too tricky; just make sure the wind is in your favour. If it isn’t, it’s better to wait than throw it all away here.
Welcome to Hell
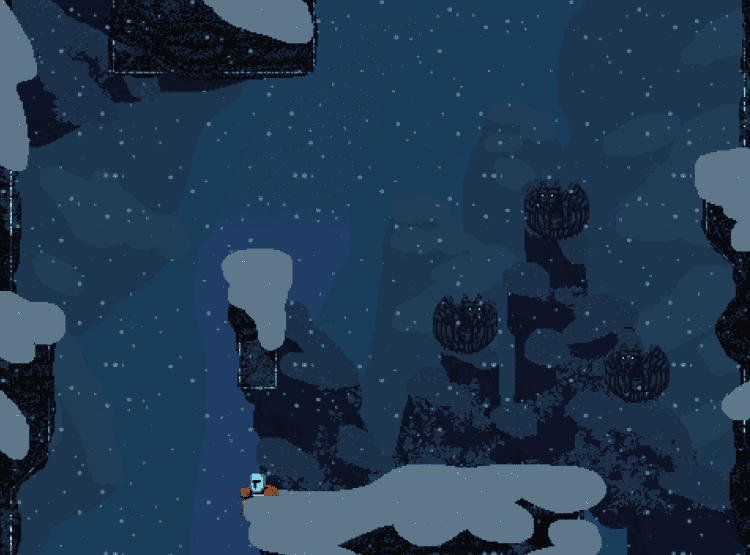
This screen is awful! It’s not enough to read the wind direction anymore. You need to wait until the wind is just turning to make your jumps. From where I’m standing (pictured), you need to full-power jump to the left, but you want to do that the moment the wind is changing from left to right. You will bump against the wall and fall if you go too early.
From that platform, jump straight up and let the wind carry you to the platform near the centre of the screen, this jump can’t be full power, or you will hit your head. From there, you can use the wind to carry you across to the right.
Big Jump

You can use the wind to your advantage once again on this screen. You can jump straight up from the platform I’m standing on (pictured) and let the wind carry you onto the ledge above, saving a little trip around. Compared to what you’ve just accomplished, the rest of this area is easy. Keep heading up to Chapel Perilous.
Chapel Perilous
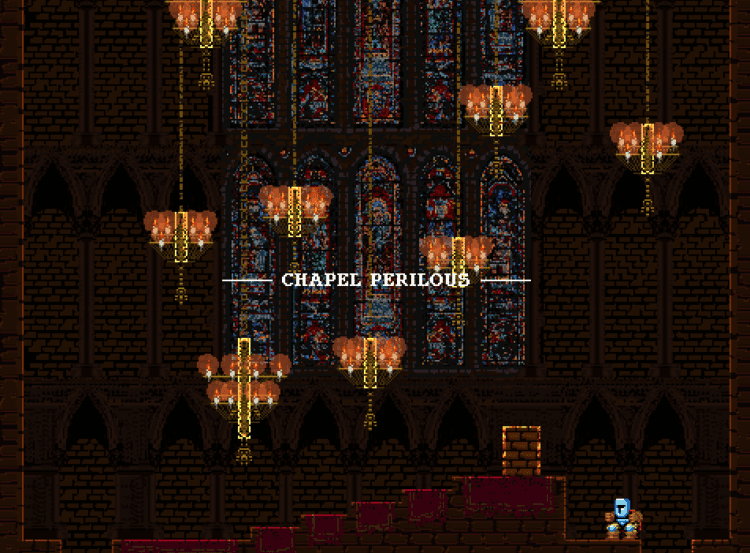
At least you don’t have to worry about frostbite and the blizzard ruining your day in here! The hardest part of this area is distinguishing what you can land on. Once you’ve figured that out, though, this place is alright.
Chapel Wall Bounces #1
There are a few ways to traverse this area. You will want to make full use of your Wall Bounces here, as big jumps will often end up with you colliding with the scenery.
If you make it to where I’m standing in the picture, you can full-power jump to the right to Wall Bounce to the chandelier just above. A full-power jump to the left will take you to the next screen.
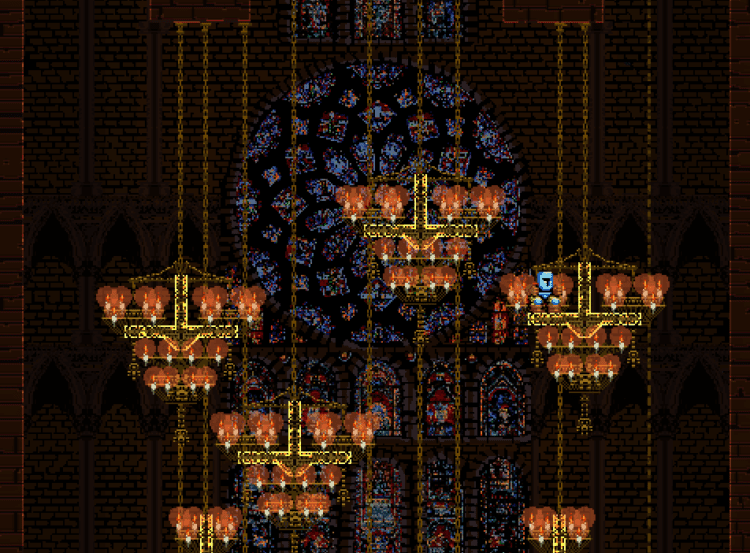
Chapel Wall Bounces #2

On this screen, make sure you do the same Wall Bounce as before to land on the chandelier above. A full-power jump to the right will take out to the top of the Chapel.
Pure Cruelty
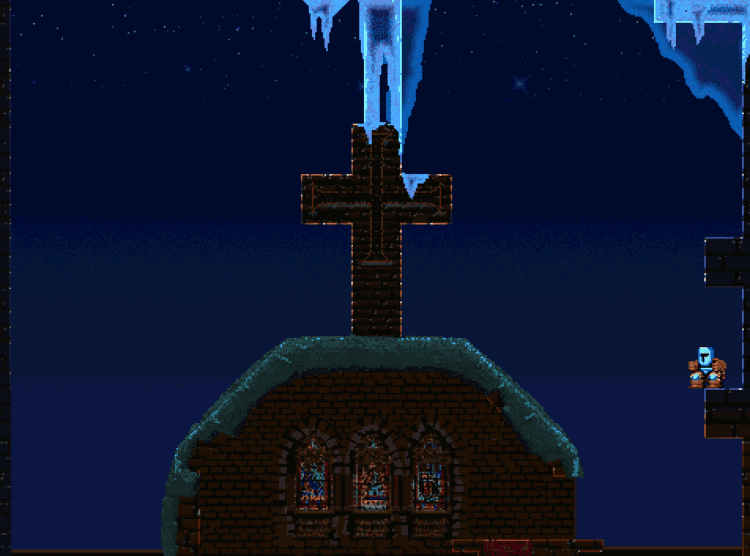
Just a side note, if you fall here (pictured), you will end up all the way down at the bottom of the Chapel, instantly killing any potential of a decent run, so be extra careful! If you do a nice full-power jump to the left from this ledge, you’ll end up on the cross.
A full-power jump to the right from here will take you to the penultimate area of the game, Blue Ruin.
Blue Ruin
If anything, I admire the dev team’s restraint for leaving an area with slippery platforms until the end of the game! I still think Stormwall Pass is worse in terms of difficulty and run-killing potential, but the slippery floors are hard to deal with.
The rules feel like they change in this area a little thanks to the icy floors. First of all, if you jump into a wall to stop yourself, you run the risk of slipping when you hit the ground.
The trajectory of your jumps also matters a lot more here. If you jump a long way to the left or right, you’ll hit the ground with a lot of that momentum still in play.
Slide Jumping
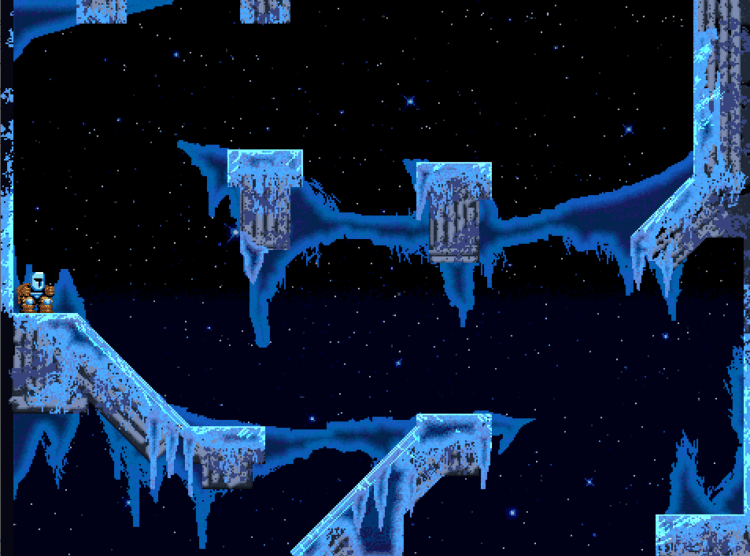
The goal in this section (pictured) is to get to the platform in the air on the right. The issue is that your momentum will slide you off the middle platform.
It’s tricky, but you have to jump from where I’m standing to the centre platform and the moment your feet hit it, jump again. That slide should carry you to the right platform, and from there, a full-power jump right will take you to the next screen.
The Ramp
To get to where I am (pictured), you need to use that angled piece of scenery as a slide. The moment you’re off the slide and on flat ground, you need to very quickly jump to land here, but you shouldn’t have enough momentum to overshoot the platform.
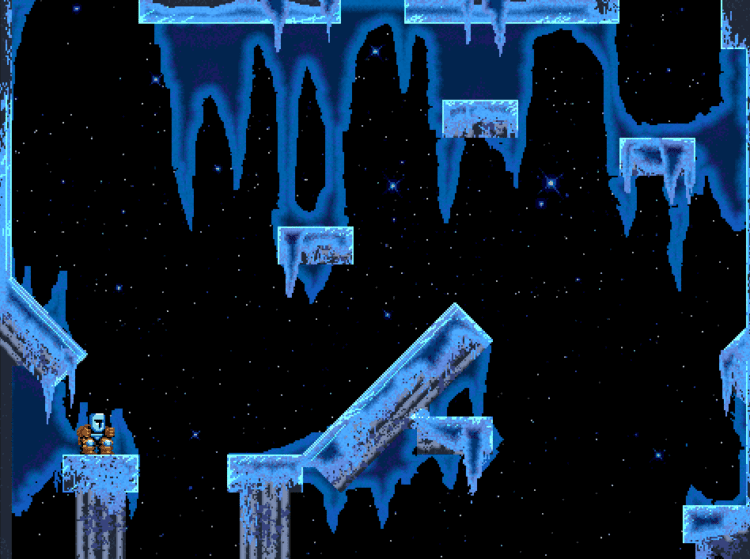
Ice Platforms
To get across the platforms above in the previous picture, the moment you land on them, you can quickly jump backwards to stop falling off the other side. This repositioning isn’t too hard, but it will take a few goes to get comfortable with the timing.
You will need a little momentum to make the jump from the middle platform to the one on the right so take a short run-up, followed by a weak jump. From here, a full-power jump to the right will take you to the next screen and the last screen in Blue Ruin.
Almost Done…
The final screen of Blue Ruin looks worse than it is. Remember, you can reposition and lightly jumping will kill your momentum if you need to stop. Naturally, since you’ve got so far, a fall here can send you as far back as the bottom of the Chapel, but you should be used to Jump King’s idea of fun by now!
The Tower
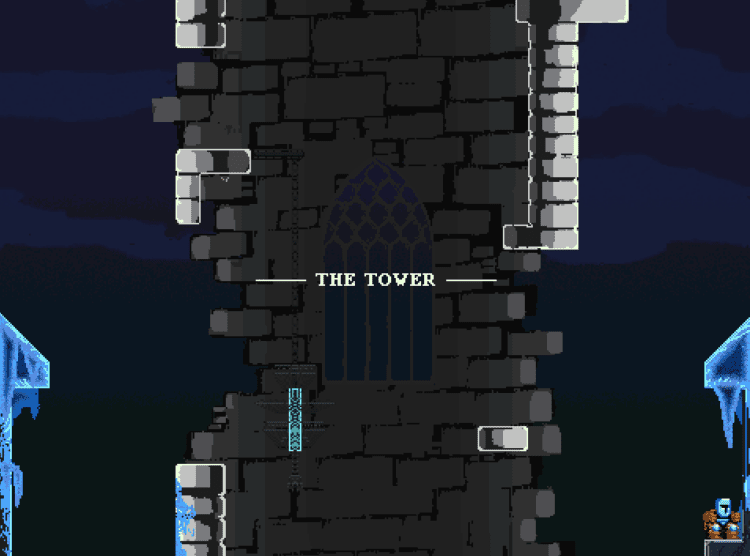
These last couple of screens stand between you and victory! There isn’t much I can explain to make this section any easier. Everything is straightforward, and there are no tricks. The Tower is all about your skills with precise jumping. If you’ve made it this far, I know you can do it!
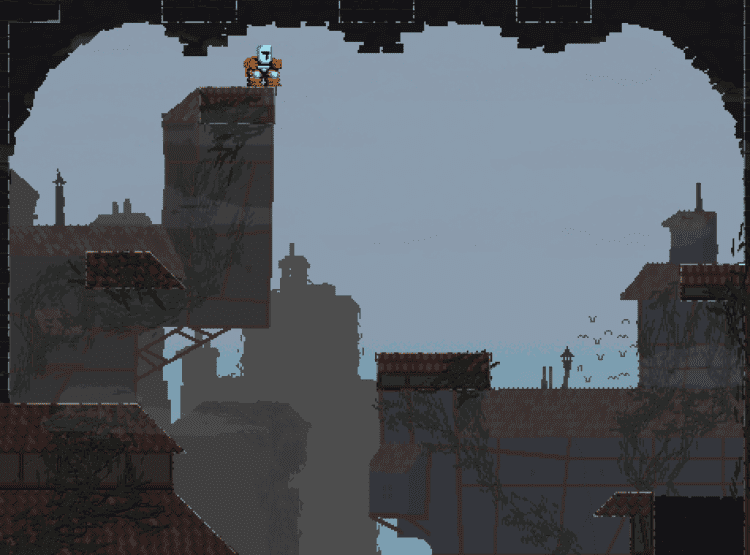
One Final Wall Bounce
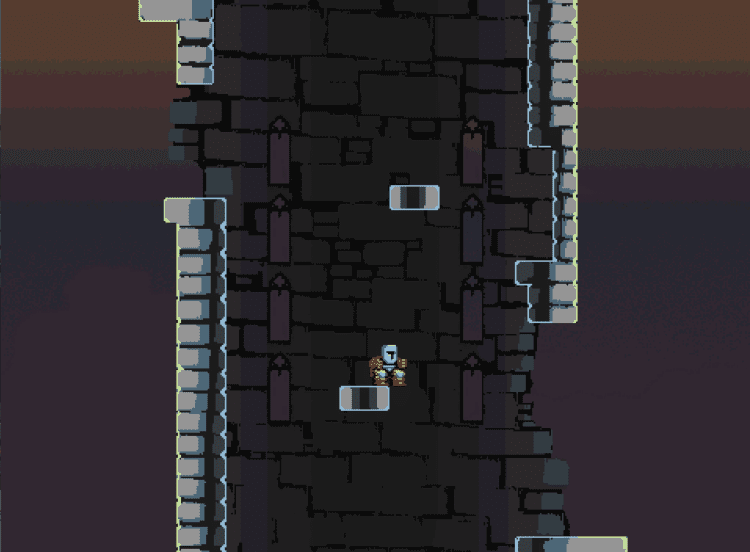
There is a Wall Bounce you can use to make one jump easier. If you stand where I am (pictured) and full-power jump to the right, you will bounce off the side of the tower and end up on the floating platform above.
After the Wall Bounce, a few more jumps will take you to the top of the tower. Save the babe and claim your crown!
If you’re timing your run, you have to wait through the end credits before it shows up.
If you’ve made it this far, congratulations! You’ve not only beaten an obnoxiously tricky game, but you’ve also done it in style!
Useful Resources
You can check out the official Speedrun.com page for Jump King, including leaderboards, here
There is an incredible mod tool available called Jump King Manager. This tool allows you to teleport to any area in the game and is essential for practice. You can download it here
An enhanced version of Jump King that has a cheat menu built-in can be found here. This is another fantastic practice tool but cheats must be disabled for any submitted run.
For recording your runs, you can use a program called OBS. OBS is constantly updated, easy to use and the best part of all? It’s free! You can download it from the official page here
A superb video detailing how much time you can save with skips vs standard play is available to watch here
Frequently Asked Questions
Question: Can I Speedrun Jump King on Any Platform?
Answer: Yes, you can. The leaderboards are dominated by PC players thanks to mod tools that help with practicing, but you can run on any platform you wish.
Question: What is a Good Time for a Jump King Speedrun?
Answer: Beating Jump King is an accomplishment in itself, but anything under 10 minutes is an excellent run, in my opinion.
Question: What is the World Record for Jump King Any%?
Answer: At the time of writing, the world record belongs to a runner called Casu with a staggering 4 minutes and 4 seconds!
Conclusion
A Jump King speedrun isn’t something for the faint-hearted! If you’re feeling brave and are up to the challenge, Jump King is a rewarding game to run.
There is a ton of nuance and skill crammed into this short speed run. When you start to feel things ‘click’ and see your times improve, it’s a fantastic feeling worth the time investment.
Continue reading: