- Evil Dead Achievements Guide - May 30, 2023
- Just Cause 3 Speedrun Guide – How to Liberate Medici at Breakneck Speed. - May 18, 2023
- Dishonored Speedrun Guide – Corvo’s On The Clock - May 13, 2023
Spyro the Dragon is a beloved classic and one of the best platformers on the original PlayStation. Its unique combination of speed, tight controls, and imaginative stages make it perfect for Speedrunning, and it’s just as popular now as it’s ever been!
There’s a lot to learn in a Spyro Speedrun, and in this Spyro the Dragon Speedrun guide, I want to demystify the tricks and provide you with a simple route to follow. Are you ready to speedrun one of the most iconic games in the PlayStation library? If you are, let’s begin!
Bottom Line Up Front
Spyro the Dragon is a demanding but rewarding Speedrun with a near-limitless skill ceiling and a welcoming community. The Speedrun will take time to learn, but as a new runner, you’ll see results quickly, and something you took months to beat when you were younger will take less than an hour with practice.
Speedrunning a classic is always special, and if you persevere, your reward is a crowd-pleasing run that’s as tough as you make it.
Before You Begin
Before diving in, you need to make a couple of decisions. These will dramatically alter your Speedrunning experience with Spyro, so take your time picking what’s right for you.
Original VS Reignited
This guide is for the original Spyro the Dragon from 1998. The Reignited Trilogy is a superb love letter to these classics, but it does play differently. Many tricks are exclusive to their respective titles, but the routes share similarities.
Any% VS 120%
For most games, 100% runs (in Spyro’s case, 120%) are for purists and never reach the popularity of the Any% category. That’s not the case for Spyro, and both have active communities. This guide will be covering Any% as there are a ton of cool tricks scattered through the run, and you can beat this classic in well under 1 hour in this category.
If you’re looking for guides for the 120% category, I’ve linked a YouTube playlist for those made by the current world record holder in the Useful Resources section below.
Should I Use An Emulator?
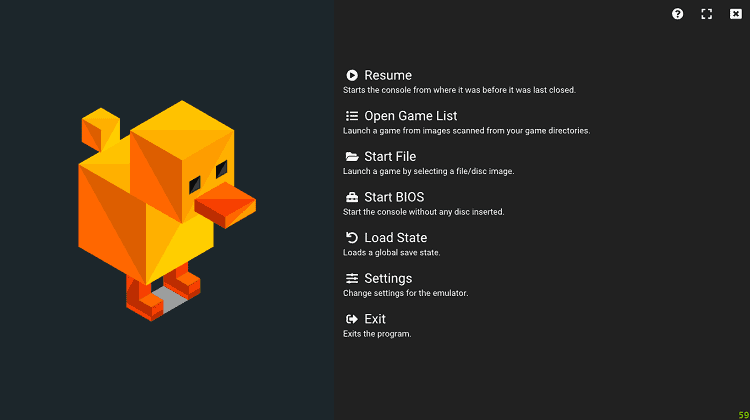
You can use the original hardware if you wish, but most runners use an emulator. The Spyro speedrun community requires submitted runs to be played on specific emulators. These are:
- Duckstation
- Mednafen
- Xebra
- ePSXe
The fastest way to speedrun Spyro is on a PS2 with the disk speed switched to ‘Fast’. You don’t need to worry about this now, but if you fall in love with Spyro speedrunning, consider it in the future.
Core Mechanics
Gathering Gems
Gems are incredibly important in Spyro, as to enter the final hub, you need to have collected at least 6000! You’ll need to go out of your way to collect gems and defeat enemies at every turn to beat the game.
Dragon Roll
Spyro can roll to either side with the L1 and R1 buttons. Almost nobody uses these in a normal playthrough, but rolls are valuable for quick repositioning.
‘Sparxless’ Movement
Sparx is the cute dragonfly that follows Spyro around and protects him from damage. When active, Sparx also draws in nearby gems. Without Sparx, you’ll need to be much more accurate to keep those gems flowing.
Dialog Skipping
If I’m not trying to go fast, I’ll always listen to the dragons when I free them. Unfortunately, this is something you need to forego if you’re Speedrunning. Press X to skip any dragons dialog.
Tricks of the Trade
Wall Gliding
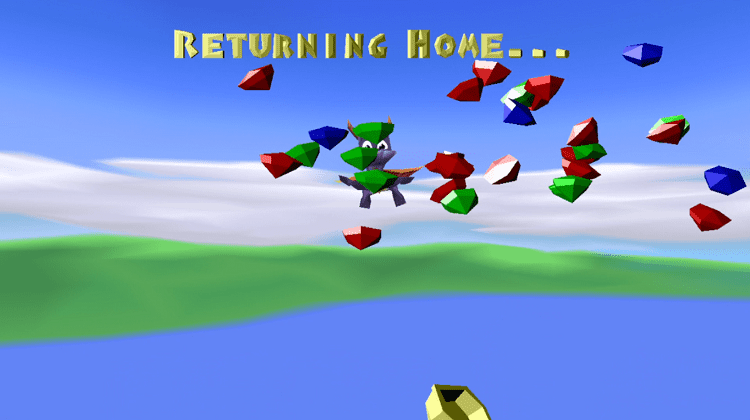
While gliding along certain walls, Spyro will glide much further than usual and sometimes gains height instead of losing it. The key to Wall Gliding is the angle, as it’s easy to bump into walls instead of sliding along them. One particularly famous example of wall gliding will be covered in the next section, but this tech is fun to experiment with.
High Jump
The timing for this trick takes time to get used to but is an essential part of Spyro Speedrunning. When you stop charging, you briefly keep that momentum. If you jump and hold a direction (usually forward) immediately after a charge, that momentum becomes extra height.
You can use that extra height to reach platforms you never could before. If you jump too soon, Spyro will launch forward or won’t even jump at all. There’s a sweet spot for this that only comes with practice.
Charge Gliding
The command for gliding is jump, then jump again in mid-air, and Spyro loses a bit of height before the glide begins. You can prevent this by quickly tapping charge (square) BEFORE the 2nd jump command.
Adding the charge forces an animation cancel and lets Spyro start gliding earlier. For the best results, you’ll want to do this at the apex of your jumps. The timing is so fast some players prefer to roll their thumb from Square to X. A visual example can be viewed here.
The Speedrun
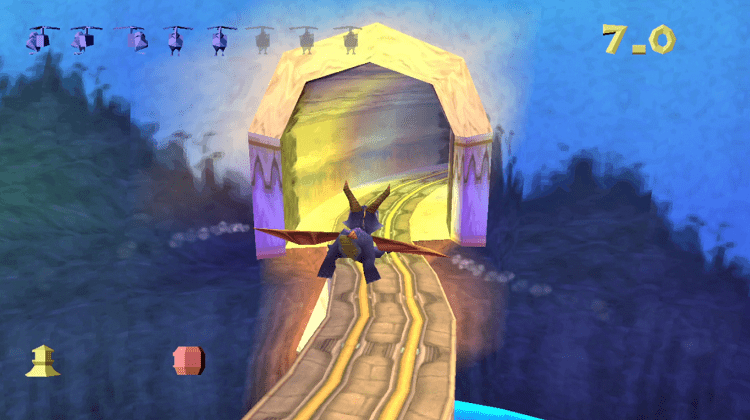
In this section, I’ll explain a beginner-friendly Any% route with a few clever tricks for you to try. This guide will make more sense if you’ve beaten the game before, but even newcomers should be able to fumble their way through with practice.
Unless explicitly stated, destroy nearby crates and enemies. Remember, you need 6000 by the end of the game.
A Quick Word on Flights
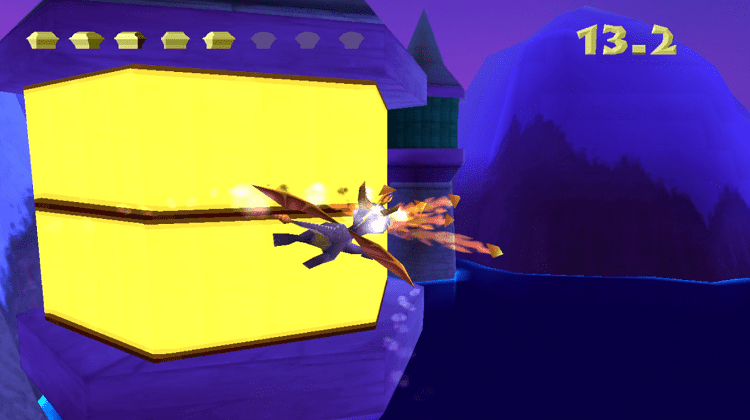
Flight levels are a staple of Spyro games but are hard to explain due to their free-form nature. Because of this, I recommend beating Flights normally while you learn the Speedrun. For optimal pathing, you can check out a full Speedrun in the Useful Resources section of this guide.
Artisans
Your journey starts in the Artisans hub world. Timing starts the moment you gain control of Spyro. Don’t free Nestor in front of you when you start, as he’s the only Dragon with unskippable dialog. Head left and rescue Delbin before heading into Stone Hill.
Stone Hill
Stone Hill is a simple stage with a circular hub and several branching paths. Free Gavin from the well, then head into the room guarded by the goat and rescue Lindar, then Astor.
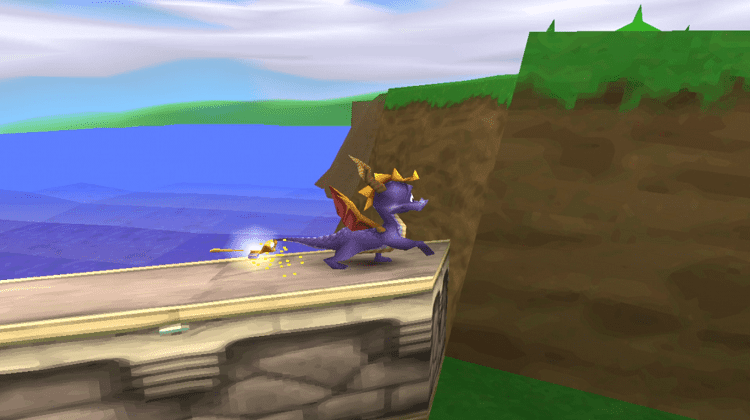
Right next to Astor, there’s a small ledge. Carefully mount it, and stand where I am (pictured).
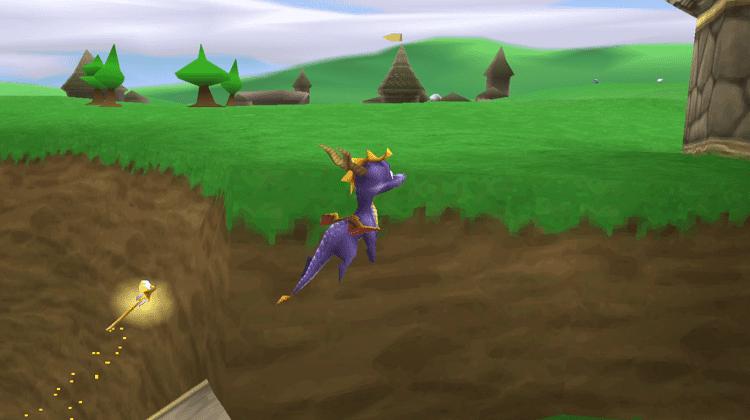
Jump towards the edge above (pictured) and press charge. You’ll end up on top if you do this right. You can run straight into the level from this elevated position, knock out the wizard and use the lift behind him to free Gildas. Use the pause menu to exit.
Rescue Tomas on your return to Artisans and take the lift to Town Square.
Town Square
Town Square has a tricky jump early on, but it’s a big time-saver and worth the practice. First, head up the staircase to the right and rescue Nils.
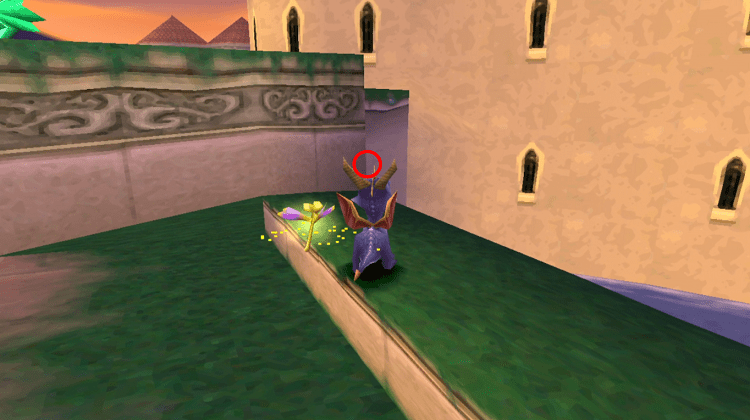
The ledge above is usually just out of reach, but if you stand where I am (pictured), you can High Jump off the edge here, bank left in mid-air, and land on the ledge. Charge before the jump, or you won’t make it.
Once you’re up here, rescue Thor and then Alvar. Follow the path and rescue Delvin. Pause and exit.
Artisan Wall Glide
Spyro has some of its flashiest Speedrun tricks right at the beginning. This is arguably the coolest and uses the Wall Glide technique explained above. This will take a lot of practice, and if you’re using an emulator, I recommend creating a Save State here.
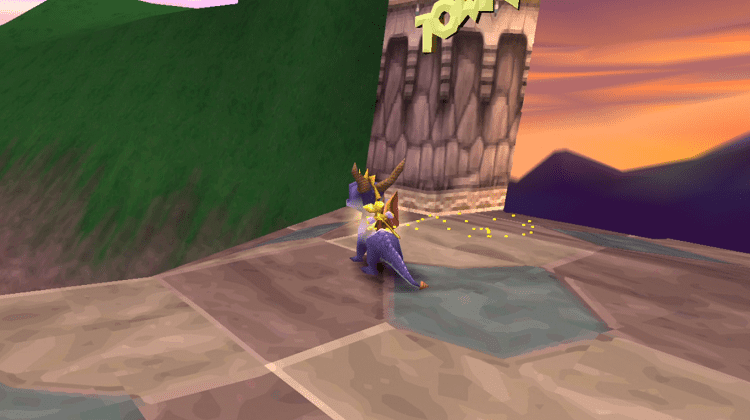
Wall Glide from the Town Square gate across the wall (pictured).
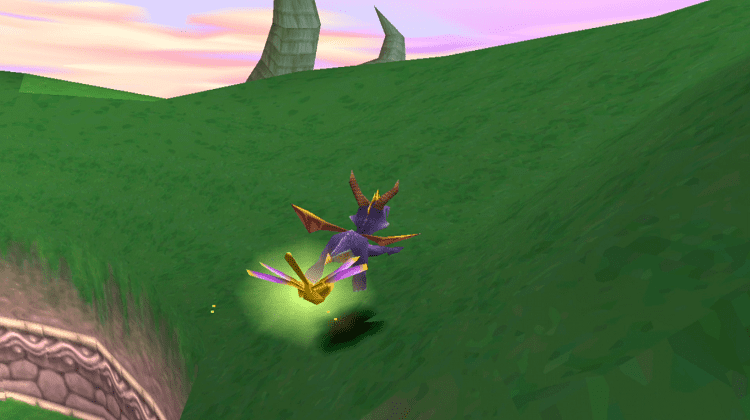
If you get enough height, you will land here instead of tumbling down the wall (pictured).
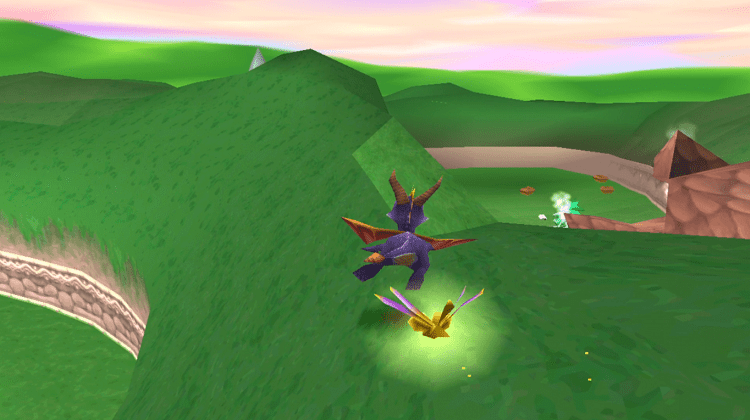
If you keep jumping and gliding toward the light green polygons, you will fall through them and end up next to the stone dragon’s head, saving a ton of time! Rescue Argus and head to Peace Keepers.
Peace Keepers
The Peace Keepers hub world is guarded by cannon crews. Make sure you defeat any in your path. Rescue Titan when you arrive and head into Dry Canyon.
Dry Canyon
Grab the chests along the way and charge the shield grunts. Then rescue Conan, followed by Boris.
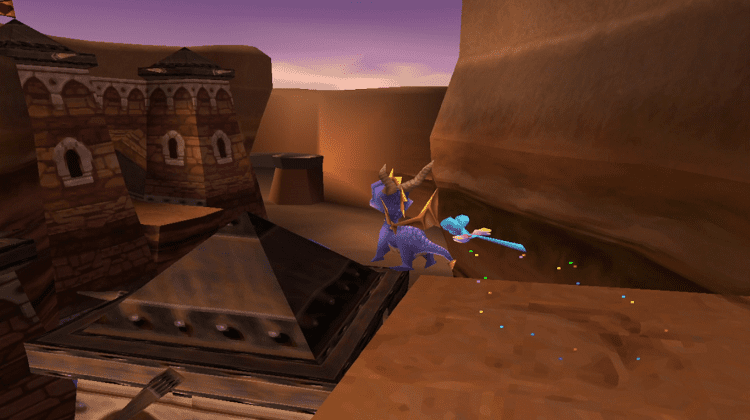
From the ledge above Boris, glide across to the doorway and jump out the window to rescue Maximos.
We’re not interested in the key, so jump off the ledge, take care of the enemies, and exit the level. Charge at the three spearmen when you return to Peace Keepers, then travel to Cliff Town.
Cliff Town
As soon as you arrive, charge the enemy right in front of you and take a sharp left around the narrow ledge. There’s a tricky jump here that’s similar to the one in Town Square and is worth 36 gems.
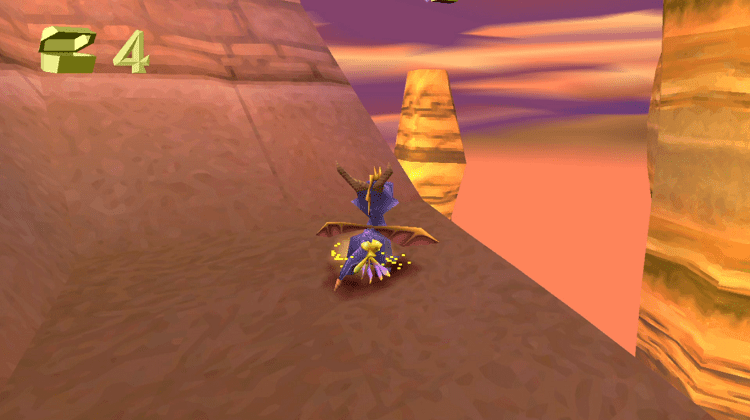
It’ll take practice, but if you High Jump here (pictured above) and sharply turn left, you’ll end up on a ledge littered with gems. Follow the path, defeat any enemies you see, and rescue Halvor.
Make sure to light the firework on the roof in the village. Then make your way up the side of the castle. When you reach the top of the path, you can rescue Enzo; just be sure to collect all the gems to your right by the level exit.
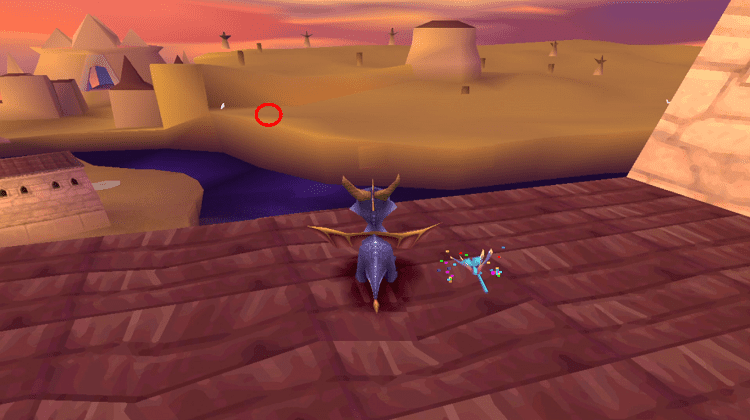
Once Enzo has been saved, jump and glide over the river.
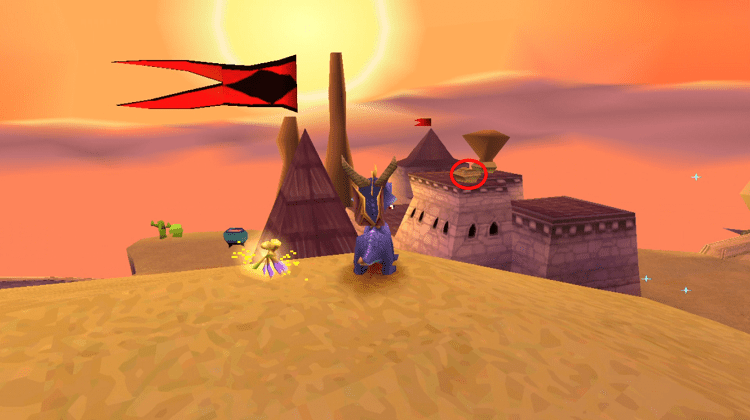
Keep left as much as possible and dispatch every vulture on your path to Marco. Once he’s rescued, glide to the top of the castle (the one with the flags), collect the gems, and exit the level.
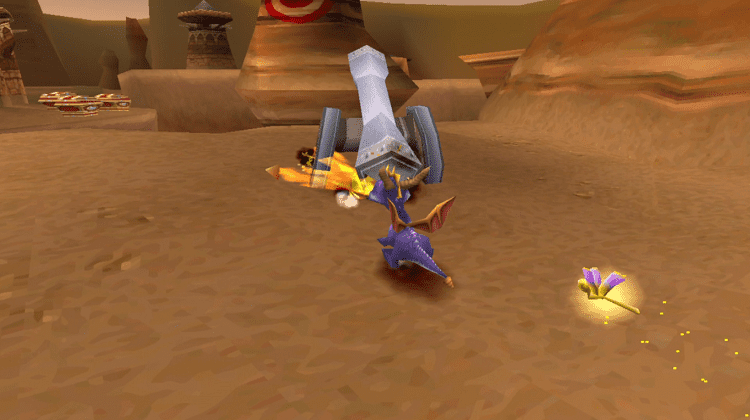
Once you’re back in Peace Keepers, head left and destroy the tower with the cannon. Dispatch every enemy along the way and enter Night Flight.
Night Flight
Complete this level as normal. Once you’re back in Peace Keepers, run straight and slightly to the right until you reach Gunnar. Rescue him, and break every chest around the pool behind him. You should easily be able to catch the egg thief here as well. Head into Doctor Shemp.
Doctor Shemp
The beginning of this stage is full of tricky enemies that require a mix of flame and charge attacks. Defeating them all may seem tedious, but the gems make it worthwhile. Once you’ve beaten everything, take the lift and rescue Trondo. Glide over to the archway, collect the gems, and exit via the pause menu.
Once you’re back in Peace Keepers, head toward the Balloonist and dip to the right into Icy Cavern.
Ice Cavern
Ice Cavern isn’t difficult, but there’s a lot to memorize, and it’s the longest stage in the game thus far.
Start by taking a left and dealing with the three enemies between you and Ulric. Keep following the path to the left, gather the gems, and rescue Todor.
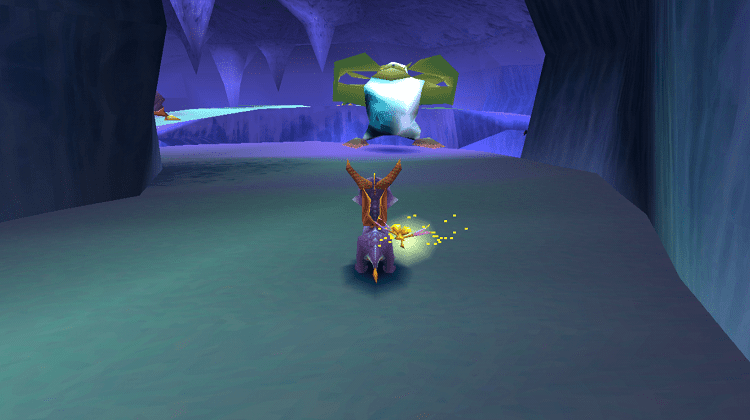
From Todor, take a sharp left and follow the route around. You can charge straight into the large, armored enemy for an easy ten gems. Once you’ve done that, make your way through the following two rooms and rescue Andor. The next area is a straightforward route to Asher; rescue him, and if you’re feeling flashy, you can cut the corner.
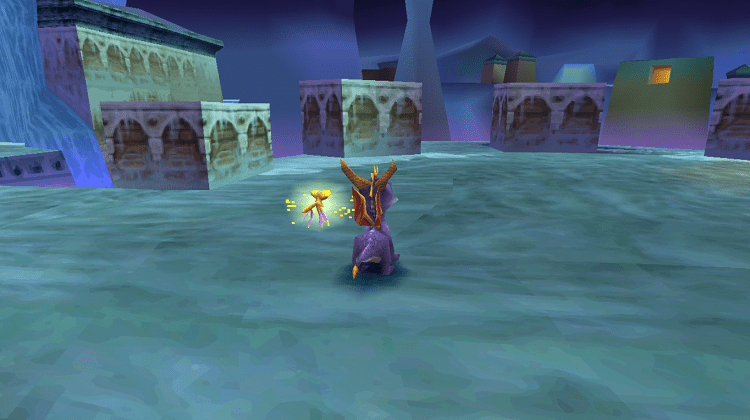
Don’t enter the nearby doorway. Instead, head to the square stepping stones behind you (pictured).
There’s a strategy for traversing these called ‘Magic Steps’. It’s optional, but I highly recommend learning it. Jump onto the first stone, then hold, Jump and Charge while adjusting your direction. You don’t need to let go of either for the entire sequence, and it’s incredibly satisfying once you’ve mastered it.
Once you’re up here, charge the big enemies off the map as you did earlier. High Jump over the gap to the right and rescue Ragnar. Exit via the pause menu. If you still need to rescue Magnus, you can do that now, as he’s next to the gate. Head to the Balloonist when you’re ready and travel to Magic Crafters.
Magic Crafters
You’ll see an Egg Thief inside the first building in Magic Crafters. He’s easy to intercept. Look slightly left before the corner, and you can catch him with your flame attack. Rescue Cosmos and make your way to Alpine Ridge.
Alpine Ridge
Alpine Ridge is a fun stage, home to one of the coolest tricks in the Speedrun! Progress as usual and rescue Zane. From Zane, glide to the platform with the giant turtle and again into the cave. It’s tempting to rush, but as the cave mouth closes on a timer, it’s best to wait than attempt a risky play. Rescue Eldrid in the following area.
Stay on the path until you reach Zander, but make sure you enter the small cave with the 2 turtles inside. There are plenty of gems and an extra life up for grabs. Once you’ve rescued Zander, the fun begins!
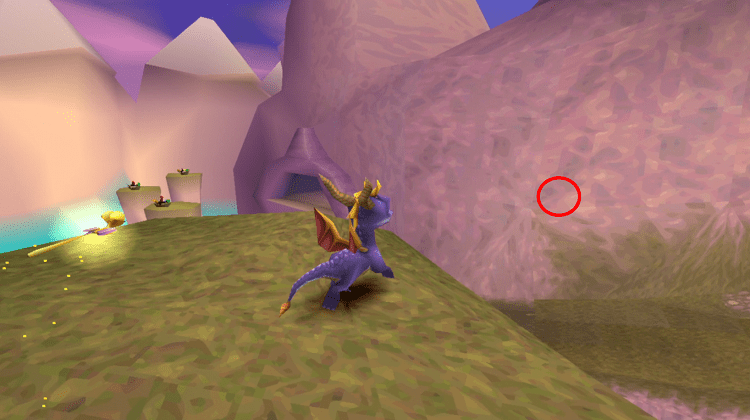
Collect the remaining chests, jump and glide from this ledge, and aim just above the green marks on the wall (pictured).
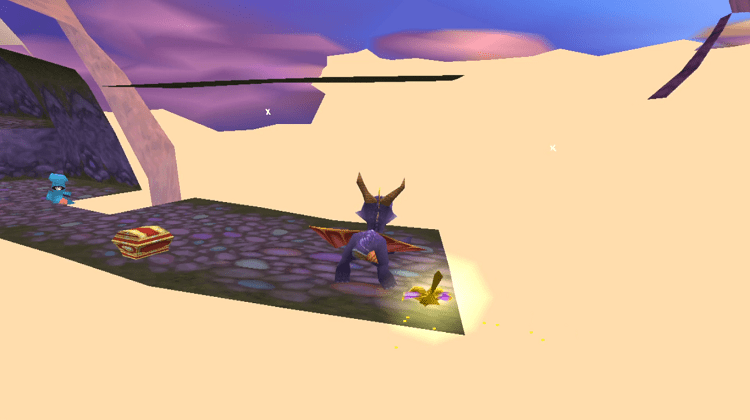
You’ll clip straight through the wall! Not only that, you’ll end up right in front of an Egg Thief that you can intercept before you rescue Kelvin. Once you’ve done that, pause and exit.
Travel further into Magic Crafters and snag the Egg Thief on the way. If you’re quick, you can avoid a chase. Charge up the ramp, rescue Zantor, and enter the High Caves.
High Caves
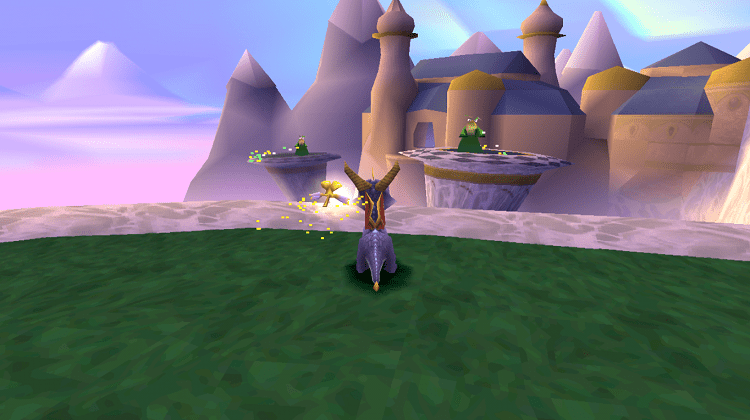
Follow the spiraling path up to Cyrus. Next, carefully jump across the moving platforms and into the cave, where you can rescue Cedric. From here, you can jump across the next gap and rescue Ajax.
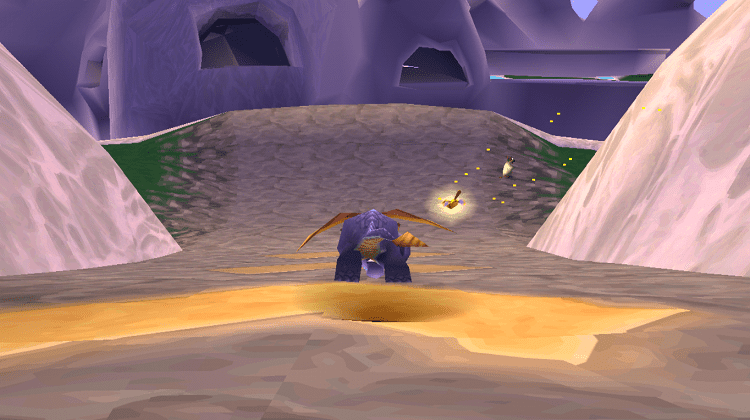
Now for the hard part. Go to the top of the Super Charge slope and Charge down it. Instead of taking the ramp, go into the caves to your left. Try to clear the staircase without losing your charge, and make your way to the red fairy.
Using her upgraded fire attack, you can jump off the ledge, quickly smash the chests and make your way into the cave. If you’re fast enough, you can kill the spider inside but be careful, as you’re vulnerable when the upgrade expires.
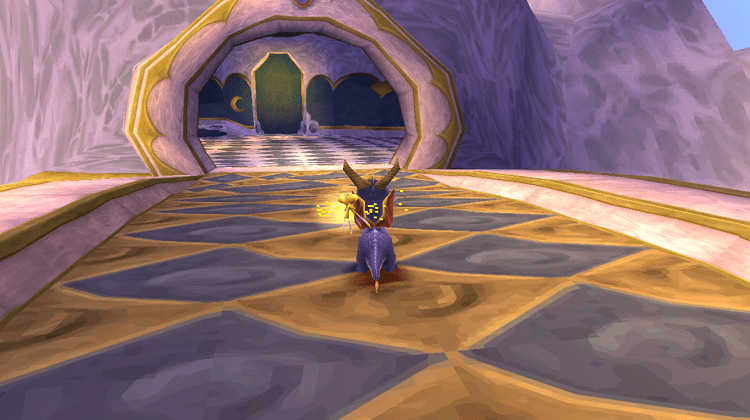
After you’ve made your way through the cave, walk past the Super Charge ramp and cross the bridge into the grotto. Collect every gem, return to the bridge, and jump to the open doorway full of stone chests. Break them and exit the level.
Back in Magic Crafters, charge down the ramp, and make your way to Wizard Peak. If you can hold your charge all the way, you’ll be able to break the locked chest without a key.
Wizard Peak
There are a ton of enemies between you and Jarvis. Defeat them all but be careful, as blindly rushing these encounters can get Sparx killed. There’s a tricky Super Charge sequence after Jarvis, but well worth it for the time it saves. A lot is happening in this single charge, so I feel a visual guide is necessary. This is a video of me doing the route.
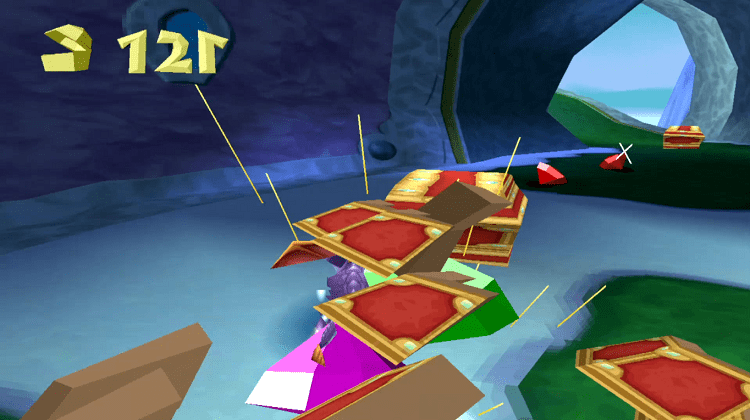
Note, after the first big jump off the ramp, you don’t need to jump to make the smaller gaps; just run across them. Once you’re on the platform I reached in the video, collect everything, flame attack the Egg Thief hiding behind the wall, and jump off to reset your position.
You’ll respawn back at the top of the ramp. From there, Super Charge and rescue Hexus. For the remainder of the stage, follow the path around and rescue Lucas before exiting. When you’re back in Magic Crafters, bear right and head to Crystal Flight.
Crystal Flight
Complete this stage normally. You only have one more step before progressing to the next hub. Make your way to Blowhard right next to the Balloonist.
Blowhard
Blowhard is a straightforward stage and barely differs from standard play. Defeat every enemy, and remember to rescue Altair in the cave. If you’re not confident tackling the moving platforms at speed, it’s OK to wait for them. Once Blowhard is defeated, exit via the pause menu and speak to Balloonist to enter Beast Makers.
Beast Makers
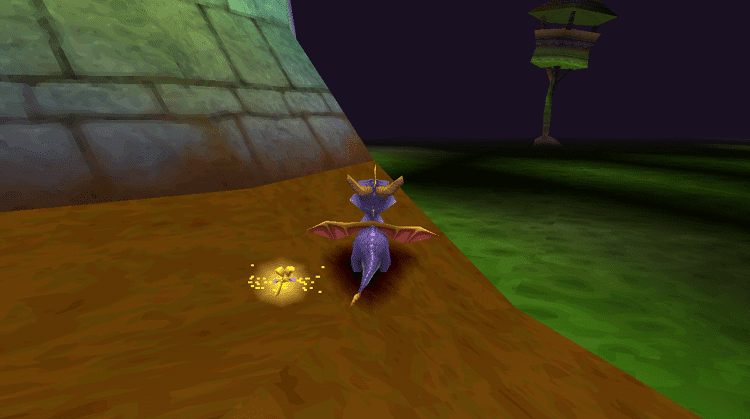
There are plenty of gems to collect in Beast Makers. When you arrive, make your way to this edge on your right (pictured).
You can jump around this edge for easy access to Bruno. After that, make your way across the platforms to rescue Cleetus. Defeat the enemy behind the house, and go inside for a ton of gems. Then, drop down the nearby well and into Wild Flight.
Wild Flight
Complete this section as normal. After you’ve beaten the stage, head to Misty Bog.
Misty Bog
There are tons of monsters in Misty Bog, and you have to beat every single one. Fortunately, Misty Bog is linear, so follow the path and rescue Zeke. I advise taking the following section slowly, as the creepy warthog-fish enemies charge when you get close.
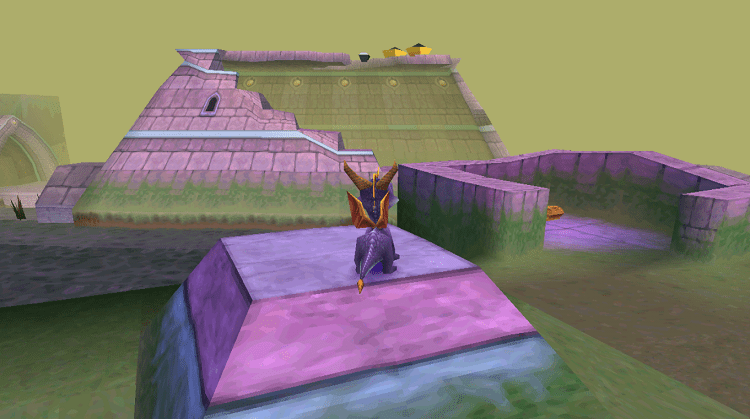
Rescue Bubba and make your way up the wall of this ruin (pictured above).
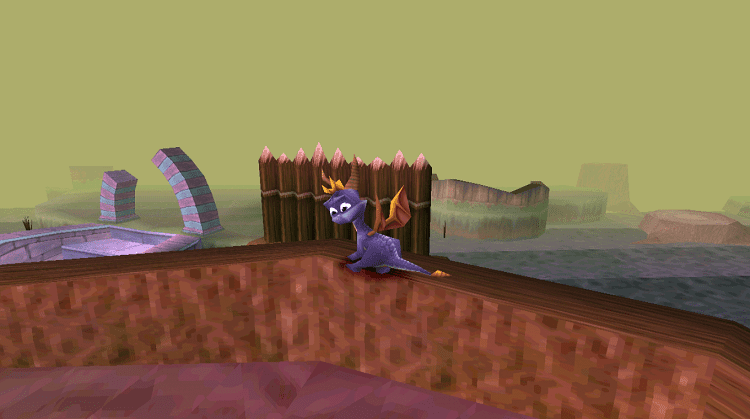
Jump across the tree stumps and reach this point (pictured above). Jump toward the broken archway and rescue Rosco. From Rosco’s ledge, jump across the Bog to the Attack Frog. Defeat it and enter the room.
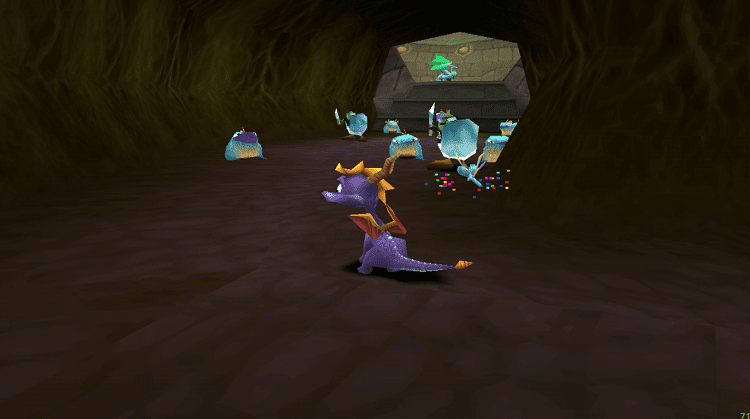
I can’t sugarcoat it. This room is ridiculous, and there are tonnes of enemies. Many runs have died in this awful room, so take combat as slow as you need to. Once you’ve rescued Damon and collected every gem, exit the level and run to Treetops. It’s to the right, beyond the large tree.
Treetops
Treetops opens with a narrow gauntlet of enemies to defeat. These guys are dangerous, so take your time. Follow the path, exit through the 2nd window on your left, and rescue Lyle.
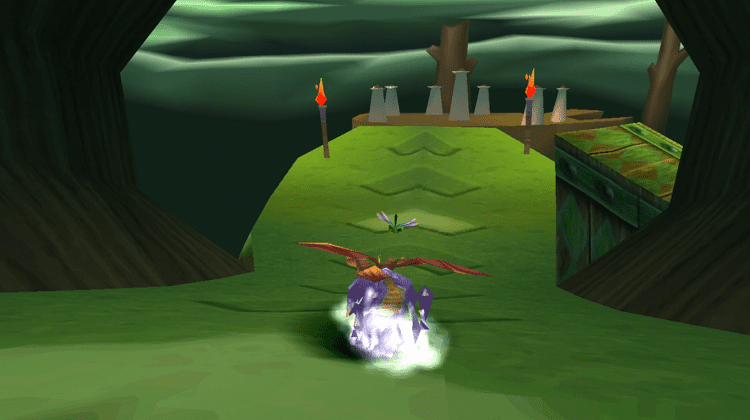
Use the Super Charge ramp to get to the platform on the left and rescue Jed. You’ll need to turn right mid-air and use the ramp around the corner to get enough height. It’s a precise maneuver, but you’ll eventually be able to do it quickly.
Use the lift to leave the platform and keep heading straight to rescue Isaak. Finally, defeat every enemy on the platform and finish the stage as usual from here, as you’ll miss gems if you just pause and exit. Next up, run across the bridge in Beast Makers and take on Metalhead.
Metalhead
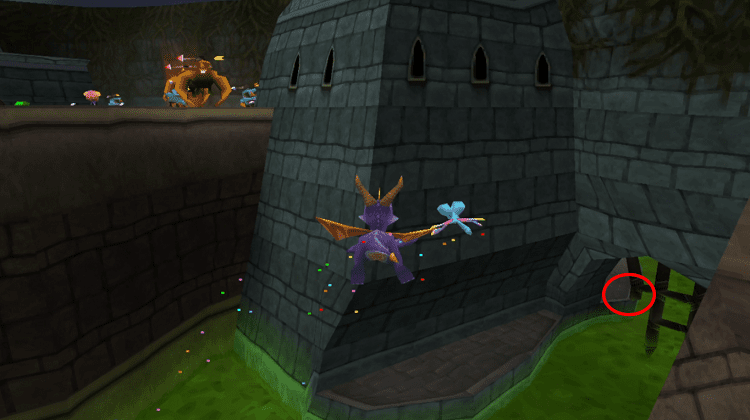
This level can be approached as standard for the most part. There’s a small grate you can glide through near the start full of chests and a key. (pictured).
This stage is easy but takes a while because of Metalhead himself. Defeat him by smashing his power poles when they go green and check the rafters around his arenas, as they are covered in high-value gems.
When you’re done here, return to Beast Makers and grab as many gems as you can see before traveling to Dream Weavers in the Balloon.
Dream Weavers
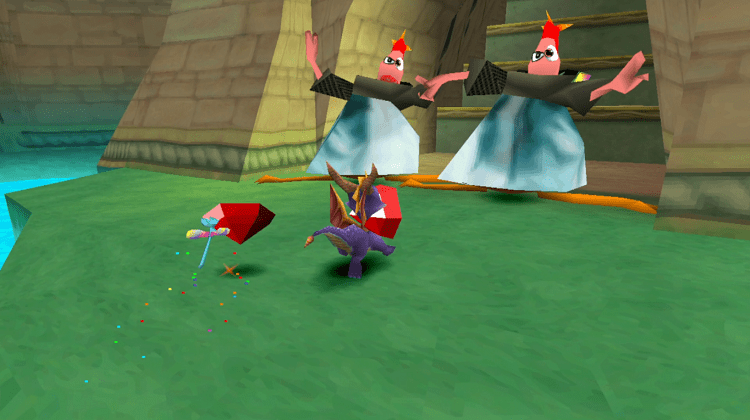
Make your way toward these two enemies in the doorway (pictured). You can’t usually pass them, but if you charge and jump into their attack, they’ll throw you over into the next area. You’ll probably take damage, but it saves time. Once you’re through, enter Icy Flight.
Icy Flight
Complete this level as usual, glide to your right toward the Balloonist, and head into Jacques when you’re done.
Jacques
The chase sequence at the end of this stage is the same as usual, but it’s essential to collect as many gems as possible here.
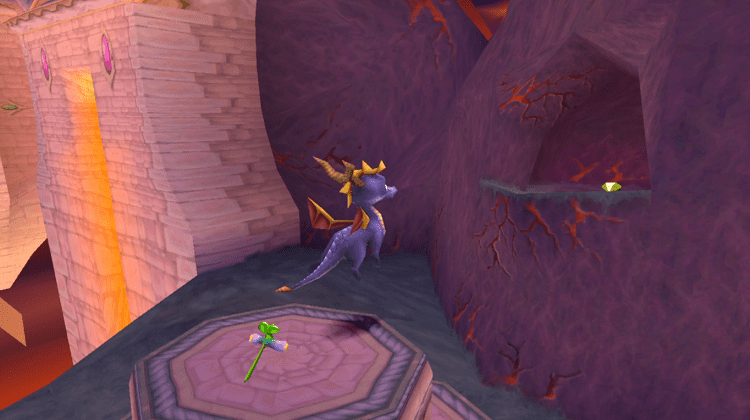
Make sure you grab the key from this alcove (pictured) and use it on the chest next to the entrance to the Jacques fight.
Remember, you need 6000 Gems to leave this world, so feel free to gem hunt if you need to. Head to Gnorc Nexus when you can.
Gnorc Nexus
The nexus is tiny, so free Delbin and enter Gnorc Cove.
Gnorc Cove
Gnorc Cove is home to the last big trick of this beginner Speedrun.
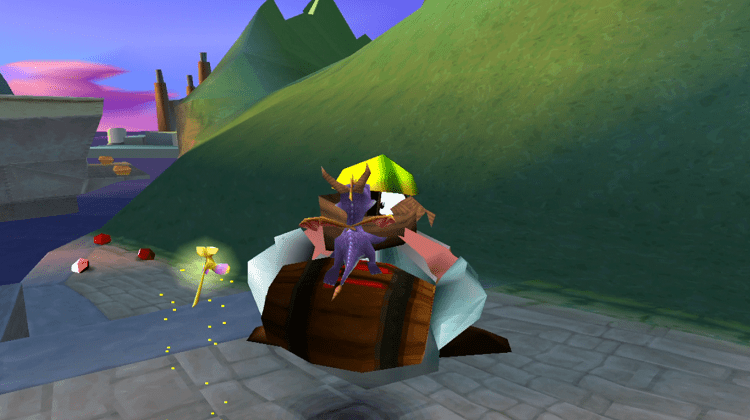
Charge into the enemy ahead of the entrance and make your way over to this enemy (pictured). If you charge and glide toward the barrel in the monster’s hands, you’ll get flung into the air when they move their hands to squash you. If you glide after being launched, you’ll end up out of bounds.
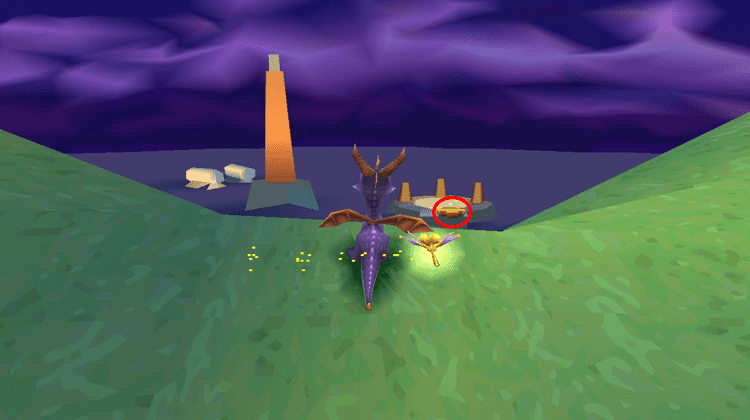
From here, head left and glide all the way to the exit. This trick is much easier than it looks, and you’ll be able to do it consistently with some practice. When you return to the nexus, head into Twilight Harbor.
Twilight Harbor
This is a relentless dash to the finish line without any gems to worry about.
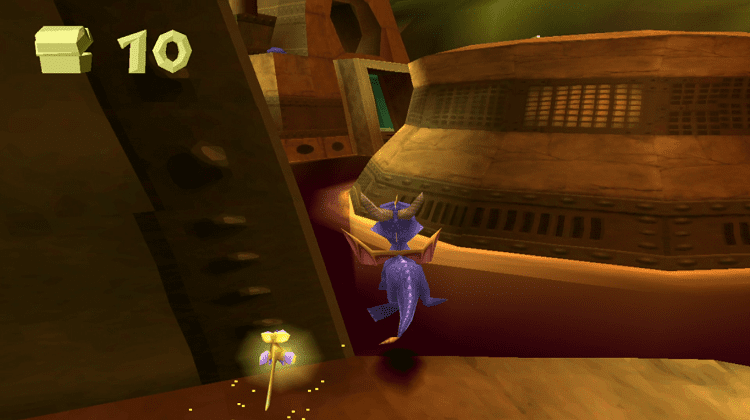
You can follow the path as normal, but if you have the health to spare, you can jump and glide into the water here (pictured). You’ll take a few hits, but you can skip a short section by struggling across the water. After that, make your way through, trying to avoid enemy gunfire.
Gnasty Gnorc
You’ve gone through hell to get here, and it’s time for the final showdown! For the most part, you can defeat Gnorc as usual, but there are a couple of corners you can cut during the chase.
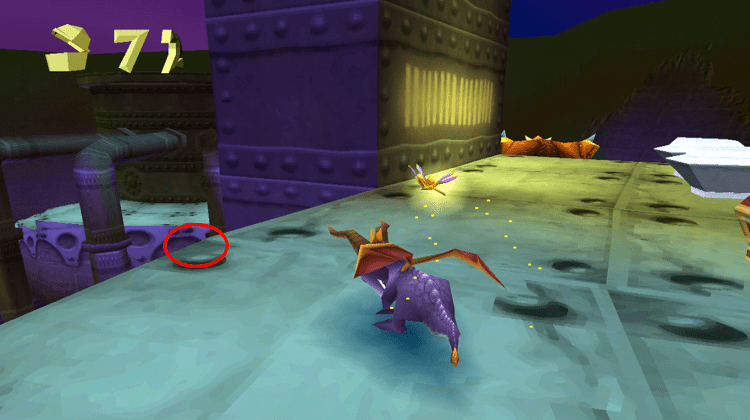
This one near the start.
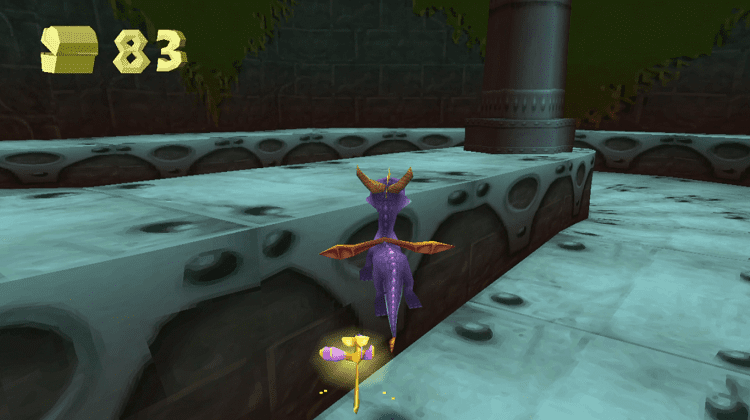
And this section. If you’re fast, you can even overtake Gnorc here!
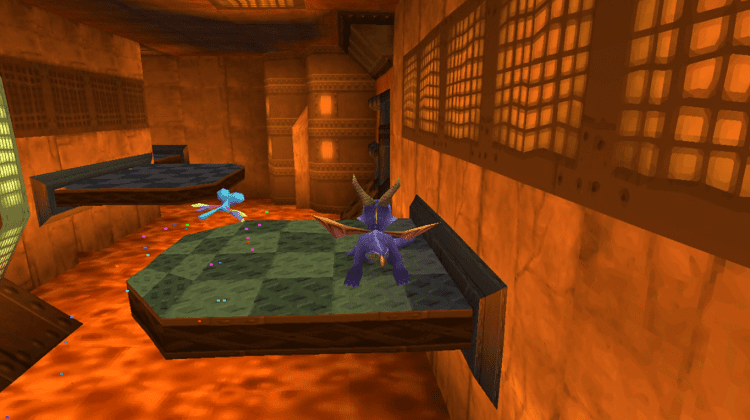
Take your time on these jumps if you need to; hit Gnorc one last time, and congratulations. You just beat Spyro in record time!
Useful Resources
- Speedrunner Towerizer has created routing maps. You can view all of them here.
- Dayoman is the current World Record holder for both Any% and 120% categories. His in-depth 120% playlist can be viewed here.
- You can view hundreds of Any% Speedruns from the Speedrun.com page here.
Frequently Asked Questions
Question: Is Spyro The Dragon a Hard Speedrun to Learn?
Answer: Yes, but that doesn’t mean you shouldn’t do it! A huge part of Spyro Speedrunning is map knowledge. You have to memorize many locations, but once you’ve done that, there are multiple ways to traverse each level, and you can morph the route to your liking.
Question: Should I Bother Learning the Speedrun if I don’t have a PS2?
Answer: Yes, absolutely. A PS2 is the best machine for Spyro Speedrunning, but you can learn and get very proficient at the game using a PS1 or emulator. While you’re learning, your hardware will make no difference whatsoever.
Question: Why isn’t the Gnasty Gnorc Proxy Included in this Guide?
Answer: The Gnasty Gnorc proxy is incredibly impressive, but it’s also one of the hardest tricks in Spyro speedrunning. It saves a lot of time but is an unreasonable ask for a new runner.

