- Evil Dead Achievements Guide - May 30, 2023
- Just Cause 3 Speedrun Guide – How to Liberate Medici at Breakneck Speed. - May 18, 2023
- Dishonored Speedrun Guide – Corvo’s On The Clock - May 13, 2023
Half-Life is one of the most well-known and influential first-person shooters in existence. Few other games can boast an impact on the industry quite like it, so it should be no surprise that there’s a dedicated speedrunning community for the game.
Suffice it to say, the community has gotten pretty good at Half-Life in the last two decades, and incredible tricks and optimizations are littered throughout the game.
We all know Valve can’t count to three, so if you’re waiting for a new Half-Life, you’ll be waiting a while! Speedrunning is a great way to breathe new life into your favorite games, and even though the learning curve is steep, it’s one of the most impressive runs out there!
Welcome to a Half-Life Speedrun Guide.
Bottom Line Up Front
Half-Life offers a fun but challenging speedrun that’s best learned in sections. One of the most complicated tricks in the speedrun is during the very first level, and it’s easy to be put off learning the rest of the game because of it.
I urge fledgling runners to persevere as the reward is an awesome skill-based speedrun full of exciting tricks and an active, welcoming community.
Before You Begin
There are a few more barriers to entry for Half-Life speedrunning than most other titles. With this in mind, there are a few things you’ll need to sort out before you start throwing down times.
Download the Steam Version of Half-Life
A few mandatory mods are required if you want to speedrun Half-Life. These mods will not function without the Steam version of the game. Fortunately, Half-Life is fairly inexpensive and frequently goes on sale if you’re happy to wait.
Scripted vs. Scriptless
Scripted and Scriptless are both popular categories for Half-Life speedrunning. The big difference between them is that Scripted allows the use of commands in the console window; Scriptless does not. Scriptless is much closer to a vanilla run through the game, but there are merits for both categories.
Download the Gold SRC Package
This folder has everything you need to speedrun Half-Life, including the relevant mod packages. Carefully read the description before you download the files.
Setting Up Your Game
This step may be confusing if this is your first time doing something like this. Carefully follow these instructions, and you’ll be fine!
- Extract the file (Extract to GoldSrc Package 2.4/).
- Open notepad and paste the following into it:
“(your location)\GoldSrc Package 2.4\Bunnymod XT\Injector.exe” (your location)\GoldSrc Package 2.4\Half-Life\hl.exe -game valve_WON -noforcemparms +map c1a0 “(your location)\GoldSrc Package 2.4\RInput\RInput.exe” hl.exe
Replace the three instances of (your location) with the folder GoldSrc is in. For example, ‘C:’. Save the text with whatever name you like (mine is called ‘HL Speedrunning’). Under the file name, change the ‘Save as type’ option to ‘All Files. Finally, type ‘.bat’ at the end of your file name, and you’re done!
That file will now open Half-Life and the mod launcher simultaneously, so you can use it as a shortcut whenever you want a speedrunning session.
Core Mechanics
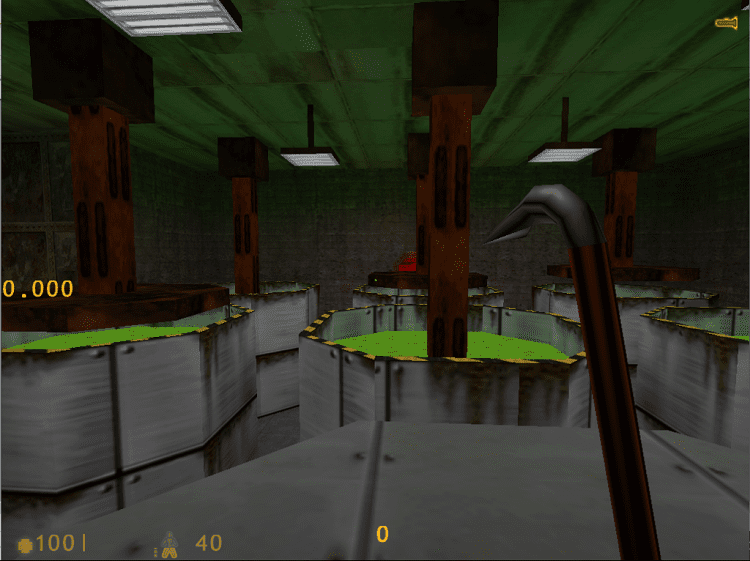
Keybinds
Saving/Loading is allowed in Half-Life Speedrunning, so I recommend binding them to easily accessible keys. I use buttons on the side of my mouse for this.
Console Options
You can open the Half-Life Console with the Tilde key (the button next to ‘1’). These are the settings I recommend. You can type each one into the console and press enter to activate it.
- skill 1 (changes the difficulty to easy)
- cl_showfps 1 (turns FPS counter on)
- default_fov 110 (widens the field of view, feel free to play around with this one)
- bind z “fps_max 20” (you can choose the key for this, but this makes ‘z’ drop your FPS down to 20. This is useful for some strategies)
- bind x “fps_max 99.5” (this brings the fps back up to the maximum by pressing ‘x’).
- bind p “map c1a0; bxt_hud_timer 1; bxt_timer_reset; bxt_timer_start” (this triggers a full run reset, complete with an in-game timer when you press ‘p’)
The Racing Line
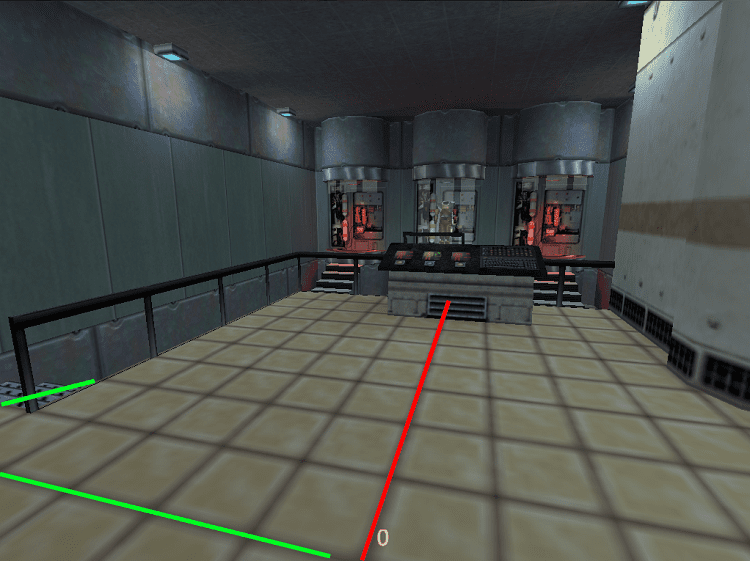
Every single room in Half-Life has an optimal path through it. It’ll take hundreds of runs before you memorize all of them, but you should take the shortest route through every room possible.
Keep Positive!
This may seem odd to include, but I feel it’s appropriate. Many tricks in this speedrun are tricky, and you won’t be able to do many of them right away. If you’re struggling, even on the big ones, I recommend leaving them and focusing on learning the route.
It’s easy to get disheartened if you can’t do the trick right away, and whereas speedrunning is akin to sprinting at breakneck speed, you need to do the work of a marathon runner first.
Tools of the Trade
Bunny Hopping (Bhopping)
Bhopping is a difficult but essential piece of movement tech. The technique feels awkward, but you’ll get it with practice. The best explanation I’ve seen for BHopping is for Portal Speedrunning, where the same method is used. You can view that here.
Wall Strafing
Wall Strafing occurs when you’re walking while pressed against a wall. For example, if you’re walking down a hallway with a wall to your left, you’d hold W and A. Doing this increases movement speed, and with practice, you can add this to your movement along with Bunny Hopping.
NPC Abuse
Many Speedruns involve manipulating NPCs, and Half-Life is no different. If you walk into an NPC, they will walk a few steps away from you so you can direct them. You can also scare NPCs with things like explosions and gunfire. The only time this won’t work is if the NPC is talking.
No matter what hellish beasties are attacking, these guys are professionals and will blindly stand in harm’s way if it means they can finish their sentence!
Object Boosting (Obbo)
Object Boosting is a tricky technique, but it is mandatory in several sections of the speedrun as it offers incredible bursts of speed. While facing a movable object like a box, you can grab it (press E), then press and hold a direction. When you do, the box moves in that direction, and you move slightly with it.
If you do this same technique but quickly de-press E, then the direction, and immediately jump afterward, you’ll be flung that way. This requires quick and precise timing as you’re doing the following inputs within a fraction of a second:
- Press and hold E
- Press and hold a direction
- Let go of E
- Let go of the direction
- Press Jump
One thing that helped me with the timing was delaying my jump input. This is the technique in action.
FPS Abuse
This trick is the reason you need those bindings in the previous section. Usually, you’ll be playing at 99.5 FPS, but reducing it to 20 has strange effects in certain situations.
The first example is in Anomalous Materials, where dropping the framerate will cause an NPC to interact with a retinal scanner faster than usual. Some notable areas you can use FPS abuse are detailed in the following section.
Grenade Jumping
Grenade Jumping is a risky but powerful speedrun technique and involves dropping a grenade and jumping just before it goes off to get launched across the map. It’s satisfying, impressive, and it’ll kill you if you get it wrong, so take your time learning this technique.
Getting Stuck
Finally, I have to explain about getting stuck. Half-Life has dozens of places where you’ll freeze in place, and there’s no way to fix it. This happens to everyone, even the best runners in the world, so accept it as a part of an old game. Over time, you’ll learn where the biggest offending areas are, and frequent saving will help.
The Speedrun
With a game like Half-Life, I can’t explain every twist and turn and have a guide anyone could read, let alone follow!
With this in mind, I recommend using this as a companion guide alongside any run on Speedrun.com. I’ll explain the critical parts of each level in the order they occur and demystify the tricks as you see them because this game is full of them!
Anomalous Materials
FPS Abuse
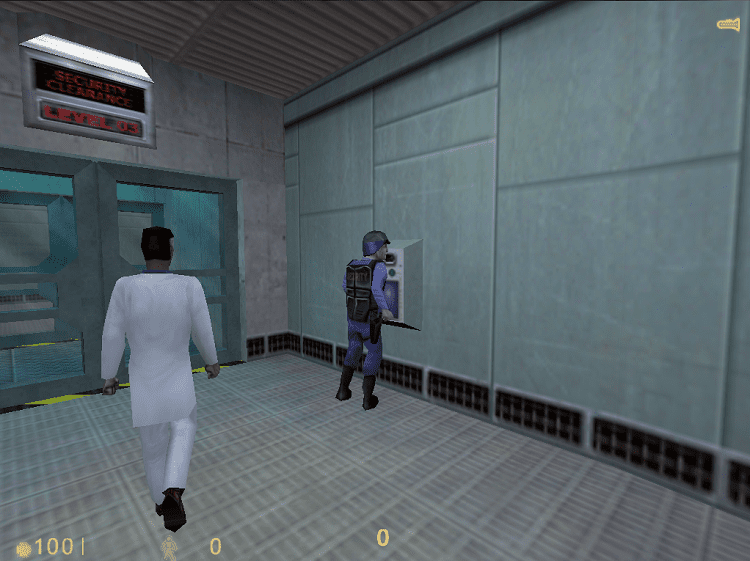
The community calls these guards Barneys, so let’s go with that! This Barney walks to the retinal scanner to open the door. If you drop your framerate here, he turns slightly faster before using the scanner. You can brush against him on the way past to push him closer to the scanner.
NPC Abuse
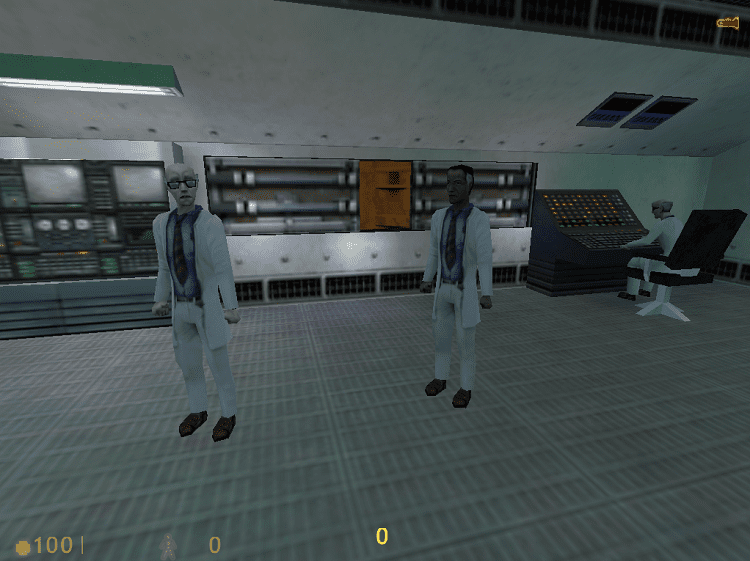
If you carefully step between these 2 Scientists, you can push the one on the right towards the door. It’ll take 3 pushes to get them all the way there; if you do, the door will open.
Test Chamber Skip
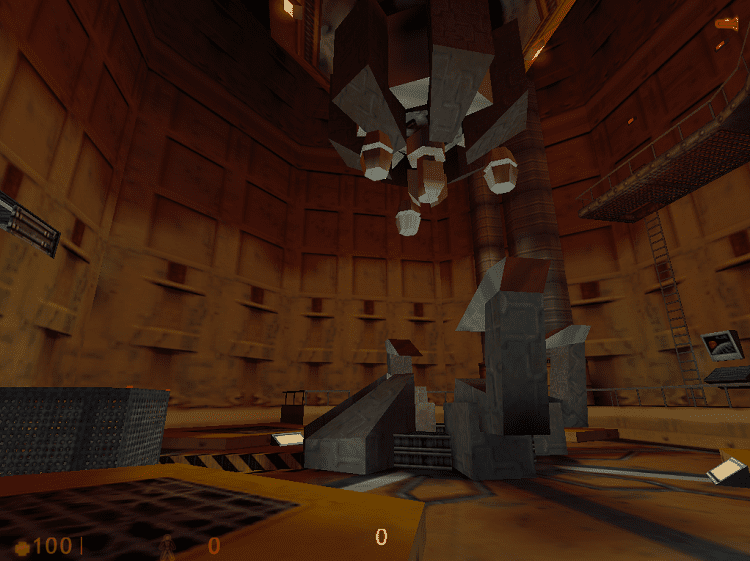
Half-Life has arguably the hardest trick in the entire run right at the start. This technique is brutally difficult, so I urge you to keep going even if you can’t do it immediately. This skip took me at least 2 hours to do just once, so it’s OK to do this section normally and practice later.
There are a couple of ways to do this trick, and the most concise explanations I’ve found are by a runner called Wowie_allie, who ran Half-Life at SGDQ in 2017. This is his strategy.
Unforeseen Consequences
If you’ve done the Test Chamber skip, save and Load inside the Observation Room before moving on. Doing this lets the game know where you are so the level loads properly.
Object Boost
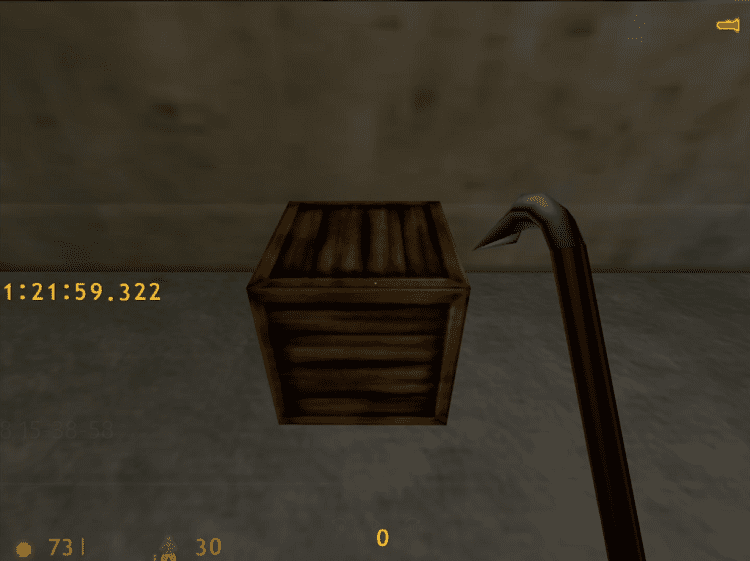
Using the Object Boost technique, you can use this box (pictured) to fling yourself across the gap, skipping a massive part of the level. This is a frustrating technique, but Save before you attempt the trick and be patient.
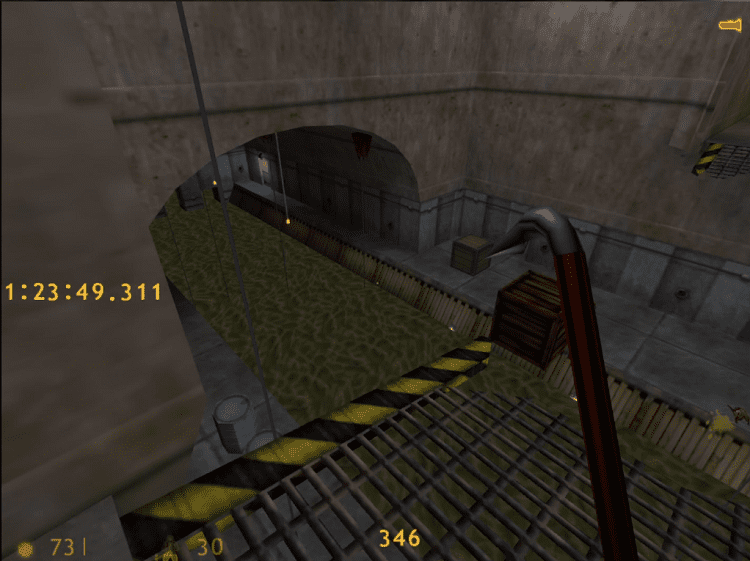
Elevator Cutscene Skip
This elevator exits the level. If you interact with the button to open the door, then stand where I am and press interact again, you’ll hit the button inside the elevator through the wall. Doing this from here triggers the next level to begin immediately.
Office Complex
NPC Abuse #1
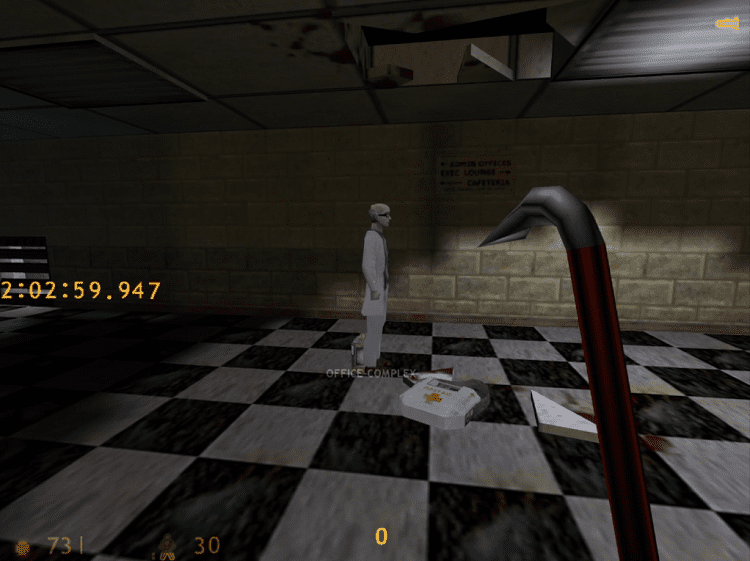
When you start this chapter, shoot the Scientist in front of you once. He will panic and open the door skipping a trip through the vents. Note, if you Save/Load in this level before doing the trick, it won’t work.
NPC Abuse #2
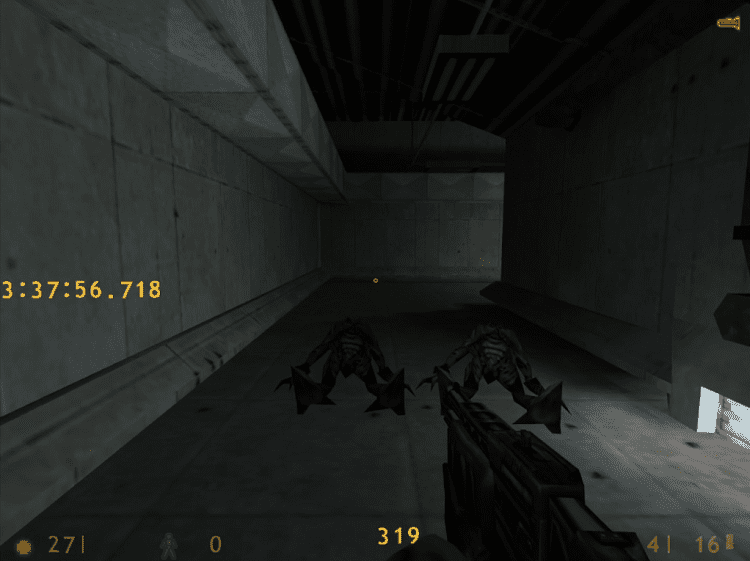
This NPC Abuse is complicated because a lot is happening, but it’s not too bad once you’ve memorized it. For this one, the last place you can save beforehand is where I am (pictured above).
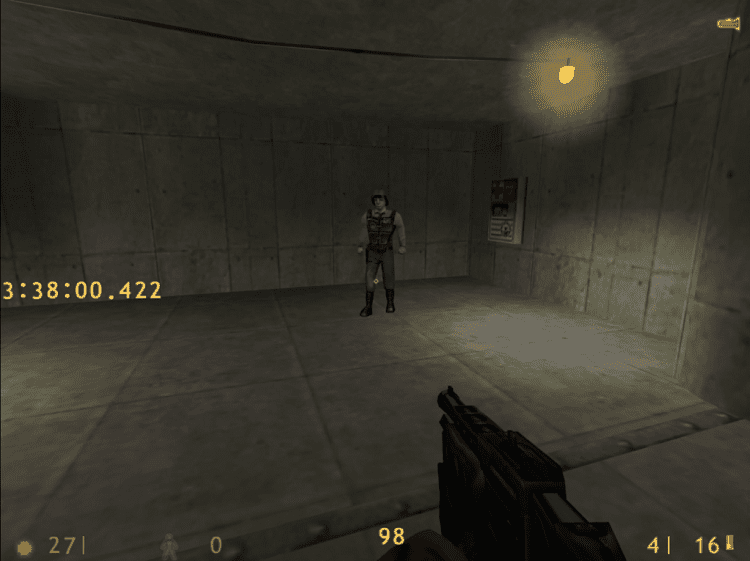
Rush into the next area and shoot Barney in the legs with your shotgun. Then run down the ramp, grab the grenades, then back up past Barney, who will now aggro on you.
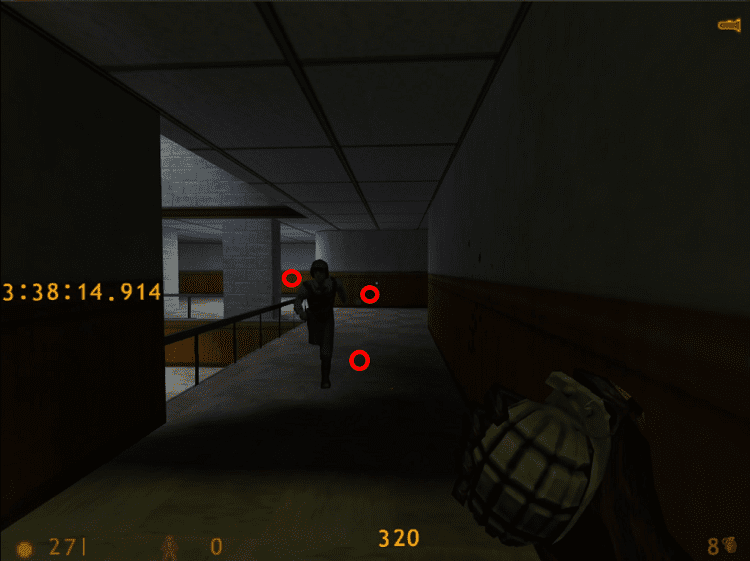
Get him to follow you into this room, then lob grenades behind him roughly as I have (pictured above).
These grenades should scare Barney into opening the door, skipping a large part of the level.
We’ve Got Hostiles!
Aren’t tricks that skip entire levels the best? Well, that’s what we have here! You can’t save in this area because you’re doing NPC Abuse right at the start.
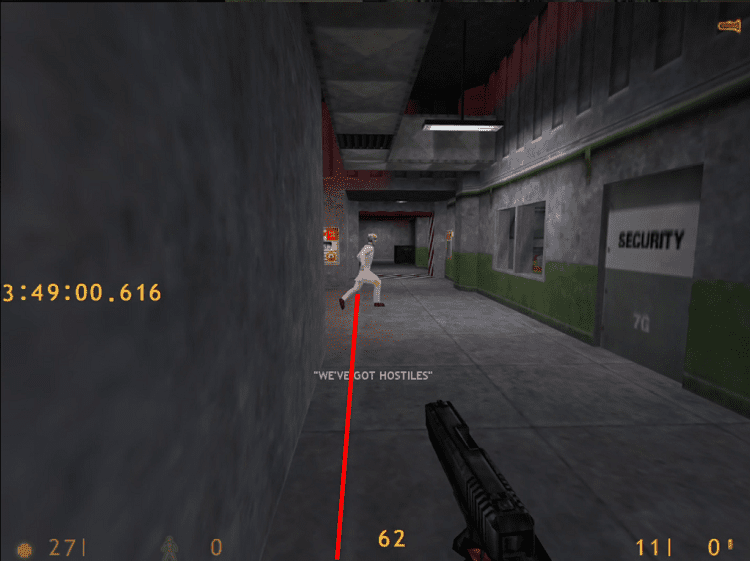
Switch to your pistol, and the moment you see the Scientist step across this line (pictured above), shoot him once.
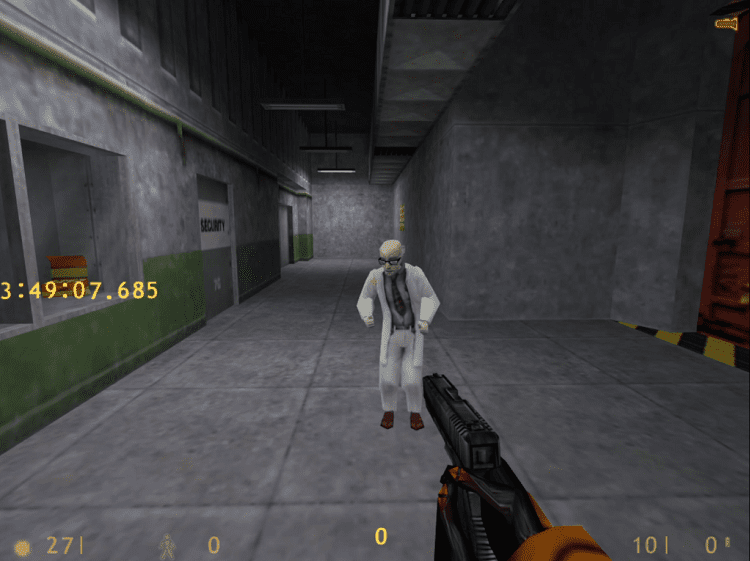
Run past him and stand where I am (pictured). The Scientist will panic and run straight to the door. With the door open, you can press the button inside and proceed straight into Blast Pit!
Blast Pit
Quick Descent
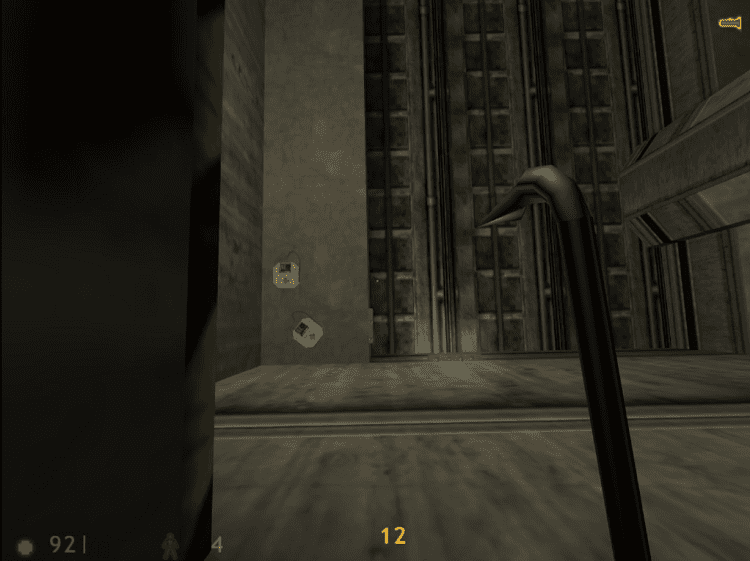
When you trigger the blast doors, you can stand in this corner and wait for them to open. The timing is strict, but you can grab the ladder at the bottom of the hole on your way down, and if you do, there’s zero fall damage.
From Atop The Elevator
Advanced strategies for the rest of this stage involve Bhopping and Grenade Jumping. These are hard to execute and explain as the areas here look identical. These strategies rely on you having specific armor values as well.
The most comprehensive explanation I’ve found for this area can be viewed here , but it’s OK if you want to complete this area normally for now.
Tentacle Boss
You can use a fun trick here to quickly end the battle. Once you’re in the boss’s lair, head up the ladder to your right, break the boxes so you can get through, and make your way to the window with the control panel.
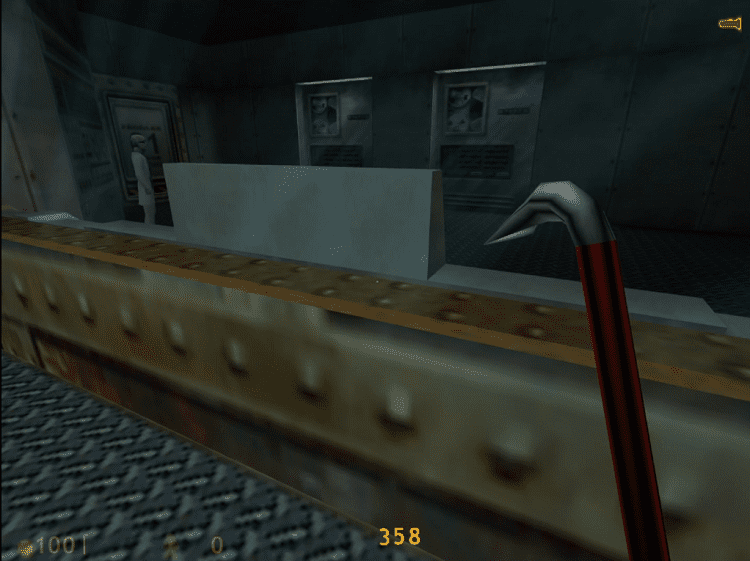
You can activate the button through the wrong side of the glass here. The safest place to wait is on the ladder you just came from, so sit there and wait for the boss to explode.
On A Rail
Object Boost & Bhop Sequence
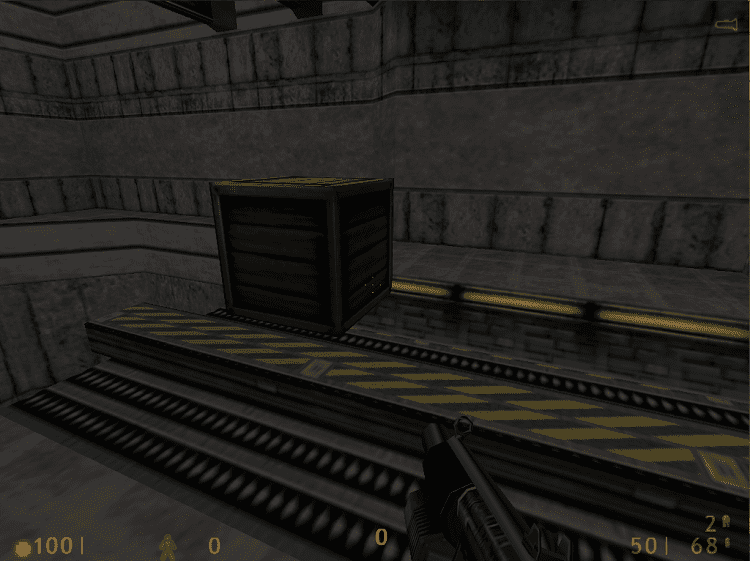
You can lightly push this crate onto the rails, as I have (pictured above). You can use this to Object Boost to the right and use the speed to start a fast Bhop down the track.
It’s hard to keep the extra speed the whole way, but it helps either way. Even if your Bhops are inconsistent, you shouldn’t need to waste time killing enemies, but your grenade launcher will help in a pinch.
Secret Armor
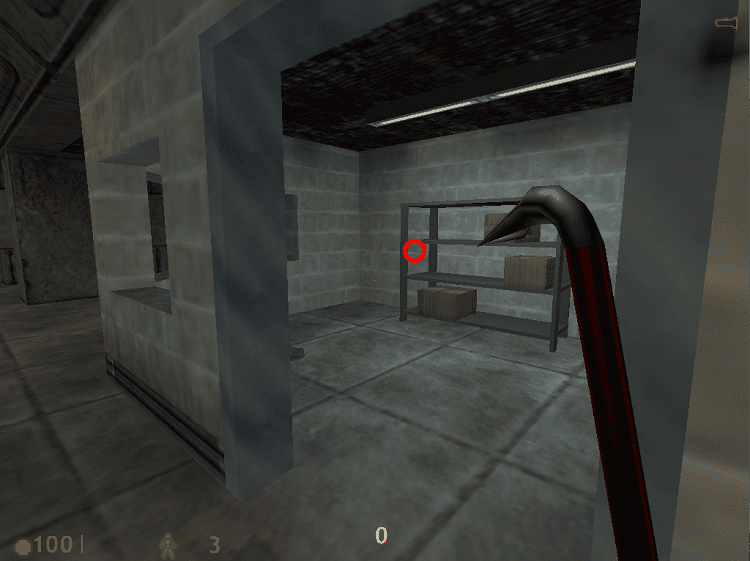
Once you’ve gone through the blast doors, if you’re hurt, you can pull Armor through this wall in the room next to the train.
Trap Hole
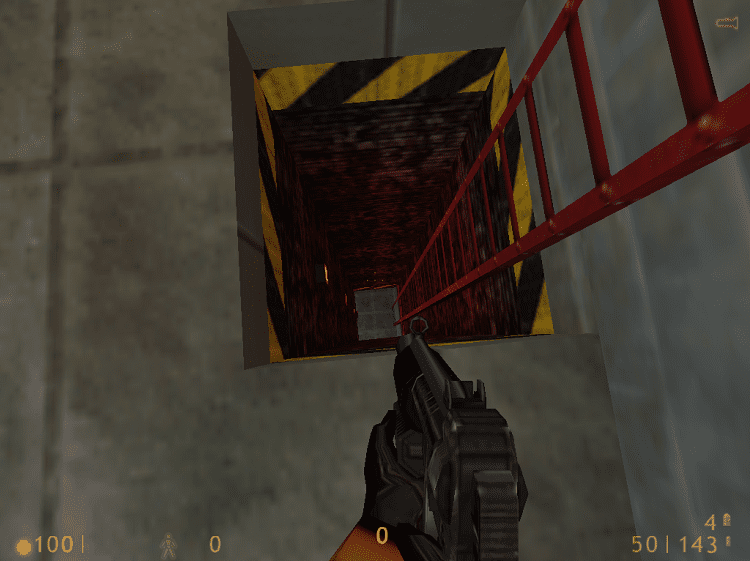
You’ll often see speedrunners drop a grenade down this hole. This is because several Tripmines are just out of view, and a well-placed grenade will pop all of them. There’s a health station down here, but be careful, as enemies hide in that room too.
Ammo Dupe Glitch
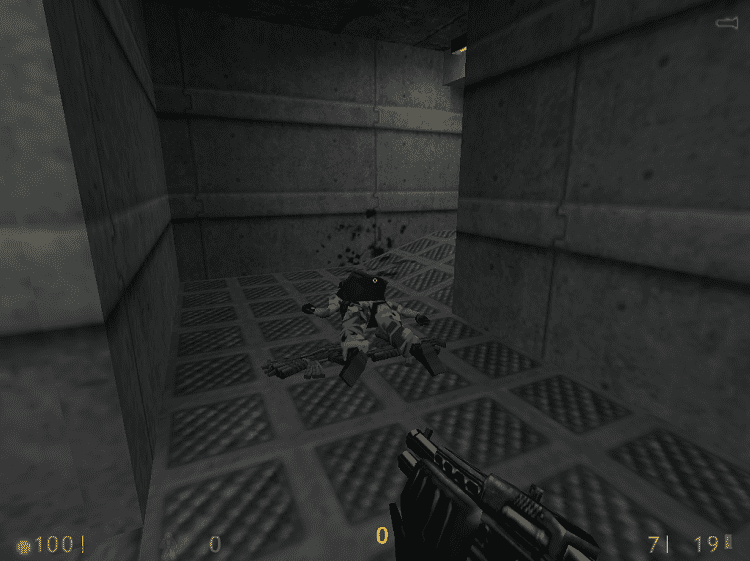
You can do this anywhere, but this is a good place to do so as there’s a single, isolated enemy. If you kill this soldier, then repeatedly Save/Load, he will fall to the ground, dropping his gun every time. Once you’ve got a nice pile of guns to pick up, collect your prize and move on.
Apprehension
NPC Abuse
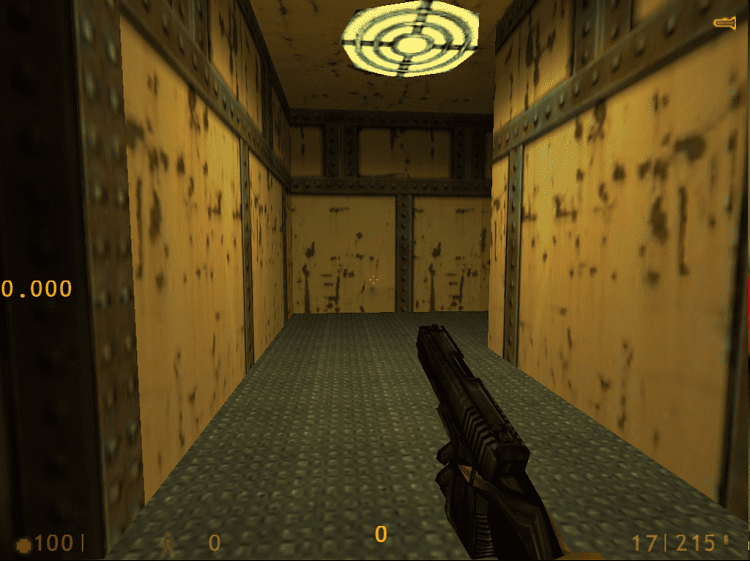
There’s an easy NPC Abuse to open a door on this level. It’s a good idea to Save beforehand, but make sure you do it when entering the yellow corridor as I have (pictured above). If you save any closer, this trick won’t work.
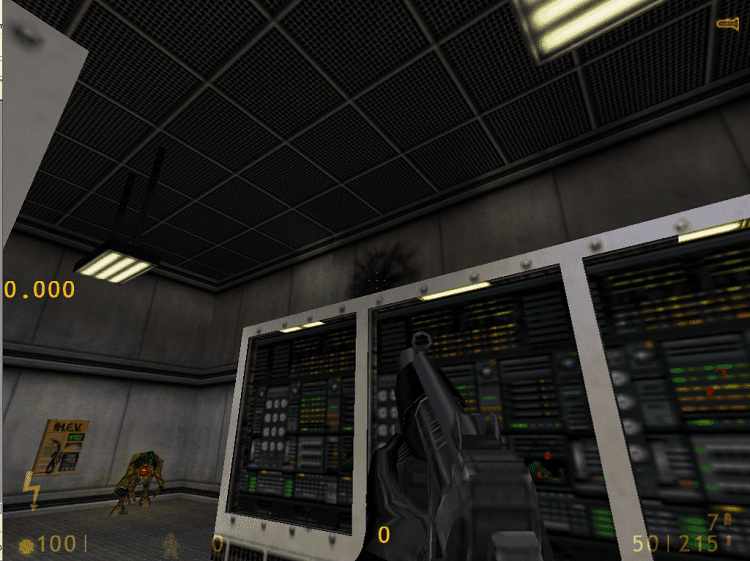
Equip your SMG, and walk into the room with the Vortigaunts inside. Stand where I am in the picture above and fire an SMG Grenade at the wall.
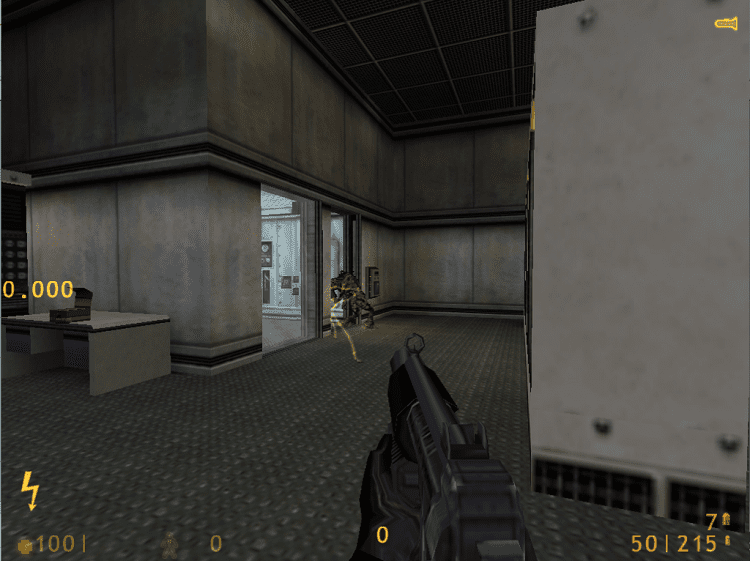
The explosion will force the enemy at the back of the room to run and open this door for you.
Pitch Black Sequence

Just before you get captured, you’ll see a health station on the wall, and the lights will turn off. You can still interact with the health station even though you can’t see it. Walk forward, then slowly strafe to the left and right while spamming the interact key.
Residue Processing
This area has a lot of precision jumps that demand a steady hand. It’s tempting to race across them but take time when you’re learning.
Sharking
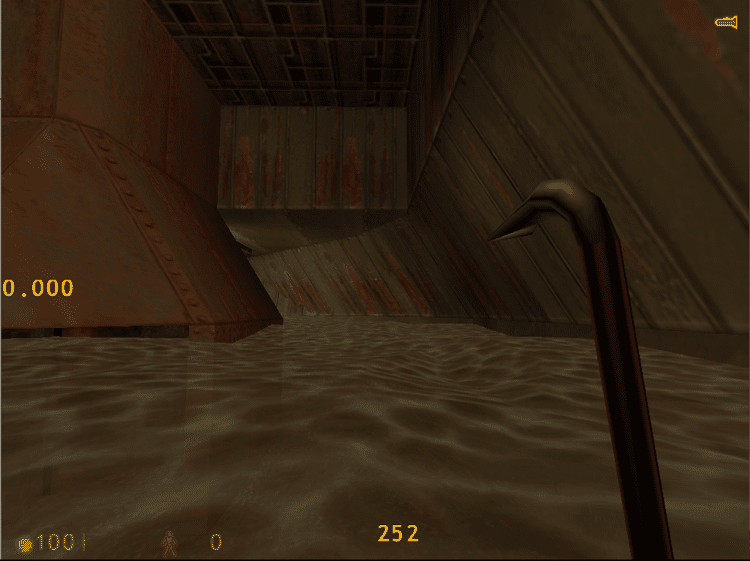
You can use a hilarious bit of movement tech in the water here. If you hold jump (or keep spinning your mouse wheel) and rapidly press crouch, you’ll race at breakneck speed across the top of the water here.
Vent Tripmines
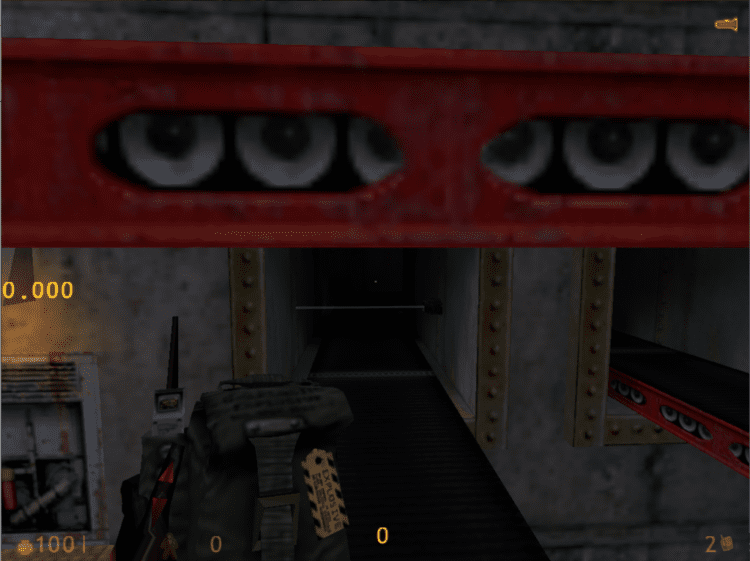
Most speedrunners do a precarious jump to clear the 2 Tripmines in this vent. A safe but slower option is to throw a Satchel Charge in, wait a few seconds and detonate it. If you time it right, you’ll blow up both mines.
Questionable Ethics
Save/Load Abuse
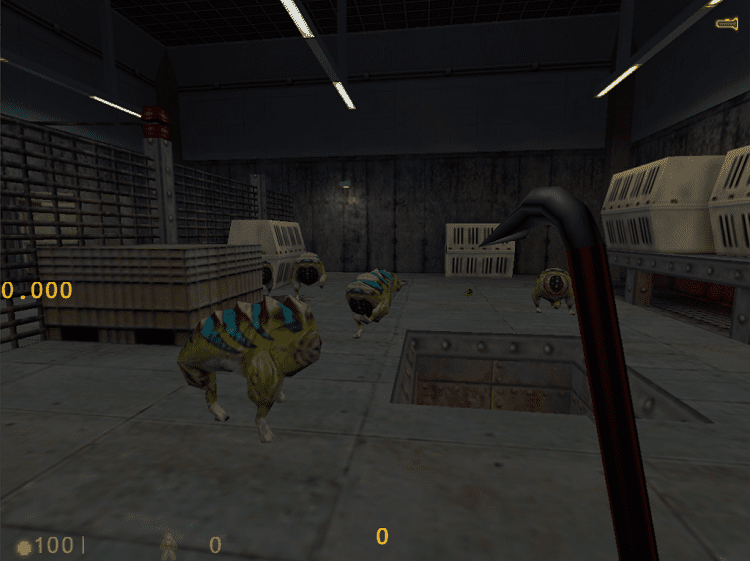
Remember when we duplicated ammo earlier? You can do something similar here. This room is full of dogs that will ruin you if you’re not careful. If you keep Saving/Loading as you go through, you’ll reset their attacks each time so they can’t hit you. This trick works with enemies throughout the game, so you can experiment elsewhere.
Mini-Boss Skip
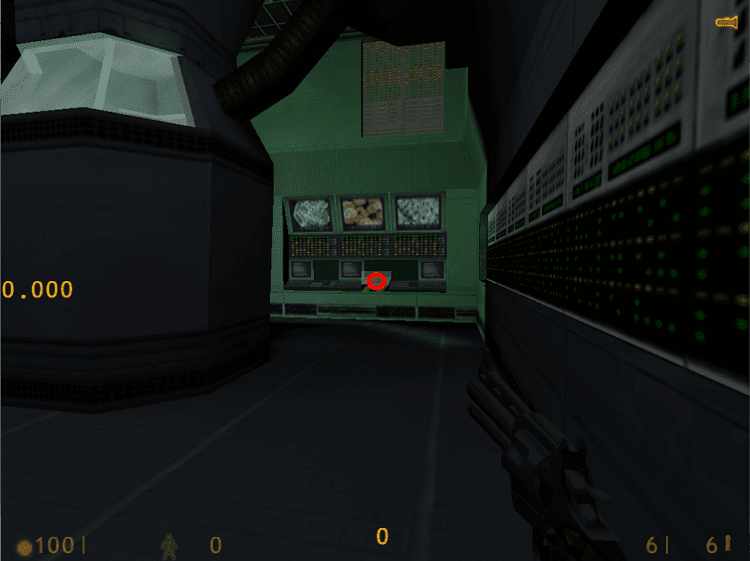
There’s a scary enemy in this room behind the large metal pillar (pictured). Usually, you walk in front of him when you activate the button on the Console, but if you shoot it instead and go around the room clockwise, you’ll be out of the room before he becomes a problem.
Surface Tension
This level is challenging, and speedrunning it hinges on your ability to master a weapon-specific technique, Gauss Jumping.
Gauss Jumping
Surface Tension has some tricky traversal strategies involving the Tau Cannon. This weapon’s secondary fire is so powerful it blows you backward. This technique is known as Gauss Jumping.
Several massive skips rely on your mastery of this trick and combat skill, as you need specific amounts of shield to pull them off. As the route through this stage is so optimized, I recommend following this guide for Surface Tension by Speedrunner, Fruich.
If you’re a new runner, he explains some very complicated tricks that may be beyond your current skillset. Don’t despair. You can complete the level normally and practice these jumps when ready.
“Forget About Freeman!”
Magic Elevator
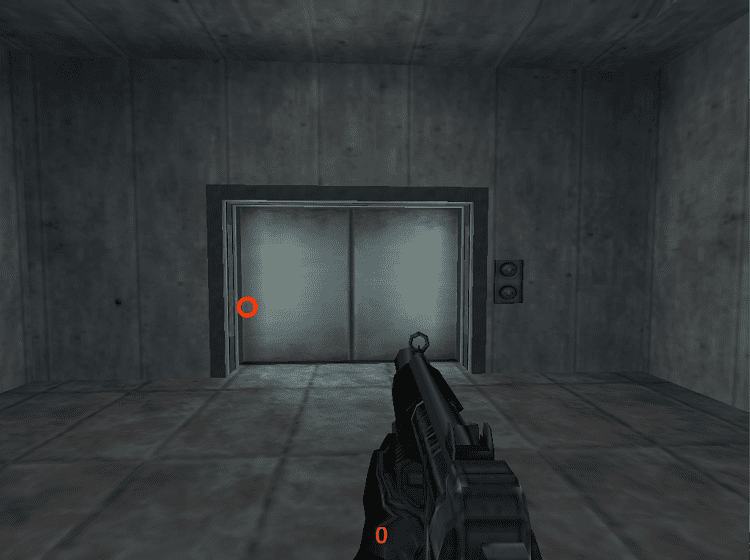
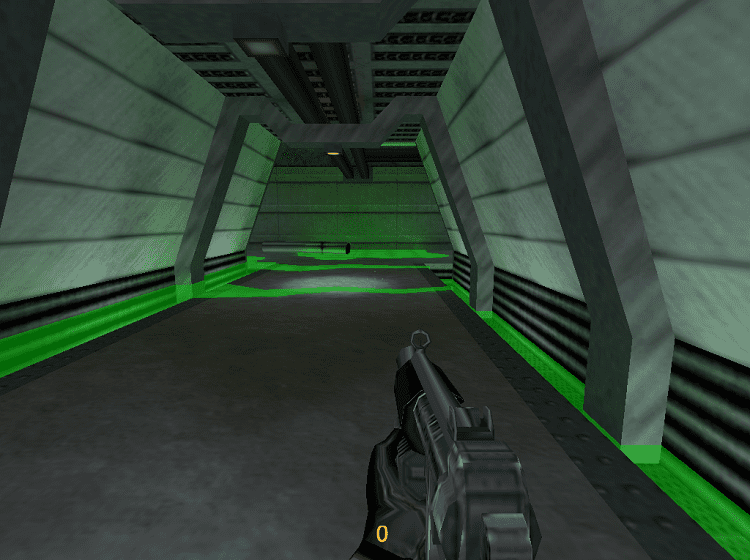
This is a really cool trick. Behind the tank, you’ll find this elevator. Destroy the gun turret to your left when you walk passed, then walk to where I’ve circled (pictured above).
Save and Load the game here, then interact with the door. You’ll trigger the button inside the elevator, and the next part of the level will load behind you without needing to go in. If you’ve done the trick right, it’ll look like this.
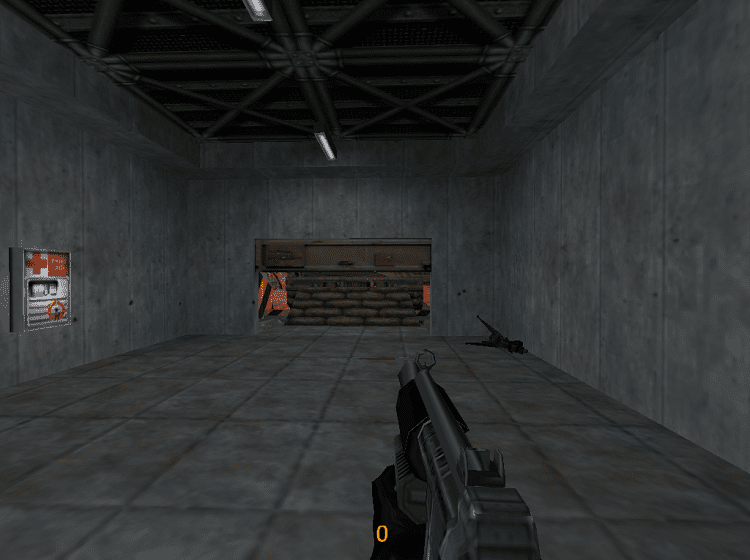
Before.
After.
You can do a similar trick with doors at the end of the level, but I don’t recommend it, as it can crash your game.
Lambda Core
Quick Slide
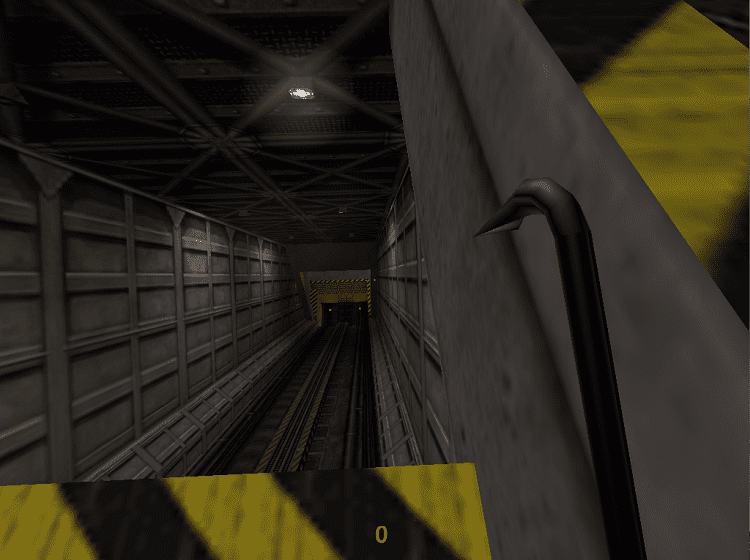
There’s a technique to quickly traverse this elevator shaft (pictured above). Align yourself with the wall on the right, lower your FPS to 20, and walk off.
Just before you reach the black and yellow stripes near the bottom, hold right and crouch. If you do this right, you’ll survive and slide onto the lower level. As with everything in Half-Life speedrunning, it’ll take time to get the timing right with this one, but it saves a lot of time.
Enemy Gauntlet & NPC Abuse
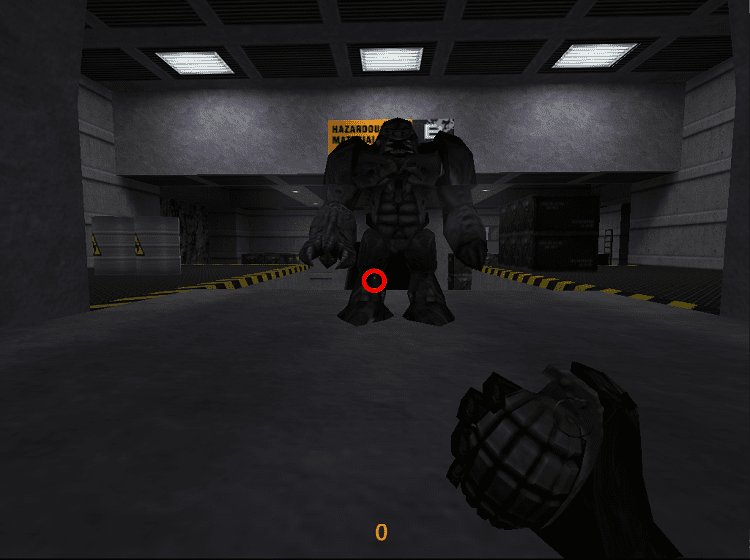
This sequence has a few strategies, but this is the safest, especially if your movement is inconsistent. When you reach the large blast doors, charge up your Tau Cannon’s secondary fire and shoot the large enemy where I’ve circled (pictured). Shooting here should kill the enemy and the one in the tunnel behind him.
Once they are dead, turn around and lob an SMG Grenade to kill the enemy behind you. One more enemy will spawn in the tunnel, and you can greet him with a well-placed grenade.
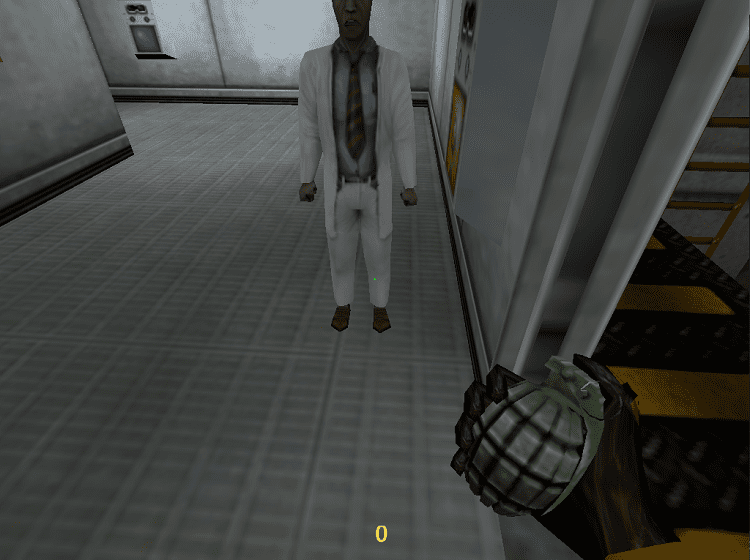
Killing every enemy causes the Scientist to spawn in the room on the landing. Once you’re inside, shoot him in the leg. He will panic and open the next door for you.
Sharking Grenade Boost
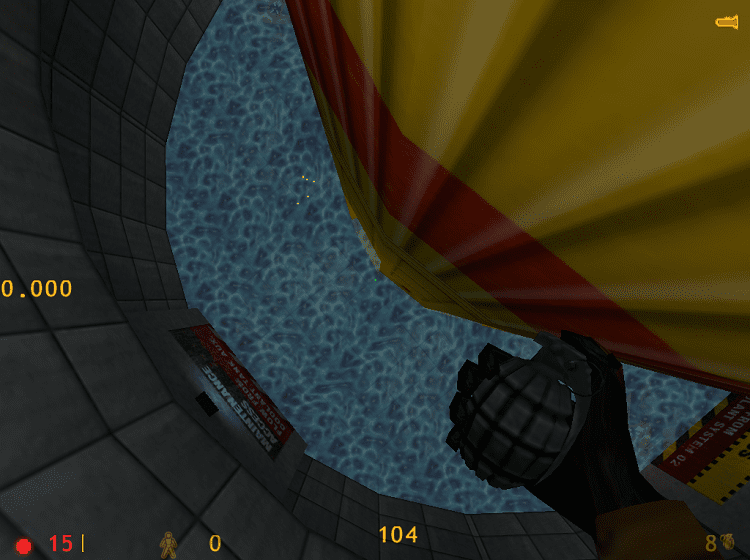
When you’re in the pool around the rocket, you can grenade jump out of the water to get an insane amount of height and land on the platform above.
Look down, hold jump + crouch, and cook a grenade. When you’re ready, release the grenade, and you’ll be blown skywards. You’ll see advanced speedrunners do a 2nd jump in the air with an SMG Grenade, but the single jump gets you pretty high and saves time.
Xen
There’s a fantastic strategy to do this level in under 2 mins, but it requires a ton of precision movement. If you’re starting out, this may be beyond your skillset, but I’ve linked videos of 2 methods for the trick. The first is tougher but more optimized. The 2nd is slower but safer.
Gonarch’s Lair
The Gonarch is a quick and easy fight once you know how. For simplicity, the battle has 3 phases.
Phase 1
Gonarch stands in 2 specific spots, which are the same every time. You can preemptively drop a satchel charge at each location and detonate them when Gonarch stands still. If the satchel charge doesn’t do enough damage, you can shoot to finish it off. These are the locations:
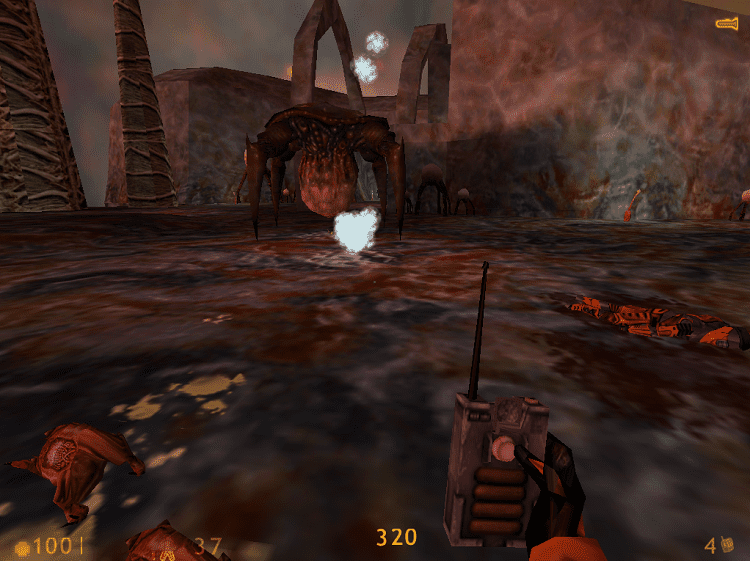
Here, just to the left of where you start (pictured above).
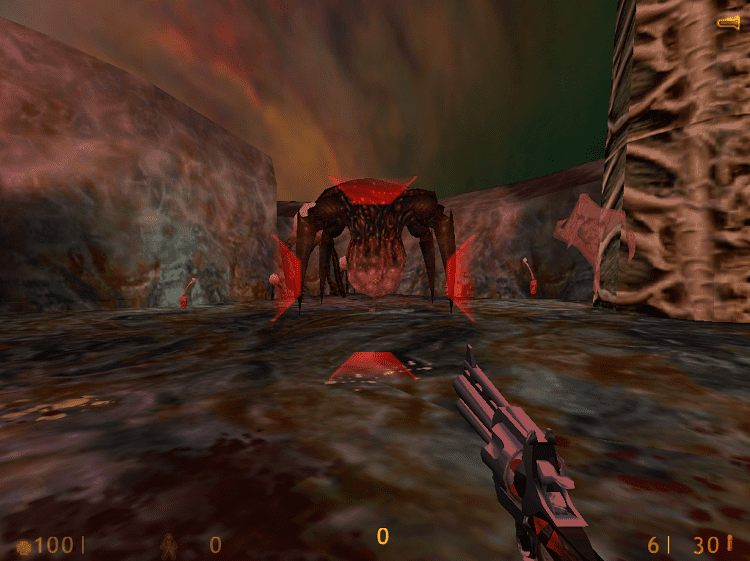
And then to the right (pictured above).
Phase 2
Gonarch will walk to 2 specific spots again. This time, you can use your Tao Cannon secondary while standing with your back against the next door. As you’re using your gun, there’s no need to preempt its movements.
Phase 3
Get in front of Gonarch as it breaks the door open. Run down to the bottom of its lair and equip your satchel charges.
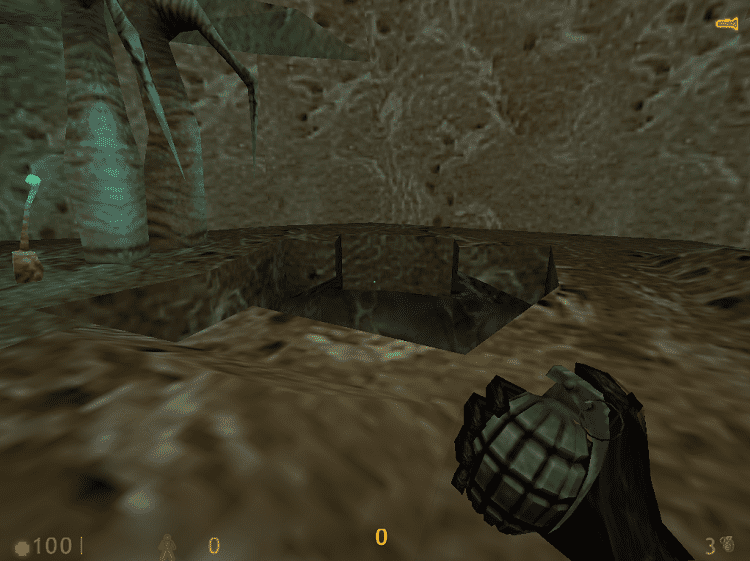
You need four satchel charges and three trip mines to break a hole in the floor here (pictured). Sometimes, you’ll need a grenade or two as a backup, but once you’ve broken through. Drop down into the hole and into the next level.
Interloper
Interloper is the last regular stage in Half-Life. Aside from the optimal Bhopping, this level is light on tricks.
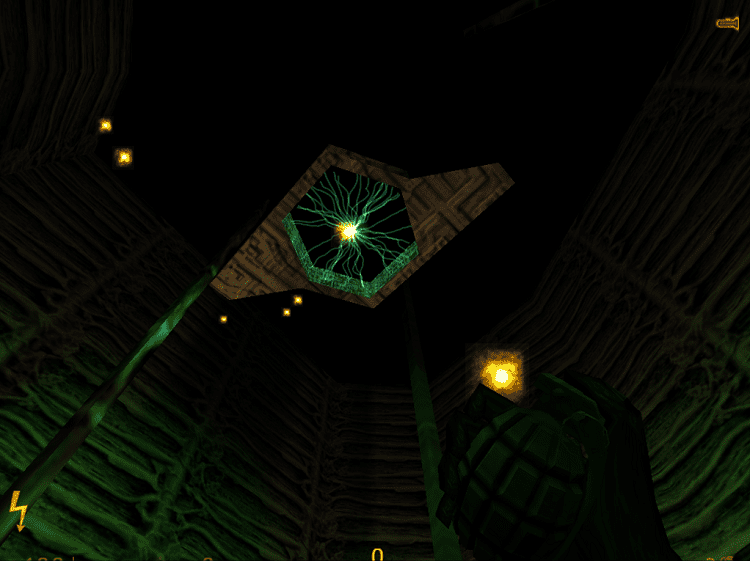
There’s a tricky grenade jump into the final teleporter, but there’s nothing in this small area you’ve not already seen in the rest of the game.
Nihilanth
Nihilanth is an intimidating boss but quick and easy once you know how.
Break the yellow crystals as usual. You can shoot them with your Tau Cannon as you fall.
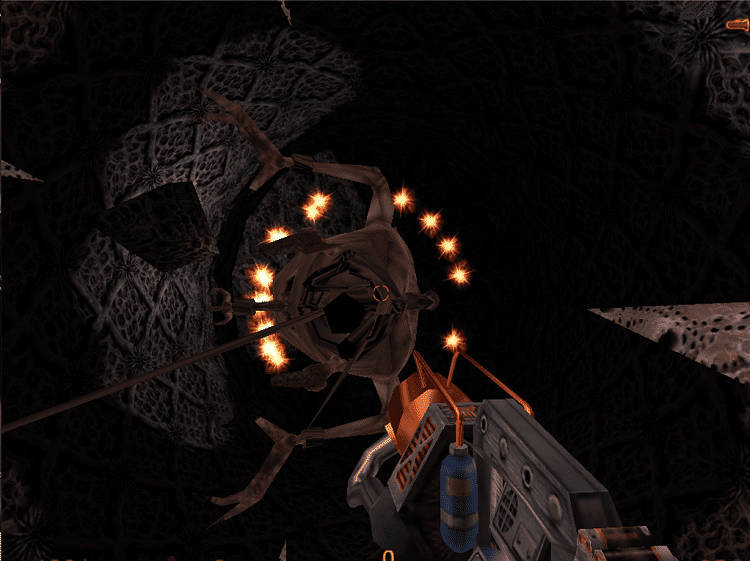
When you’re on the ground, if Nihilanth focuses on you, he can recover health. To ensure this doesn’t happen, move in a tight circle directly underneath him and try and stay behind his gaze.
You’ll know you’re doing this right as he constantly turns, trying to spot you. Lay into him with everything you’ve got, but SMG Grenades and your Shotgun are great choices. When his head opens, use an SMG Grenade to boost yourself up, shoot him, and it’s game over.
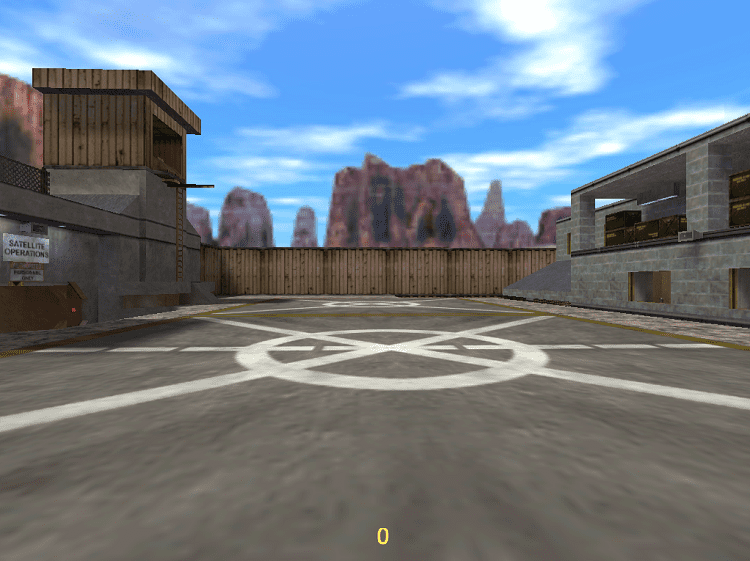
If you want a space to practice Bunny Hopping, you can do so in-game by typing “map crossfire” into the console. This command will take you to a map with a large open courtyard and is perfect for practicing your BHops and Wall Strafing.
Frequently Asked Questions
Question; I get a message that says” Failed to initialize authenticating interface” when I try to use my .bat file. Any help?
Answer: This message usually means you need to install the Steam version of Half-Life. If you already have, ensure you’re logged into Steam, which should fix the problem.
Question: Should I learn this speedrun if I can’t Bunny Hop?
Answer: Bunny Hopping takes a lot of work, and everyone struggles when they’re new. It’s a mandatory requirement for Half-Life speedrunning, and there’s no way around it. Still, there’s value in learning the route and tricks without it.
With everything in speedrunning, if you’re willing to put the time in, you’ll master the technique eventually.
Question: Is There any Way to Practice the Nihilanth Boss Fight?
Answer: Yes, there is. You can enter this into the console during the fight, “bxt_hud_nihilanth 1”. This will show you Nihilanth’s health and level. The level will go up the more damage you do; at 10, its head will open so you can kill it.
Useful Resources
Looking for a Half-Life Speedrun to follow? Pick one from the best of the best on the Speedrun.com leaderboards. If you’re a beginner, I recommend choosing a run from the middle of the list, as they will incorporate less advanced strategies.

