- The True Dovakhiin: Skyrim Trophy Guide - December 19, 2022
- Titanfall 2 Speedrun Guide - October 23, 2022
- Majora’s Mask Speedrun Guide - October 23, 2022
Terraria is a side-scrolling survival game that players can spend hundreds of hours in to create a picturesque village, fill it with citizens and work to slay colossal bosses.
However, some of the game’s most diehard fans are instead dedicated to getting through it as quickly as possible to compete for speedrun records in various categories. So, if you’re looking for a new way to experience Terraria and are interested in speedrunning the game, you’ve come to the perfect place.
Key Info Up Front
Category: All Bosses
World Record: 1 Hour 42 Minutes 54 Seconds
World Record Holder: Max_Overpower
Platforms: 3DS, Android, iOS, PC, PlayStation 3, PlayStation 4, PlayStation 5, PlayStation Vita, Stadia, Switch, Wii U, Xbox 360, Xbox One, Xbox Series X/S
Before You Begin
As any player of Terraria knows, one’s play through of the game is subject to a lot of RNG and luck. So, before you even consider speedrunning the game, I suggest playing a decent amount of the game first to fully understand the possibilities of that RNG and all of the tools available to you so that you can react accordingly.
This will also help you get more comfortable with the game’s controls which are very important as you’ll take on all of the game’s bosses. It will also help you figure out which build you prefer to get to have a perfect equipment set up in mind during your run that you can work toward.
Before you start speedrunning, you need to know the community’s official rules for this run. I will go over the All Bosses run, but numerous other categories don’t take as much time to complete if you would prefer to run one of those. So, here is everything you need to know about this type of run:
- Bosses you have to kill include King Slime, Eye of Cthulhu, Queen Bee, Skeleton, Wall of Flesh, Queen Slime, The Twins, The Destroyer, Skeleton Prime, Plantera, Golem, Duke Fishron, Empress of Light, Moon Lord, and either Eater of Worlds or Brain of Cthulhu
- The time for your run stops when the death message for your final boss is posted in the game’s on-screen chat log.
- The bosses may be defeated in any order.
- You have to use a random seed, and it cannot be an easter egg seed.
- You cannot click on the seed field during world creation, which impacts your seed’s generation.
- This category also does not allow any of what the community has agreed are “major abuses.” These include:
- Using multiple worlds
- Hoiking (Creating a series of sloped blocks to move enemies across the map)
- Crafting beehives
- No Duping or getting items through unintended means
- Invincibility through I-Frame set-ups
- Exploiting the in-game cap on mob spawns
When you are ready to start your run, you’ll also need to set up the world with the appropriate settings for it to be counted as an acceptable entry. These settings need to be captured in your footage of the run to be verified. So, when you make your game, make sure you adhere to these settings:
- Character Difficulty: Hardcore
- Seed: Random (make sure to not enter or clear the field in any way)
- World Size: Small
- World Difficulty: Master
- World Evil: Crimson
Core Mechanics

This section will break down some of the mechanics that you’ll need to be familiar with throughout the run for this guide. That way, when I cover my suggested path of your run, it won’t get bogged down in mechanic explanations or the more minor details as much. So, here are the aspects of Terraria that will be at the center of your speed runs.
Gear
One of the most open but essential parts of your run is your build. Terraria has dozens of different items to choose from, but some setups work best for speedrunning and have become more common in the community. The gear you use will depend on what you find and can buy as you get established, but you should always have an idea of what items you’re looking out for as you progress through the run.
The most common builds are Summoning, Magic, melee, and Ranged. For a Summoning build, you should prioritize keeping obsidian until you get 60 to make Obsidian Armor that you can pair with the Firecracker Whip or Feral Claws.
The Magic build requires you to get the Laser Rifle, Gem Robe, Mana Regeneration Potion, and a backup Shotgun with Explosive Bullets. A Melee run will use either the Gradient or Hel-Fire. The Ranged build, which I think is the most powerful and consistent in this context, uses either a Repeater and a Shotgun or the Clockwork Assault Rifle with Explosive Bullets. Then, when you need to use a bow, try to get special arrows like Hellfire, Unholy, or Jester.
Of course, as you go through runs and define your style, you can also make tweaks to your goal build to fit your playstyle or if there are any particular bosses or sections of the run that give you a more challenging time than others.
Regardless of which you go for, however, you should also try to get as many accessories as possible that improve your movement. I’ve found that items like the Hermes Boots or a Cloud in a Bottle can help shave a lot of time off a run if they are gotten early on.
Housing

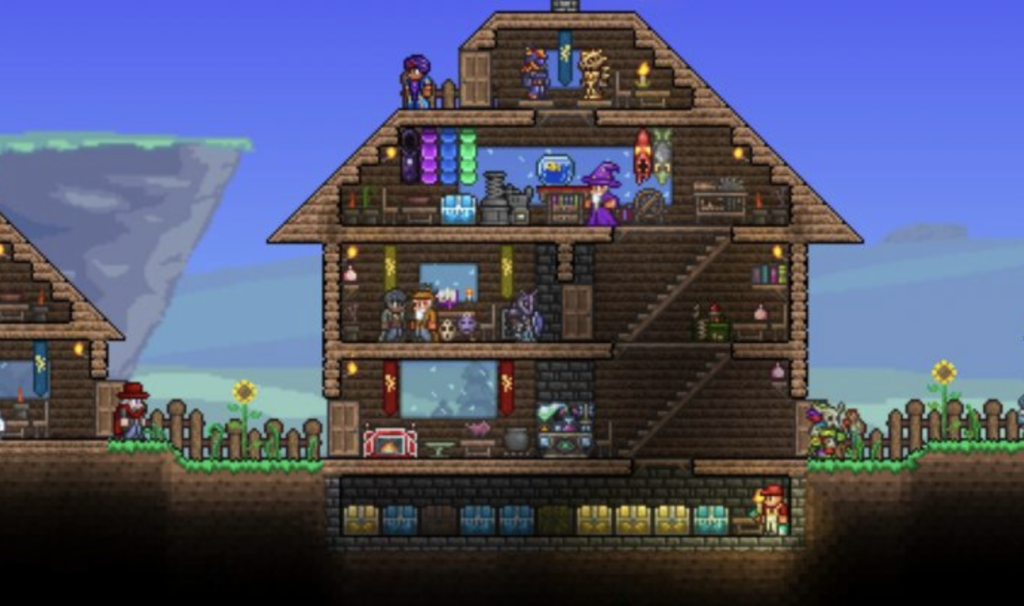
You’ll also need a few residents to move in for your run, mainly the Demolitionist. Depending on your approach, you will need from three to five houses, but I recommend just building five so that if you get an unnecessary resident, it doesn’t ruin or hinder your entire run.
However, the best way to build your houses for the residents is a floating row with a stair of platforms leading up to it. Place a single line of a solid block straight across. Then, fill in the back wall of all but one of the houses, as the Guide that spawns at the beginning of the game doesn’t need full walls. Then, wall each house off with platforms, leaving just enough room to have a table, chair, and torch on the wall. Make a roof of Platforms as well, and you’ll have your houses ready to go in a quick and resource-efficient way.
You’ll want to fill these houses with the Demolitionist, Guide, Merchant, Nurse, and Gun Dealer. However, the Nurse and Gun Dealer are optional depending on your approach and build, but I recommend getting them anyway, just in case you have to pivot mid-run or unexpected complications. Apart from those residents, however, you don’t have to worry about attracting anymore, so don’t waste any time building beyond their rudimentary housing. You can leave everything else you need to collect or craft out in the open to save time.
Money
You’ll also need to purchase items from the merchants that have moved into your small apartment complex throughout your run. To do so, you have a few options. The first is to sell all of the items and drops you get and don’t need. However, this won’t generate much wealth, so you’ll likely need to focus on building some funds here and there.
There are many methods of quickly making money, but my personal favorite is selling Stained Glass. As you explore underground, you will naturally come across gems. Once you have a few, take some bombs or Dynamite to a desert biome and use it to blow up chunks of sand. The sand can then be smelted into Glass Walls and crafted into Stained Walls. These are quick to make a decent number, and you can get one gold for every 20 that you have.
Plants

You’ll also want to set up a rudimentary farm about midway through your run. This may seem like a waste of time in the grand scheme of the run, but the products that you can craft from it will make the later bosses in the game much more manageable and help prevent failing a run in the final stretches. I think this can be one of the most important parts of the run, even if it seems like a waste of time.
To make your farm, you’ll need to craft some Clay Pots and plant Daybloom in them. You should easily get the resources for these while adventuring, but if you don’t, you can purchase them from one of the merchants staying with you. Once they’re planted, you can check on them and harvest if they’re ready. Then, you can combine the Daybloom with Iron or Lead Ore to make Ironskin potions or with Mushroom to make Regeneration potions.
Farming
While the above section is about farming Daybloom, this section is actually about farming other resources. There are a few different points in the run where you will need to slow down on slaying giant monsters and turn your attention to gathering supplies from your surroundings, so you’ll want to make sure that you correctly understand how to save as much time as possible.
The first time you will need to farm is for wood and chests at the start of the run. To do so, go into a hill that leads underground and start searching for chests. Look for as many as you can find until you get your hands on a solid inventory of bombs. Take those bombs to a forest with tall trees and use them to blow them up for an easy time, gathering large quantities of wood for building and crafting. Then, use the rest of your explosives to expedite your mining, as they are much faster than using a standard pick.
Later on, you’ll have to farm Vertebra from the Crimson. I recommend getting exactly 18 Vetebra, so get used to surviving in the Crimson and blocking up entrances to the underground to avoid dealing with all of the nasty creatures that tend to spawn within them. You’ll also have to farm for Hardmode Ore and Souls of Night, so in the games before the run, make sure you practice gathering those safely and effectively. I usually focus on targeting Crimson Altars as they are one of the safer methods.
You’ll also need to farm in a mushroom biome to prepare for a couple of the required boss fights. To do this, flatten the entire biome in the Hallow and build a rudimentary house with only a bed in it. You can then use that area to farm nine Souls of Light. Once you’re done doing so, catch four Truffle Worms. If you can’t find any spawning after getting the Souls of Light, save and quit to make some spawn in.
This run will also require you to farm Unicorn Horns by making a Hallow biome on the surface of the world. Do this by making a line of Hallow blocks over a desert area and then gather five Unicorn Horns to create a full stack of Holy Arrows.
Hardmode
During this run, you’ll also have to activate Hardmode. This is done during the game and is a permanent effect placed on the world after killing the Wall of Flesh boss. Once it is activated, it will trigger the Hallow and Underground Hallow biomes that will steadily spread and corrupt the surrounding area of the world.
Activating Hardmode also causes both Demon Altars and Crimson Altars to spawn, which you can destroy with the Pwnhammer to get rare resources that will help you survive in Hardmode. The conversion also causes more difficult enemies to spawn in and gives the player access to new items and gear, so you’ll want to practice playing in Hardmode extensively to make sure you can see this run through to the end.
Speedrun Path
Now that you understand the core mechanics of this run, we can go over what you need to do. However, it is essential to note that this path is merely my preferred way through the run. As you practice and work your time down, you may want to get different items or change the order to complete things, and you should feel free to do so. For this section, I’ll also put the steps in bold before offering a description so that you can quickly reference it during your run to help remind you what to do next.
- Farm Early Resources and Build Homes
- Find your way into a cave system to search for chests.
- In those chests, look for any explosives and gear that you can use.
- Use those explosives to farm wood from tall trees and use that wood to build homes.
- Keep an eye out for Gems and Life Crystals as you explore.
- Use explosives to mine quickly.
- Save and Quit to return to the surface rather than running the entire way.
- Establish Yourself
- Sell items to get money and start purchasing starting gear.
- Make your Daybloom farm so that you can harvest it for the remainder of the run.
- From your merchant, buy an Anvil, a Bug Net, and as many Torches as you can afford. Keep them in your inventory for use while exploring.
- From your Demolitionist, buy a stack of Grenades, Bombs, and a stack of Dynamite.
- Create a Hellevator
- Craft a Bucket and fill a few bottles with water.
- Use your Grenades, Bombs, and Dynamite to get as far straight down underground.
- Use Bombs to destroy obsidian and use your Grenades to deal with enemies that you come across quickly.
- Build a rudimentary house at the bottom and move the Demolitionist there.
- Collect any Gems you come across along the way.
- Return to the surface once you have run out of Dynamite and Bombs.
- Buy Glowsticks, Torches, and a Piggy Bank from your Merchant.
- Buy more explosives from the Demolitionist and continue the Hellevator until you reach the bottom.
- Search Floating Islands
- Use your preferred method to find and reach the floating islands.
- Search them until you get the Fledgling Wings and Shiny Red Balloon.
- Farm the Crimson
- See the Farming section of Core Mechanics above.
- Enter the Underworld
- Buy a full stack of Grenades and build a straight line of solid stone blocks to the Wall of Flesh in the Underworld.
- To speed this up, craft a potion of Swiftness with Blinkroot and Cactus if you can do so quickly.
- Make sure to grab a bed in the Underworld when you cross one.
- Block off platforms at the top of houses to protect yourself.
- Build a small house above the lava and move the Guide into it.
- Kill the first boss: Wall of Flesh.
- Runaway from the Wall of Flesh down your bridge and throw Dynamite at it.
- This will quickly kill it, and if you stay at your maximum throwing distance, you won’t have to worry about dodging the lasers.
- Get your preferred gear set up.
- Farm Hardmode Ore and Souls of Night
- See the Farming section of Core Mechanics above.
- Kill the second boss: The Destroyer
- Craft three Mechanical Worms to start.
- Build a small room in the sky with holes in its walls, floor, and ceiling that are platforms.
- Build a small platform underneath it covered in chests.
- Drop Dynamite onto the platform below to deal damage to the Destroyer.
- Kill the Probes as they enter your room; otherwise, they will kill you.
- Repeat this process three times to gather enough materials from the Destroyer to craft a full set of Hallowed Armor.
- Farm Truffle Worms and Hallow Resources
- See the Farming section of Core Mechanics above.
- Kill the third boss: King Slime.
- This boss will be a breeze with the Hallowed Repeater you crafted from the Destroyer and some Ichor Arrows.
- Kill the fourth boss: Eye of Cthulhu
- This boss will be a breeze with the Hallowed Repeater you crafted from the Destroyer and some Ichor Arrows.
- Kill the fifth boss: Brain of Cthulhu
- This boss will be a breeze with the Hallowed Repeater you crafted from the Destroyer and some Ichor Arrows.
- Kill the sixth boss: Skeletron
- This boss will be a breeze with the Hallowed Repeater you crafted from the Destroyer and some Ichor Arrows.
- Kill the seventh boss: Skeletron Prime
- Killing the Skeletron will give you access to the Dungeon area.
- Take a Wire Cutter from the Mechanic to clear out wires as you explore.
- Farm 30 bones so that you can summon the Skeletron Prime.
- Buy any other gear necessary for your ideal build.
- Just dodge Skeletron Prime’s attacks and focus on getting in as much damage as possible during safe moments.
- Kill the eighth boss: The Twins
- Focus on killing Spazmatism first and Retinazer second.
- If you have a hard time with Retinazer’s second phase, hide in a bunker to avoid all shots and then come out and deal damage to him.
- Kill the ninth boss: Duke Fishron
- Use the Hallowed Repeater as it does much more damage against him than the Megashark.
- Build a small platform above the water and stay on it to dodge his attacks as you shoot him.
- Focus on destroying the Sharknado bubbles at the sides of the arena rather than in the middle.
- Keep the items he drops as the Fishron Wings, Tsunami, Tempest Staff, and Shrimpy Truffle are all good upgrades for you at this point.
- Farm the Hallow Surface
- See the Farming section of Core Mechanics above.
- Raid the Underground Jungle
- Go through the biome as fast as possible to get approximately 250 Chlorophyte Ore to craft bullets for the Vortex Beater.
- Keep an eye out for the Plantera Bulb and search for it by creating a long shaft going down.
- If you can’t find any, sleep for a few minutes to accelerate their growth and check again.
- Kill the tenth boss: Queen Bee
- Killing her should be easy with the gear you have at this point.
- Kill the eleventh boss: Plantera
- Equip the Tsunami with Holy Arrows.
- Fly around Plantera while it is in bulb form and go up the vertical shaft you made earlier when it tries to attack you to stay out of range.
- Search the Temple
- Take the Wire Cutter with you to disarm traps.
- Pick up at least one Lihzahrd Power Cell and use it to summon the Golem.
- Kill the twelfth boss: Golem
- Block off the main entrance to the room to prevent other mobs from interfering.
- Remove any traps in your way before starting the fight.
- Dodge attacks by flying over the Golem and deal damage with your preferred build.
- If you move quickly and get lucky, you should be able to reach this boss without losing your buffs from killing Plantera.
- Kill the thirteenth boss: Empress of Light
- Farm for a Prismatic Lacewing at the surface Hallow if you don’t have one already.
- Fight her in the arena where you fought Duke Fishron.
- Her attack pattern doesn’t change across worlds, so you’ll be fine here as long as you practice fighting her in other worlds.
- Use your weapon of preference that works best for your build.
- If you can do so quickly, craft a Feather Falling Potion to give you more mobility in the air throughout the fight.
- Make sure to grab the Terraprisma and Soaring Insignia after killing her.
- Restock One Last Time
- Prepare for the final bosses.
- Get either the Ice Rod or the Snake Charmer’s Flute to help you build things midair in the coming fights.
- Fight the Cultists
- The cultists shouldn’t present much of a challenge, but there is a chance that they won’t spawn right away. If they don’t, save and quit to make them.
- Destroy the Pillars
- Defeat the Vortex, Stardust, Solar, and Nebula pillars with whatever strategies you prefer.
- Kill the fourteenth boss: Moon Lord
- Use your pillar fragments to craft as many Super Healing Potions as you can.
- Use the Stardust Dragon Staff to destroy the Stardust pillar.
- Can also use the Phantasm with Ichor Arrows to attack during certain sections as well.
- Stay flying with the Soaring Insignia and keep as far away from the Moon Lord possible.
- Attack constantly and keep an eye on his head to watch out for the Phantasmal Deathray.
- Kill the final boss: Queen Slime
- This boss fight is much easier and will go quickly using the Phantasm with Ichor Arrows or whatever build got you this far.
Conclusion

Even completing this run, much less getting it down to a competitive time, is impressive. So, be patient with yourself if it takes you a few tries even to get it done in a single run. However, if you want to start with other more manageable categories first, that is a solid strategy, and this guide can still help you with those if you ignore the unneeded parts. Since Terraria has so much RNG, solid runs also require a good dose of luck on top of the skill necessary to perform, so be prepared to get lucky and unlucky in equal measure.
FAQs
Question: How Tall is the Moon Lord in Terraria?
Answer: The Moon Lord does not have an official height, but it is possible that he is 5.669 million feet tall since he could be the size of the moon.
Question: How Long Does it Take to Beat Terraria Normally?
Answer: Most playthroughs of Terraria take around 50 hours to complete for average players.
Question: Which of the Pillars in Terraria is the Easiest?
Answer: The Stardust pillar is the easiest of all of them, so you may want to target that one first and use the Stardust Dragon Staff to make destroying the others easier for yourself.

