

Anthony enjoys deep diving into strategies and explaining them to people whilst they blankly stare back, and is also a big fan of cosplay and creating assets for Cons and events in his spare time.
- Evil Dead Achievements Guide - May 30, 2023
- Just Cause 3 Speedrun Guide – How to Liberate Medici at Breakneck Speed. - May 18, 2023
- Dishonored Speedrun Guide – Corvo’s On The Clock - May 13, 2023
Slay the Spire came out way back in 2017 and remains the gold standard for deck-building roguelites. Slay the Spire draws players in with its simplistic style, but it doesn’t take long for a game full of nuance and strategy to reveal itself. At that point, you’re already hooked!
In this Slay the Spire Tier List, I will focus on the most impactful items in the game, the Boss Relics. These Relics have the potential to win you a run outright.
They also have the potential to destroy a great deck in the making if you pick the wrong one! If you want the lowdown on what Relics to look out for and what ones to avoid like the plague, this tier list is for you. Let’s begin!
Bottom Line Up Front
The best thing about Slay the Spire is even the ‘bad’ Relics and cards have a use. No matter how niche, everything in this game serves a purpose.
With this in mind, this tier list is a guide to what would typically be a strong Boss Relic, and your situation can wildly change this. The only Boss Relic I would advise you never pick up is ‘Runic Dome’ as it can single-handedly ruin your entire run!
Why a Boss Relic Tier List?
Many Relics in Slay the Spire have the potential to be game-changing, but they are usually just a buff you can take without much thought. Boss Relics are different because you’re offered 3 to pick from at once.
As there’s so much choice, these Relics often balance powerful effects with significant downsides. Those downsides can be so nasty that they single-handedly ruin your entire run if you’re ill-prepared.
Selection Criteria

I have separated the Relics based on their impact on a run and how much their downsides can hamper it. Slay the Spire runs are a finely tuned balancing act, and ultimately, there aren’t any ‘bad’ cards or Relics if they work at that moment.
This Tier List leans towards beginner players that aren’t confident playing around things like Curses and lack the game knowledge to turn a failing deck around. Some Relics are stronger if you’re an experienced player
Any Tier List will be subjective with a game as free-form as Slay the Spire. If your play style differs from mine (I almost always prefer thin decks, for example), your experiences may vary.
The Tier List Explained
S – Tier
These Relics are the cream of the crop and will enhance your deck no matter what you’re building. The best of the best!
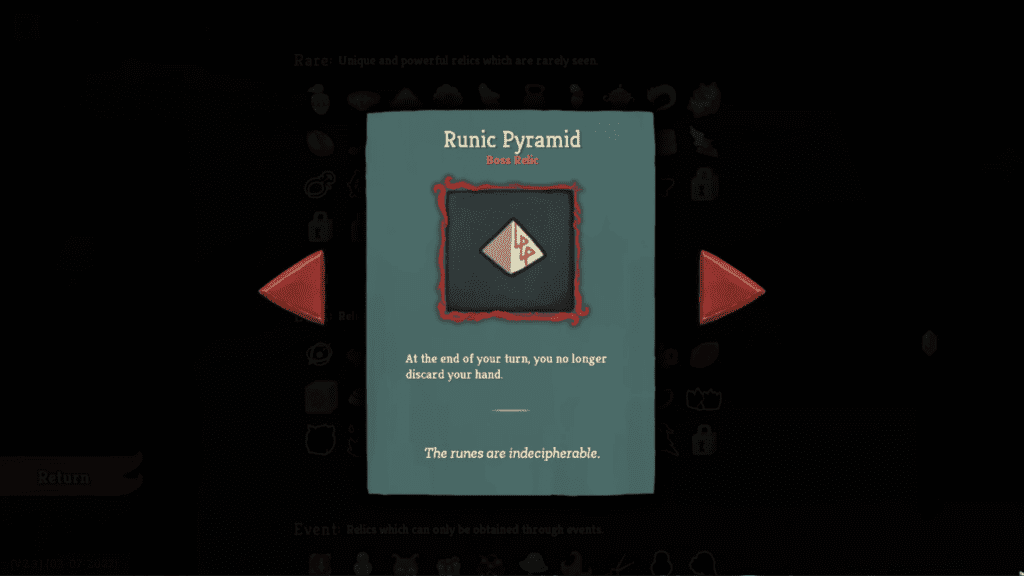
Runic Pyramid
Class: Any
Taking Runic Pyramid simply means you no longer discard your hand at the end of your turn. This is a potent effect and quickly gives access to your entire deck. You’ll always have defensive cards to fend off powerful attacks. You’ll always have your strongest Attacks when it’s your turn to go on the offensive.
Deck building is a constant struggle to balance offence and defence. Runic Pyramid allows you to make as unbalanced a deck as you want with almost no drawbacks. Easily one of the strongest Relics in the game.
Pandora’s Box
Class: Any
This Relic is insane as it Transforms all of your Strikes and Defends!
One of your early priorities is getting rid of your basic cards through Events or the Card Removal Service. Pandora’s Box has an element of luck, but Strikes and Defends are arguably the worst cards in the game.
Changing them into anything else will always be an improvement. The Transformation will often give you incredible cards to work with that can grant your deck a phenomenal power boost. Pandora’s Box is an absolutely game-changing Relic and one you should take almost every time!
Snecko Eye
Class: Any
Snecko Eye increases your draw each turn from 5 to 7 cards. The only downside (which usually isn’t a downside) is it makes you ‘Confused’, which gives each card a random cost.
I think most Slay the Spire players would agree; this Relic is awesome! Confusion is risky because it can screw you over, but I still take Snecko Eye whenever I see it. You can put high-cost cards in your deck, knowing that you will usually pay far less to use them!
There’s always a danger when Confusion works against you, but Snecko Eye lets you build your deck based on card effects alone. No other Relic in the game does that.
A – Tier
Fantastic Relics that you’ll be glad you picked up. These will enhance your deck with minimal downsides, or those downsides will be easy to work around.
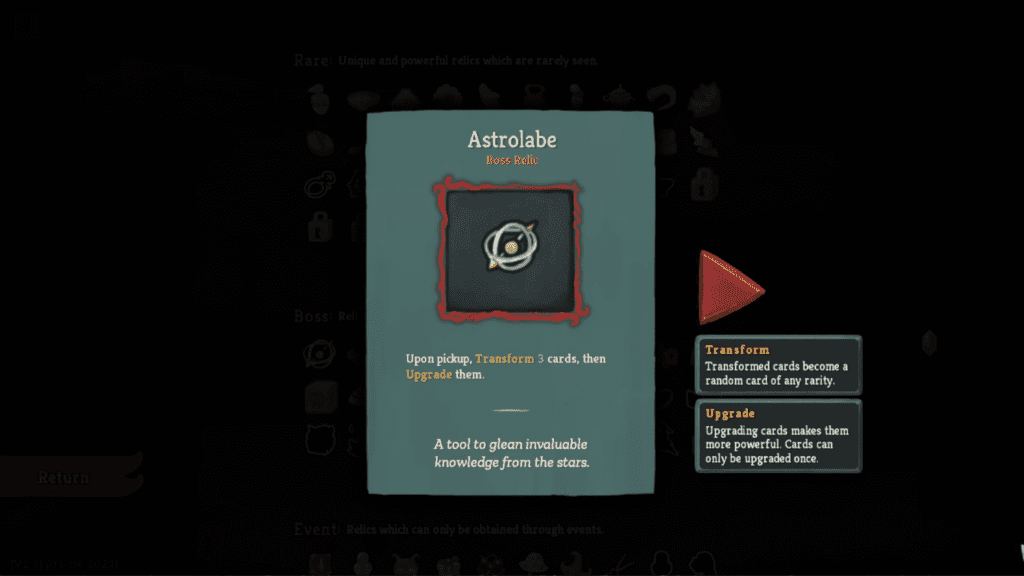
Astrolabe
Class: Any
Astrolabe lets you choose and Transform three cards. Those cards are then Upgraded.
Astrolabe is a Relic you can comfortably take in just about any situation and know you’ll benefit. If you grab it as your first boss reward, you can use it to remove some of your Strikes and Defends.
It can salvage a deck gone wrong and give your run an identity if it doesn’t have one yet. Early on, it’s easy to add cards to your deck in the vain hope that you’ll see others that synergize. Astrolabe allows you to re-roll those cards into something better if that plan fails.
The best thing about this Relic is you get to choose the cards to Transform. Without that, it would sit much lower on the list with Relics like ‘Tiny House’.
Black Star
Class: Any
Part of me wanted to put this Relic in B-Tier, but getting double the Relics from Elites is fantastic! It’s a shame you’ll usually get Black Star a little too late to get the most value out of it.
Black Star can put a run on an excellent footing, but unless you swap your starter Relic, you probably won’t have it during Act 1. Still, if your deck is strong enough to take on Elites in the later floors, you’ll laugh at how many Relics you end up with. A powerful Relic that rewards you for taking those tough battles.
Holy Water
Class: Watcher
Holy Water replaces the Watcher’s Starter Relic; it adds three Miracles to your hand instead of one at the start of each battle, making it a strictly better ‘Pure Water’.
‘Miracles’ are essentially free Energy, and there’s never a situation where you don’t want that! Having three extra Energy allows you to pull off an explosive first turn and start battles on the right foot. Holy Water is arguably the strongest Starter Replacement Relic in the game and only narrowly misses a spot in S-Tier.
Nuclear Battery
Class: Defect
Nuclear Battery is a fantastic Relic and channels one Plasma at the start of combat.
If you’ve not used the Defect in a while, Plasma is an Orb that gives one Energy when it’s passive. When it’s evoked, it provides two. If your deck isn’t evoking Orbs that often, Nuclear Battery gives an additional permanent Energy with zero downsides.
The only issue is its dwindling usefulness if your strategy involves cycling through your Orbs, and some of the best Defect decks do this.
Violet Lotus
Class: Watcher
The Watcher really is spoilt for fantastic Relics! With Violet Lotus, you gain one additional Energy whenever you exit ‘Calm’ Stance.
Violet Lotus is a brilliant Energy generator. If your deck is thin and you have even just two cards that get you into ‘Calm’ Stance (‘Vigilance’, for example), you’ll get a lot of free Energy each battle. Lots of free energy means you can use high-cost cards more freely or batter your opponents with multiple low-cost ones.
Two incredible Watcher Relics narrowly miss the top tier. That says less about how good these Relics are and more about how broken the ones are in S-Tier! Rest assured, Holy Water and Violet Lotus are some of the best Relics you can pick up as the Watcher.
Wrist Blade
Class: Silent
Wrist Blade is one of my favourite Relics because I love Shiv decks… I also usually push way too hard to make them happen! Wrist Blade makes any Zero Cost Attacks deal an extra four damage, so you can see the synergy there.
Of course, Shivs aren’t the only Zero Cost Attacks in the Silent’s arsenal. If you can load your deck with them, Wrist Blade can add up to hundreds of extra damage throughout a run.
B – Tier
B – Tier Relics all do something great, but some have more notable downsides. These downsides will sometimes require a playstyle alteration and can start to hinder a run if you’re not careful.
Black Blood
Class: Ironclad
Black Blood is a solid comfort Relic and an upgrade on the Ironclad’s Starting Relic, increasing your HP gain after combat from 6 to 12. 12 free HP at the end of every battle is a big deal and allows for more aggressive play. This also pairs well with ‘Runic Cube’, which allows you to draw cards whenever you take damage.
You’ll be able to Smith at Rest Sites far more often as your HP is always getting topped up. The only thing keeping this Relic in B-Tier is once your deck is strong enough to keep you from taking damage, Black Blood becomes somewhat redundant.
Empty Cage
Class: Any
Empty Cage simply lets you choose and remove two cards from your deck. This Relic is one of the least impactful in the Boss Relic pool, but free card removal is always good. There really isn’t much to say about Empty Cage; it’s a solid relic and is great for streamlining your deck or removing pesky Strikes and Defends.
Frozen Core
Class: Defect
Frozen Core replaces the Defects Starter Relic. If you end your turn with empty Orb slots, you channel one Frost. This Relic is tricky to place as it fundamentally changes how you play the Defect.
Not necessarily bad, not necessarily good either. Sadly, it doesn’t hold a candle to ‘Nuclear Battery’ (in A-Tier), but if you’re looking for more defensive options, it’ll certainly do that.
Fusion Hammer
Class: Any
Fusion Hammer gives 1 Energy at the start of each turn, but you can no longer Smith at Rest Sites. This downside sounds horrendous, but as the stipulation is ‘at Rest Sites’, you can still upgrade cards with things like ‘Apotheosis’ and ‘Armaments’.
If you’re sorely needing upgrades, I would recommend against taking Fusion Hammer as Slay the Spire will punish you for having weak cards later.
Hovering Kite
Class: Silent
Hovering Kite grants 1 Energy per turn the first time you discard a card. Depending on how your deck is shaping up, it’ll either be easy or impossible to make this happen.
This Relic is a little tricky to rate as if your deck discards regularly, you’ve got an S-Tier Relic with no downsides. On the flip side, if you don’t discard, Hovering Kite is wholly useless, and you can do your deck more harm than good by adding cards trying to make it work.
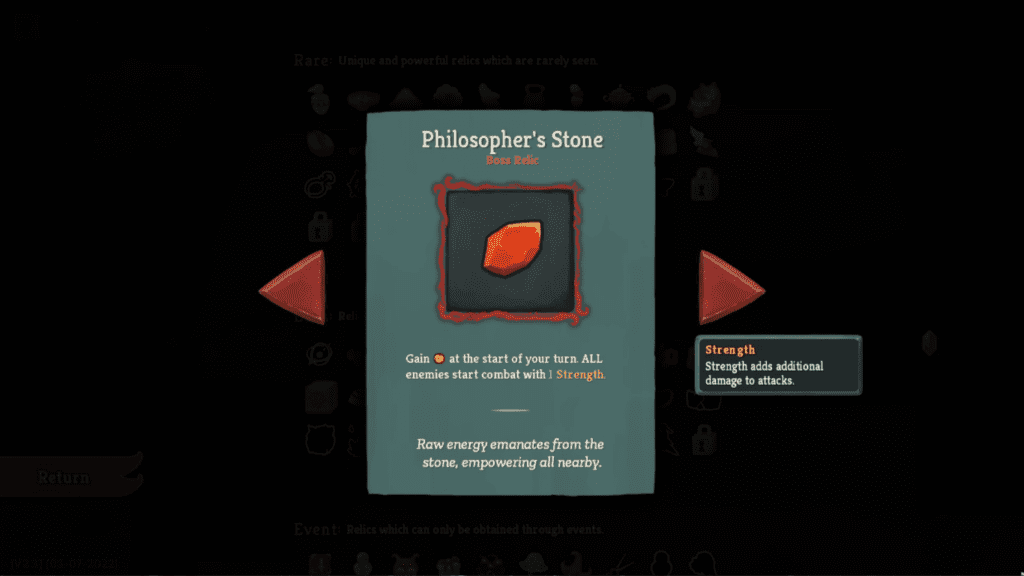
Philosopher’s Stone
Class: Any
Philosopher’s Stone grants an additional energy per turn, but the caveat is all enemies start with 1 Strength.
Strength is a much more dangerous buff on enemies that attack you with multiple hits. A good example of this is the Byrds in Act 2. Usually, they do one damage five times. With a single point of Strength, they do two damage five times, doubling their attack!
This same enemy also has the ability to give itself one extra strength anyway, so you better have some great defences to fall back on!
You can deal with the extra Strength on most enemies, but it can catch you unawares if you’re not ready.
Sacred Bark
Class: Any
Sacred Bark simply doubles the effectiveness of potions. It may not sound like much, but if you usually stick your nose up at potions, now’s the time to stop!
For a one-time use resource, the usefulness of potions can’t be overstated in Slay the Spire. Potions can single-handedly win fights and save your run from the jaws of defeat.
Boosting these already powerful items is a win/win in my book! Sadly, this Relic finds its home in the middle of the pack because some runs simply aren’t blessed with decent potions. If you’re on one of those runs, ‘Sacred’ Bark is anything but.
Slaver’s Collar
Class: Any
Slaver’s Collar gives you one additional Energy to play with but only during battles against Bosses or Elites.
This Relic is excellent and has zero downsides in the fights where you’ll need it most. Of course, giving no benefit in standard battles is a shame, but the good still outweighs the bad.
Slaver’s Collar can make deck building a challenge as you’ll usually add cards based on the Energy you have to play with. You can end up with a restrictive deck unless you’re battling those stronger foes.
It’s worth mentioning that you will miss that extra Energy in regular fights on higher Ascension levels. From as early as Ascension 2, regular enemies hit harder and Slaver’s Collar will not help.
Velvet Choker
Class: Any
Velvet Choker is a compelling Relic because it grants that valuable extra Energy but limits you to playing only six cards per turn.
If you’re playing with a deck with lots of zero-cost cards, Velvet Choker can single-handedly ruin your deck! If not, this Relic has virtually no downsides. This Relic is powerful, but I always enjoy being able to throw my entire hand at my opponents. Velvet Choker runs counter to that.
C – Tier

In C-Tier, you’ll find Relics that are much more situational. There is still value to be had here, but these Relics can be very risky picks.
Calling Bell
Class: Any
Calling Bell gives you three Relics and the unique curse ‘Curse of the Bell’, an irremovable, useless card.
Although not in the description, you actually obtain 1 Common, 1 Uncommon and 1 Rare Relic specifically. Calling Bell is tricky to place because the 3 Relics can be terrific!
However, as you don’t get to choose, they can have a minimal impact on your run, and you get cursed for it. Curse of the Bell is just annoying, and if you run a thin deck, you’ll be seeing it A LOT. Fortunately, Curse negation from Relics like ‘Omamori’ remove the downsides from Calling Bell if you stumble across it.
Coffee Dripper
Class: Any
Coffee Dripper gives you one extra energy at the start of each turn, but you can’t Rest at Rest Sites.
I was tempted to put this Relic in B-Tier, but C-Tier is more appropriate as this list is aimed at beginners. Not being able to rest at that last campfire before a boss truly punishes novice players.
If you’re confident at managing your HP and have solid defences in your deck, this could be an A-Tier Relic, but if you’re prone to the odd miscalculation, Rest Sites are an integral part of your runs.
Cursed Key
Class: Any
I’m not a fan of any Relic that adds curses to your deck. Cursed Key at least allows you to avoid those curses, as you’ll only get one if you open a non-boss chest.
Cursed Key is another Relic that gives one extra Energy at the start of your turn and opens up great options for deck-building. If you can avoid chests on the map, Cursed Key can net you that Energy increase for free!
In practice, this is trickier than it looks, and you can miss out on fantastic rewards in those chests you’re avoiding! Still, just like with ‘Calling Bell’, curse negation from things like ‘Omamori’ will work here.
Inserter
Class: Defect
Inserter gives an additional Orb Slot every two turns.
Inserter is a great Relic that can make the Defect an absolute powerhouse in a long fight! The downside is that you won’t notice the benefits in a shorter one. It takes two turns to see any value from this Relic, and not every Defect build wants lots of orb slots.
Inserter works exceptionally well with ‘Consume’, which gives you 2 Focus at the cost of removing an orb slot.
Fun fact, Inserter is a nod to Factorio, a game about building factories that’s way more fun than I just made it sound!
Ring of the Serpent
Class: Silent
Ring of the Serpent replaces the Silent’s starting Relic and increases your starting draw by one card.
This Relic falls short because the Silent already has a good starter Relic in the ‘Ring of the Snake’. I always like to start a fight with an explosive first turn, and starting with two extra cards (which Ring of the Snake provides) is far more impactful.
You will need to be on your 3rd turn for Ring of the Serpent to give you more draw power than ‘Ring of the Snake’. It’s not terrible; there are just far better Boss Relics!
Runic Cube
Class: Ironclad
Runic Cube is the only Boss Relic that triggers when you take damage and whenever you do so, you draw one card.
I’m not a fan of taking damage on purpose, especially when HP is so precious but extra draw power is always welcome. Nothing beats starting your turn with a ton of cards but trying to get the most out of Runic Cube is risky.
This Relic pairs nicely with something like Black Blood to top off your HP after each fight but doing this pushes you into a dangerous play style.
Mark of Pain
Class: Ironclad
Mark of Pain is an Ironclad exclusive Relic that gives one Energy but throws two unplayable ‘Wound’ cards into your deck.
I can’t stand having my deck clogged up, so two useless cards is horrendous. More draw power or a large deck can mitigate this, but it’s a hassle to work around unless your deck is already primed for it.
Cards like ‘Evolve’ cancel out ‘Wound’ cards as they allow you to draw a card whenever you draw a status card (Wound is a status). Still, you have to jump through hoops to get synergies like this off the ground, which lands ‘Mark of Pain’ squarely in C-Tier.
Tiny House
Class: Any
On paper, Tiny House does it all! Upon pickup, you gain the following:
Obtain one potion.
Gain 50 Gold.
Raise your max HP by 5.
Obtain one card.
Upgrade one random card.
At face value, Tiny House upgrades your run in 5 different ways with no downsides; how is that a bad thing? The issue is that 50 Gold isn’t much, 5 HP isn’t a lot, the card could be useless, and so could the upgrade. I’m not trying to be a pessimist, but Tiny House rarely substantially impacts your run.
Tiny House would go up a Tier if you could pick the card to upgrade (an upgraded Strike is such a waste!), but as you can’t, C-Tier is appropriate. A comfort relic, and that’s all.
D – Tier
Relics with such niche benefits, something else will almost always be better. These Relics are also potential run killers, so handle with caution.
Busted Crown
Class: All
Busted Crown permanently grants one extra Energy but reduces your card choice after a battle from 3 all the way down to 1! Energy is great, but it’s a hard sell for severely hampering your selection of cards.
Busted Crown is a beginner’s trap because you don’t feel the downsides immediately. You’ll only realise the mess you’re in after you’ve made it through an entire Act without improving your deck. If you’re sitting pretty at the end of Act 2, it’s okay, but I’d take just about anything else!
Ectoplasm
Class: Any
Gaining an extra energy per turn with the downside of never being able to collect gold is so much worse than it sounds.
The wording of Ectoplasm is particular and means you can’t gain gold from ANY source, not even Events. Energy is lovely, but Shops are so crucial in Slay the Spire!
Whether you use them to remove cards, buy powerful Relics or pick cards from a generous selection, kiss it all goodbye with Ectoplasm. More trouble than it’s worth unless you get it late in a run.
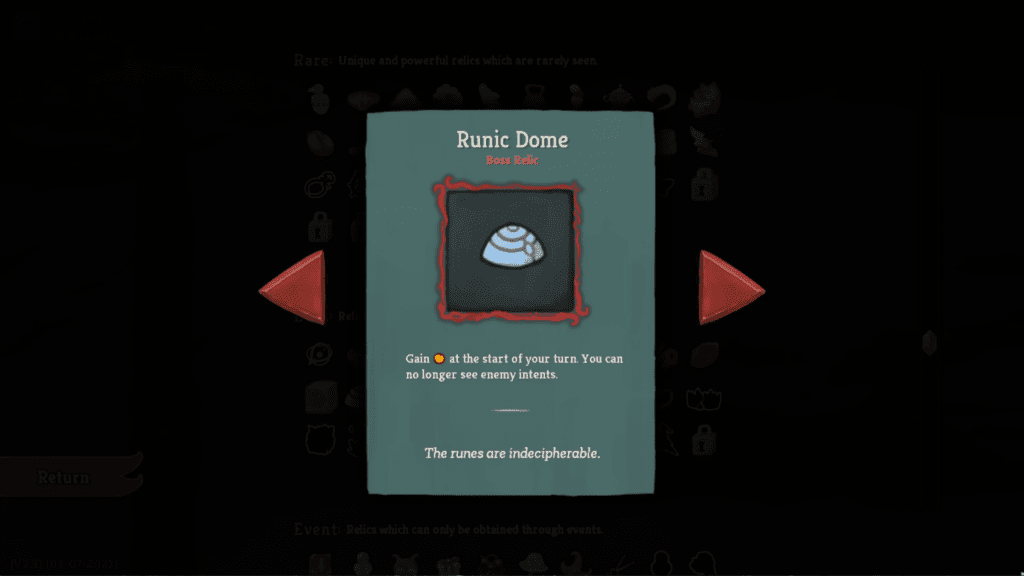
Runic Dome
Class: Any
If an E-Tier existed on this list, Runic Dome would be in it. This Relic gives one extra Energy per turn, but you can’t see enemy ‘intents’ from then on.
Runic Dome is a run ender. Losing the ability to tailor your turns to your enemies’ actions has got to be the most savage effect in Slay the Spire! You’ll Block when nothing is coming; you’ll Attack into Thorns… All the Energy in the world just isn’t worth it.
If you play at the highest level, then sure, maybe you can make Runic Dome work, but at least 90% of the players aren’t there yet! If I had to pick between Runic Dome and no more Relics for the rest of the run, I’d choose the latter any time.
Sozu
Class: All
Sozu grants one extra Energy per turn, but the downside is you can’t use potions.
Potions are huge in Slay the Spire! Considering their brief effects, I’ve lost count of how many runs have been saved by clutch Potion plays. Sozu might not be in this tier if there weren’t so many insanely powerful potions but as it stands, journeying up the Spire without them puts you at an incredible disadvantage.
Useful Resources
Snecko Eye isn’t as random as it appears, and some interesting math calculates what this Relic throws at you! If you’re curious, you can read about it here.
To put it nicely, Slay the Spire has somewhat of a ‘passionate’ fan base. If you want to chat about the game with other players, I’ve found the best place to do so is on the Official Discord. In my experience, they are very welcoming to newcomers as well.
Frequently Asked Questions
Question: Should I Avoid Your Low-rated Boss Relics?
Answer: The best thing about Slay the Spire is even the ‘bad’ Cards and Relics will have a niche use. Unless it’s ‘Runic Dome’ (please don’t take this unless you want to lose!), anything in the tier list can work. Just think if there’s any way a Relic will be detrimental to your deck.
Question: Should I Swap My Starter Relic for a Boss Relic at the Start of the Game?
Answer: This is tricky because every class has a decent Starter Relic. I usually go for it, but if you’re new to a character, stick with their default.
Question: What is the Best Boss Relic in the Game?
Answer: As with anything in Slay the Spire, it’s situational. Still, I’d pick Snecko Eye. Out of the Boss Relic Pool, Snecko Eye is the one Relic I would take over all the others almost every time.
Even though it has the potential to ruin a run, it also has the potential to lay waste to any boss in the game. The best thing about it? Snecko Eye can do that with a barely coherent deck that makes no sense. Let Snecko Eye bring the madness!
Conclusion
One of the most charming things about Slay the Spire is how balanced everything is. There’s never one card or Relic that’s the best 100% of the time. With this being the case, this Tier List is a loose guide at best.
If you’re an experienced player or prefer thick decks, your own list may vary wildly from this one. There’s no wrong answer, and that’s why Slay the Spire remains so beloved after all these years.