

Anthony enjoys deep diving into strategies and explaining them to people whilst they blankly stare back, and is also a big fan of cosplay and creating assets for Cons and events in his spare time.
- Evil Dead Achievements Guide - May 30, 2023
- Just Cause 3 Speedrun Guide – How to Liberate Medici at Breakneck Speed. - May 18, 2023
- Dishonored Speedrun Guide – Corvo’s On The Clock - May 13, 2023
Cuphead was released to widespread acclaim with its charming art style, wonderful soundtrack, and brutal difficulty. The effort Studio MDHR put into this title is staggering. Every frame of animation in the game is hand-drawn! If that wasn’t impressive enough, some backgrounds include real-life models that were painstakingly scanned into the game!
Challenging games draw Speedrunners like moths to a flame, and Cuphead is no exception. Competition is fierce, but with the long-awaited Delicious Last Course DLC coming out soon, there is no better time to try it yourself!
In this Cuphead Speedrun Guide, I will explain everything you need to know to start speedrunning the game, along with spicy tech and tricks to fly through the game fast and safely. Let’s dive in!
Before You Begin

There are many ways you can Speedrun Cuphead. Still, this guide will focus on the No Major Glitches – All Bosses – Regular Difficulty Category on Speedrun.com.
The category name is a mouthful, but it uses Version 1.2 of the game. This is the current version of Cuphead, which means even if you are playing on a console, this is the version you have.
If you’re using Livesplit (A popular Speedrun timer), you can find some great presets for that here: https://www.speedrun.com/cuphead/resources.
The top runs on Speedrun.com use a loadless timer where the timer pauses on loading screens. This eliminates any hardware advantages. More information on this can be found in the Useful Resources section toward the end of this guide.
And finally, it would be impossible to guide you through every fight step by step, so this guide assumes you have some knowledge of the boss’ battles. I will go over the best weapons to use and strategies to defeat each boss quickly, and how to stay alive!
Core Mechanics
Choosing your Weapons
The most popular weapon combo is the Spread Shot and Lobber.

Spread Shot does significant damage, but you have to be close because of its poor range, which is risky. That’s where the Lobber comes in. The range does not affect the Lobber, and it does reliable damage at any distance.
Both the Spread Shot and Lobber have significant EX attacks, too. EX Spread Shot lets out 6 large projectiles. These deal decent damage, but usually, a few will miss. The EX Lobber throws out a single powerful shot that you can aim anywhere.
Each weapon covers the flaws of the other, and learning when to swap between them will come with practice.
Damage Boosting
When you’re confident in your skills, health becomes just another resource. The Damage Boosting technique can make a tremendous difference to your times. Simply put, Damage Boosting is when you allow yourself to get hit so you can continue to dish out damage. If you know you have the health to spare, you can spend it on dealing as much damage as possible instead of avoiding attacks.
This is a risky technique, but there are parts of almost every battle where you can damage boost to end the fight quicker.
Lobber Traps
You can create a wall of projectiles with the Lobber if you shoot straight up repeatedly. This is called a Lobber Trap when you set this up for enemies to move through. A few bosses really hate Lobber Traps; more on these later on.
Kaleva Swapping
Named after the Speedrunner who came up with it, Kaleva Swapping is a powerful technique once you’ve mastered it. You will use Spread Shot a lot during your run, but usually, you will want to use the Lobber EX. Kaleva swapping allows you to quickly switch to that EX attack and back to your Spread shot.
The timing will take a while to get used to, so practice this in the Tutorial mode. Hold the fire button and press EX attack once, quickly following your Weapon Swap twice. If it’s worked, you’ll use the EX of the weapon you’re not currently using whilst keeping up a constant stream of shots.
If you can’t get this to work, try waiting a fraction of a second between pressing EX attack and Weapon Swap.
Risk vs Reward
A death in Cuphead wastes more time than missing a few shots. Speedrunning rewards aggressive play, but safer strategies are more viable if you’re one hit away from death. Learning to read the situation will come with time.
The Run
It goes without saying, but this is a crazy Speedrun that’s full of lots of cool tricks. I hope you’re ready!
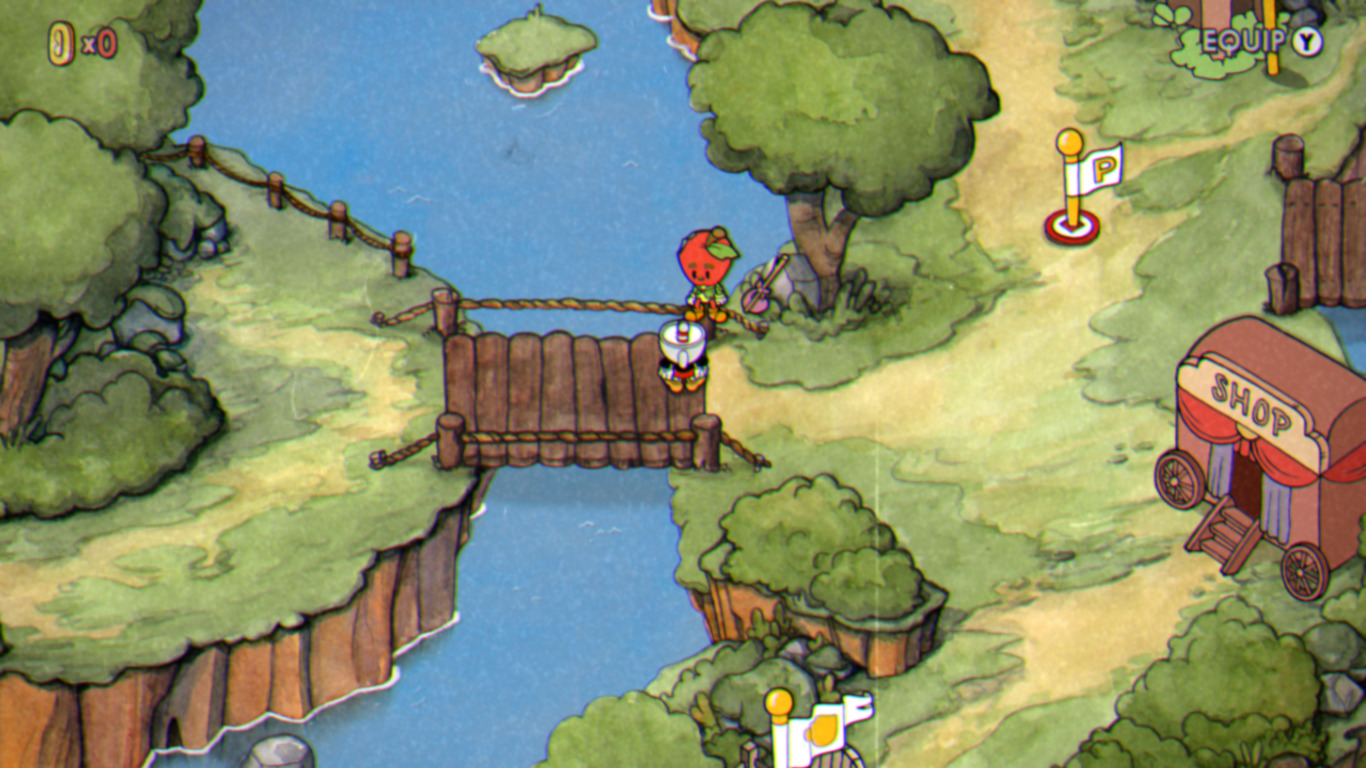
The Tutorial is optional, so once you’re in the house at the start of your adventure, quickly hit Pause and ‘Exit to Map.’ Head across the bridge but don’t forget to talk to the Apple as they give 3 coins which you need. 3 coins aren’t enough for our Spread Shot and Lobber, so even though this is an ‘All Bosses’ run, your first level is actually a Run ‘n Gun.
Forest Follies
This stage is fairly simple, and your goal here is to collect all 5 coins. They are all in plain sight, and one requires a parry to reach. Simple or not, taking a couple of hits early on can quickly make this stage rather scary, so be careful!
Take your time, as a few lost seconds from the safe play are always better than repeating the stage.
Shop
Now you’ve got enough coins, head down to the shop and buy Spread Shot and Lobber. Quickly equip them when you exit, and ideally, you want Lobber in your first slot.
Root Pack
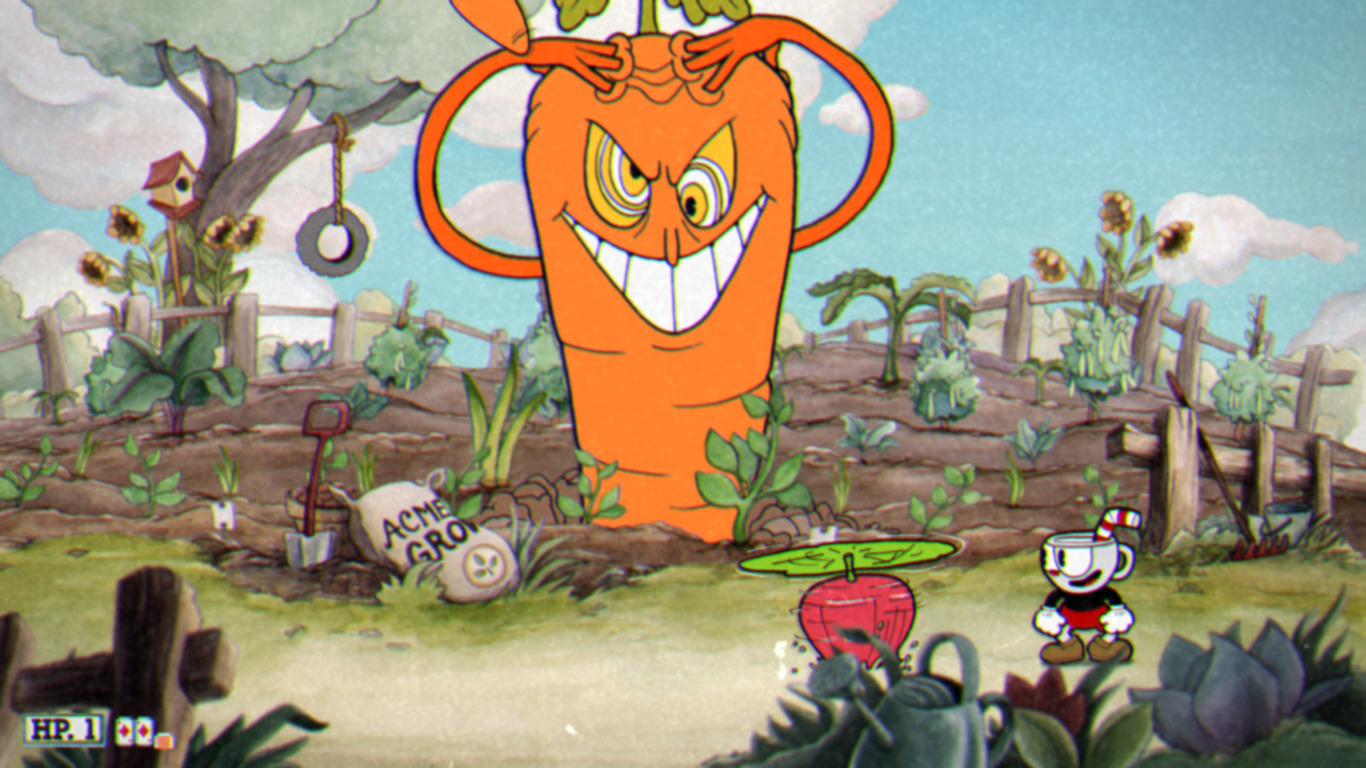
You can use a clever trick to make the first boss stage in this fight shorter! The 2nd enemy you face in the Root pack is the Onion, but if you don’t attack, it will just leave on its own after a few seconds.
Sadly, the downside to this is it makes the Carrot phase of the fight harder. If you can handle the pressure, jumping with Spread and using your EX attacks will make quick work of this fight, and if you have the health to spare, Damage Boosting through the Carrot’s beams will make it even faster.
Ribby and Croaks

Ribby and Croaks have a lot of attacks for such an early battle!
Lobber is absolutely the safest weapon for this fight, but if you’ve got the timing down, you can deal a ton of damage with Spread for the first phase of this fight. Depending on how much damage you’ve done here, particularly when the 2nd frog attacks, the next phase may be shorter, so bear this in mind.
In the last phase against the slot machine, Lobber will be the weapon of choice once again. If you’re feeling brave, try to land some EX Lobber shots, but at this point in the fight, you’ll waste a lot of time if you die, so only do this if you’re comfortable or have the health to spare.
Goopy Le Grande
If you thought Ribby and Croaks were tough, don’t worry. Goopy is much easier!
The key to this fight is maximizing your damage through accurate shots. The damage will really add up if you can track Goopy through the air! The Lobber is great when Goopy is small, but swap to Spread when he gets larger and when he tries to attack you.
When Goopy is about to enter his last phase, switch to Lobber and spend all of your EX attacks. This won’t kill him but will make the Gravestone phase at the end very short. Damage Boosting can close the fight out in seconds if you’ve got the health!
Hilda Berg
Welcome to Cupheads’ first flying stage. I hope you brought a parachute!
Flying stages reward accuracy, so focus on landing your shots. Staying back will give you extra time to dodge attacks, and remember, you can spend 5 EX cards to do a Super attack, which does a ton of damage. Make sure you use this whenever it’s available.
There’s an excellent Damage Boost opportunity when Hilda charges at you if you’re confident. Keep shooting when she charges, take the damage, and fire an EX shot when she comes back through. It will follow and hit her multiple times if you’ve done it right!
It’s important to note that when Hilda is screaming before transforming into her last form, she’s immune to damage even though it looks like you can hit her. You can shoot to get more cards but don’t waste any EX shots until she’s transformed.
Cagney Carnation

Cagney’s arena can feel really claustrophobic, as he has an annoying attack that spawns more enemies. Unless you’re really confident, make dealing with them a priority, as this fight can quickly get out of hand.
An excellent place to stand is on the platform right in front of Cagney’s face. Lock yourself in place and let your Lobber get to work. Any time Cagney charges, you can dodge and use Spread for a little extra damage.
The hardest attack to avoid is the seed barrage, as you will need to stop shooting Cagney to deal with the extra enemies. Cagney’s last phase is easier to hit with Spread, and you can stand on the same platform right at the front. Dodge any vines that come your way, and remember, you can duck under Cagney’s spit attack even though they look too low.
If you’re feeling bold, you can jump over the Vines if they are about to hit your platform and Kaleva Swap in mid-air. This does a ton of damage if you can pull it off!
Baroness Von BonBon

The hardest thing about this fight is how much you have to memorize. You will face 3 random mini-bosses before the Baroness shows up. They aren’t tough on their own, but fighting 3 without getting hit is tricky.
You’ll really want to save as much health as possible during the mini-bosses as you can pull off a huge damage boost at the end of this fight.
The Baroness herself will appear at the top of the castle after 3 mini-bosses have fallen. Stand right underneath her and repeatedly attack with Spread and EX attacks. If you’ve not taken any hits until this point, just power through her attacks, and she will go down long before you do!
Wally Warbles
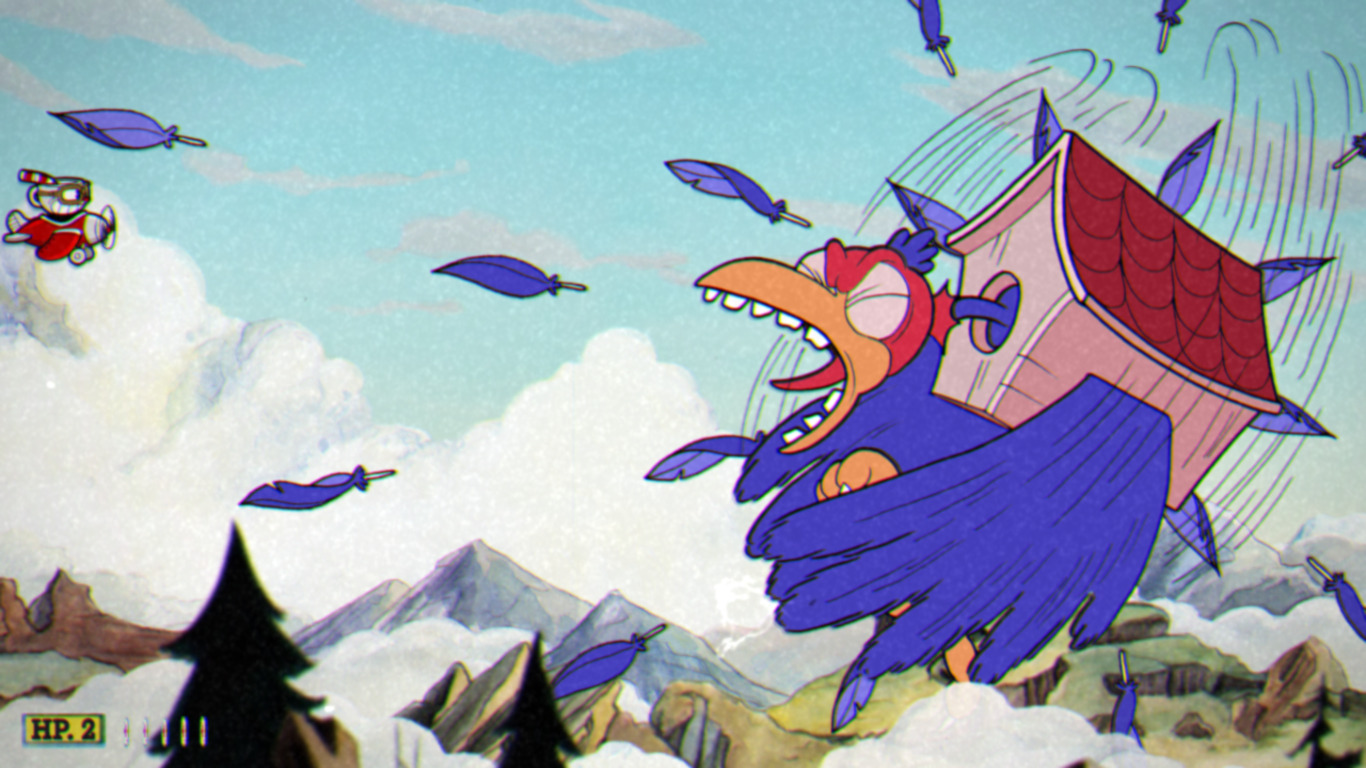
A lot is going on in this battle, but you can easily avoid most attacks if you stay back. As you did in the Hilda fight, use your Super attack when it’s ready.
The tricky phase in this battle is when the baby bird flies around, surrounded by eggs. If you save a Super attack for this, you can let it off right in his face when he gets close, which does significant damage.
Finally, when Wally is on the stretcher, you can use mini bombs from above, or if you have space, you can EX attack him from the back of the screen for a quick last phase.
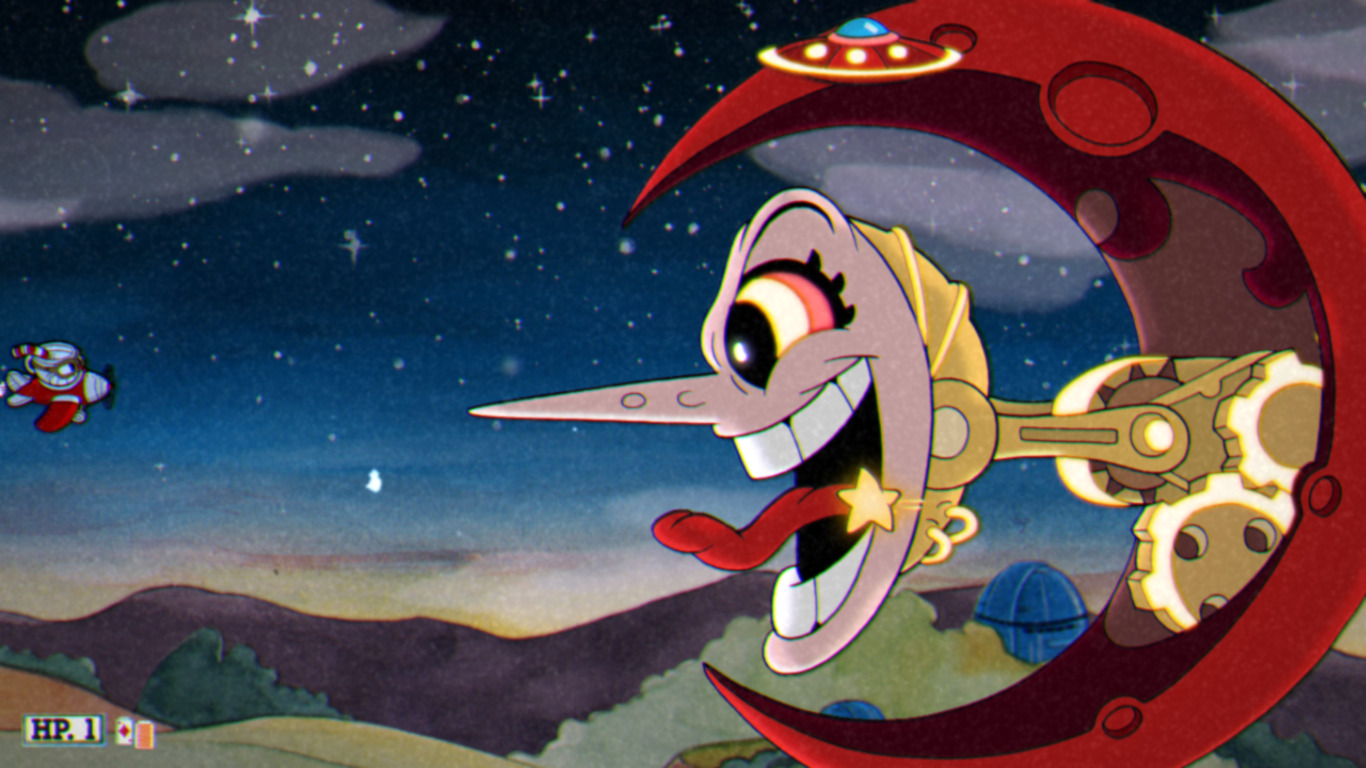
Djimmi The Great
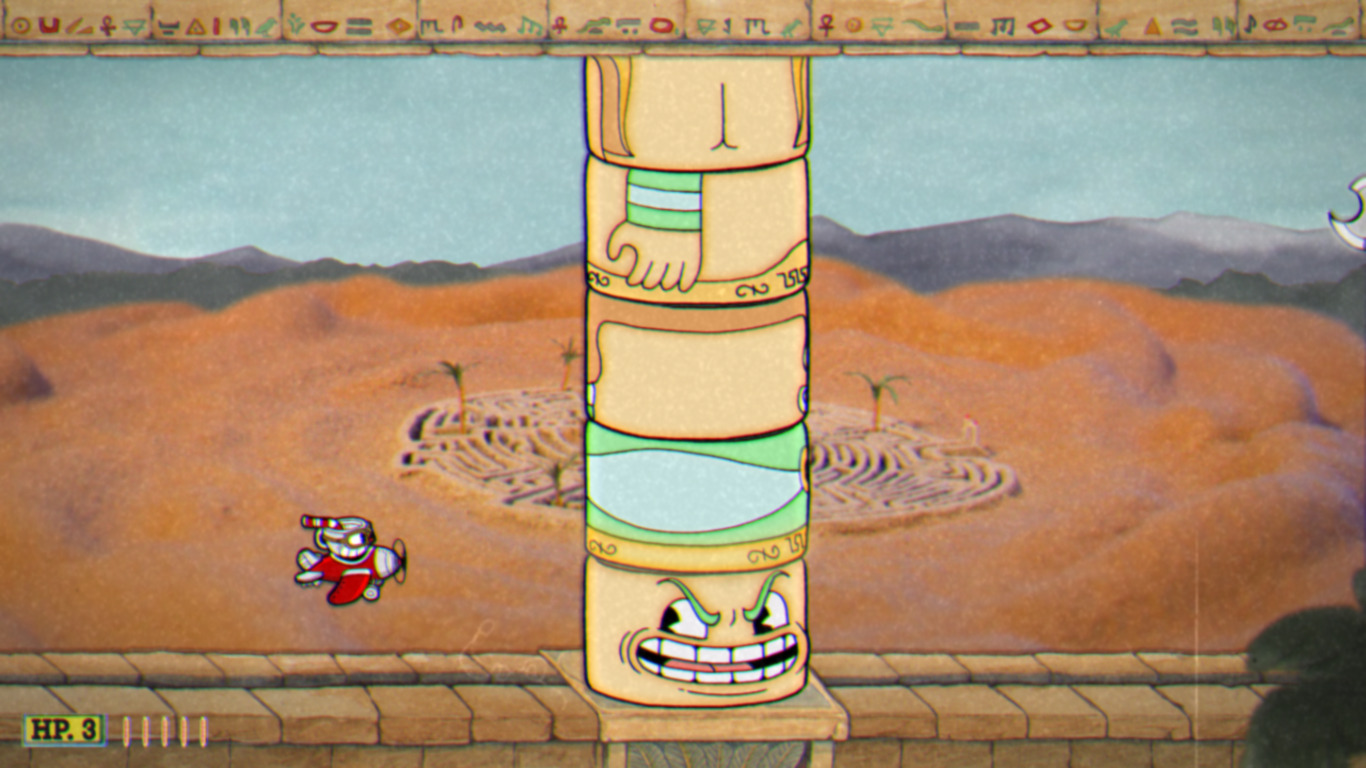
This is easily the longest battle so far, and although there’s nothing too tricky here, you can take damage if you’re careless.
You can use a cool piece of speedrun tech in the pillar phase of this fight! Instead of just shooting through the heads, carefully land 4-5 normal shots into each, followed by a mini bomb. The health of these heads is tied to the boss’s overall health, and as you’re doing extra damage here, the next phase will be much faster. You can EX or Super through the rest of the battle as you see fit, but I prefer waiting for Super attacks as they give a little protection right afterwards.
Beppi, The Clown

The trickiest part of this battle by far is the last phase. Fortunately, there’s a great way to beat it fast, so make sure you save your EX attacks until the end!
Use the Lobber for the bumper car section of the fight, and don’t ignore the ducks overhead. If you don’t hit them, they will hit you. Once you’ve taken care of the bumper car, you will use Spread for the rest of the battle.
The last phase is brutal, but you can beat it before it even starts if you’ve saved your EX attacks! Set up a Lobber Trap, then stand right in the middle of the screen. As soon as the boss appears, spam your Spread EX. When those run out, jump to the platforms above and keep shooting. Beppi will go down before the worst shows up if you land your shots.
Grim Matchstick

The Gatekeeper for Isle 3 is no joke with completely random platforms, but there are things you can do to simplify the fight and walk away with a fast time.
Lobber is the best weapon to use here, but you can use Spread if you’re confident up close. You will always be the safest at the top of the screen, so you can just rain down damage and focus on avoiding attacks if you’re using Lobber. EX Lobber is great to use whenever available, especially in the last phase. You can jump above the screen boundary and land powerful shots from relative safety.
This fight has one of the rare moments where you may not want to shoot all the time. During the last phase, Grim fires projectiles that split if you shoot them. Ease off the trigger and time your shots if you’re struggling here.
Rumor Honeybottoms
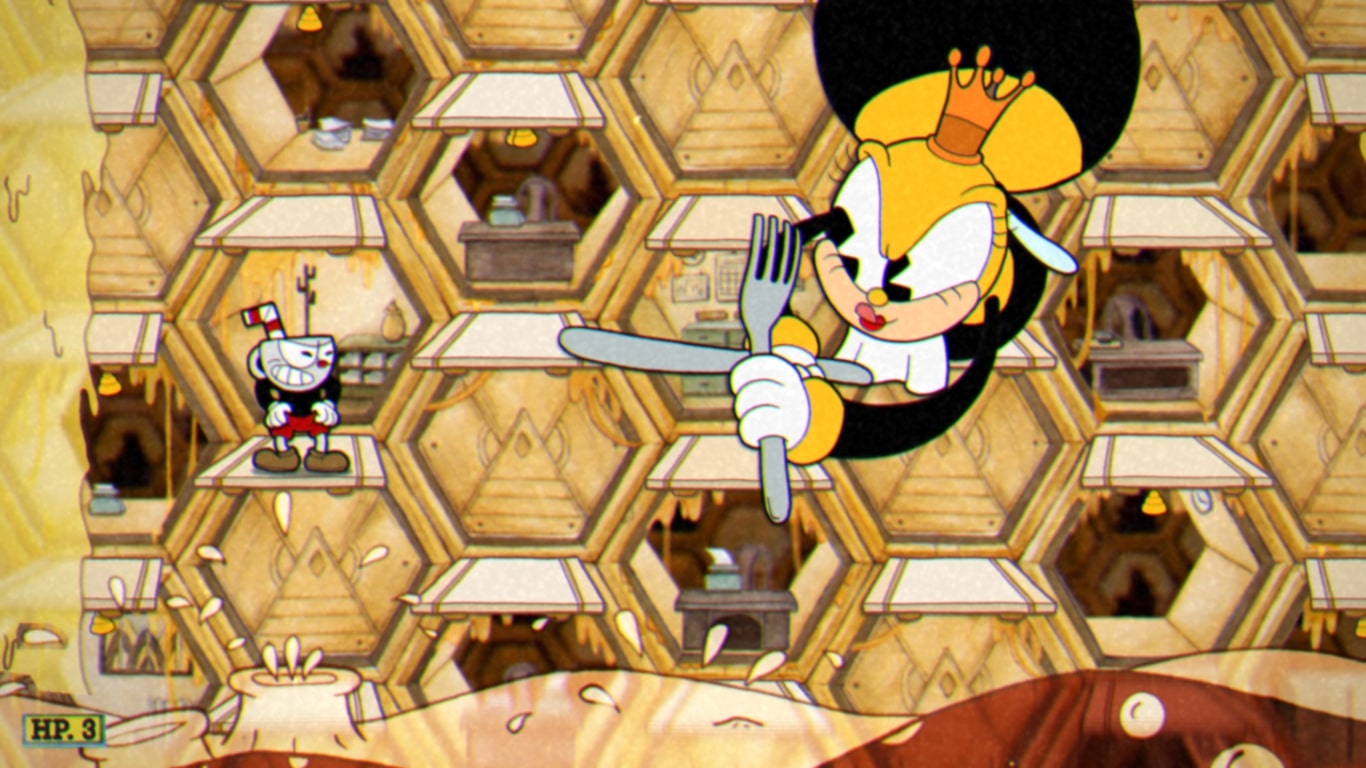
Honeybottoms has a nasty last form where she becomes an aeroplane and chases you up the screen (now, that’s a sentence!). The strategy is simple, do so much damage that her flight never gets off the ground!
Thanks to the random platforms, this fight can get real tough fast. Remember, dealing damage is excellent, but surviving is important too.
This fight will always start the same way, with a Police Bee entering the arena from the right. You can get behind him and follow him across the screen with your Spread Shot. This sounds easy, but be careful as you have little room to work with if you’re trying to maximize damage.
After you’ve defeated the Bee, Honeybottoms will make 2 attacks. You’ll want to be up close, hitting her with Spread, and try some Kaleva Swaps, too, if you can. The goal is to do so much damage during these attacks that she has almost no health left before entering her last phase.
Dr. Khal’s Robot
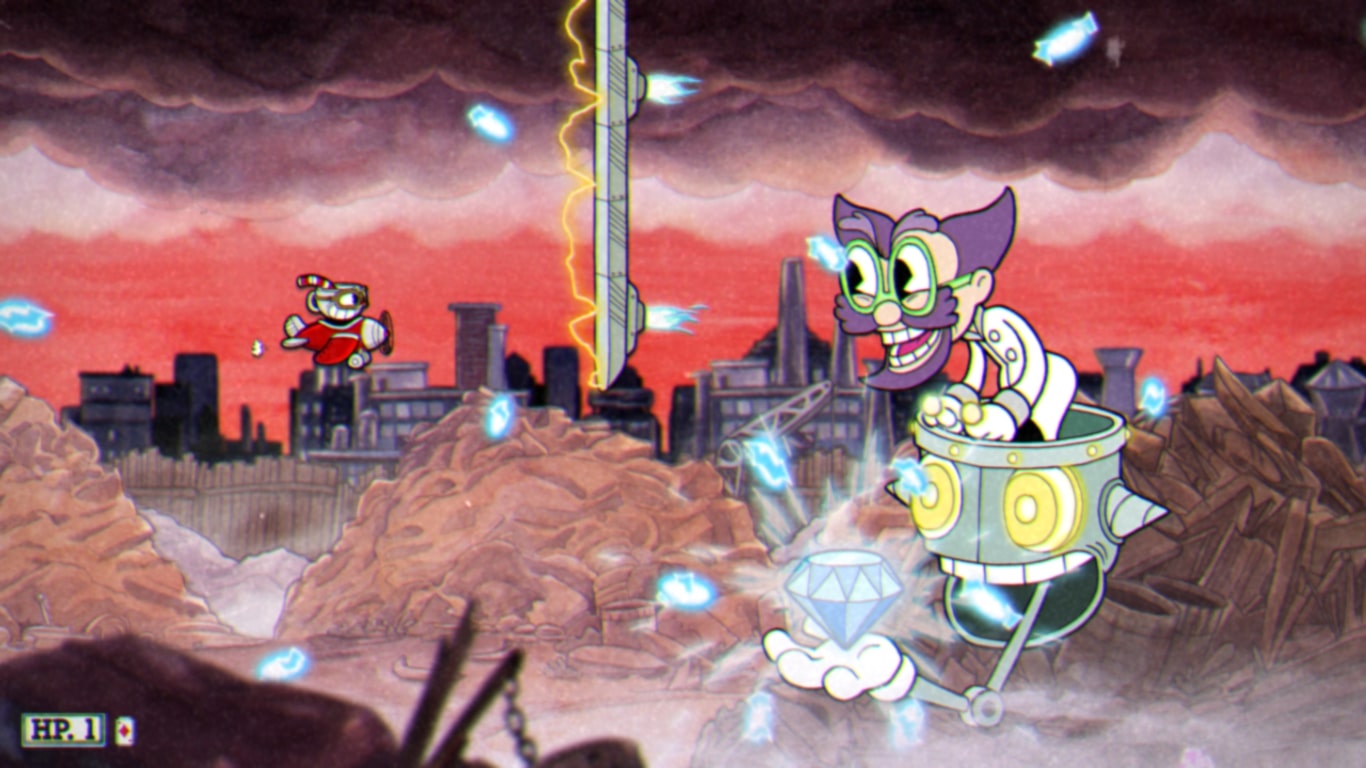
For most encounters so far, you’ve been able to shorten the tough parts or avoid them altogether. Sadly, against Dr Khal, you have to do it hard.
You can at least make the first part easy! As soon as the fight starts, switch to mini bombs, rush to the Robots Antenna, and keep shooting until you’re forced to dodge. After this, fly low and aim to land your mini bombs between the hole and vent on the Robot’s chest. If you’re accurate, you can hit both targets simultaneously, effectively doing double damage!
Keep switching between attacking the chest and antenna, and after a few seconds, you can target the Robot’s heart and go in for the kill.
For the rest of the fight, switch back to your normal shots, use your Super attack when it’s ready and concentrate on not getting hit! The last phase where you chase Dr Khal demands a steady hand, so take your time and focus on dodging.
Sally Stageplay

Sally isn’t too tough, but this is a rather unique encounter as she’s so small.
The strategy here is to use Spread and get as close as possible. During most of her attacks, Sally will jump near or over you, so you don’t have to move much and can focus on landing your shots. Make sure you’re using your Lobber EX when it’s ready too. Just make sure Sally doesn’t jump over them!
You can use an excellent Damage Boost when Sally is hanging from the rafters, stand underneath and shoot up at her with Spread. After a few moments, the Big Wave will enter the arena but just ignore it, take the damage, and Sally will quickly enter her last phase.
Sally can be a little tricky to hit at the end of this fight, but if you can land 4 EX Lobber attacks here, victory will be yours.
Werner Werman
Some of Werner’s attacks are tricky to dodge, but you can make quick work of most of the fight with Spread shot.
It’s safer to fight Werner with your Lobber during the first phase, but after that, switch to Spread. You can get up close and personal, just keep an eye out for his flamethrower and dodge when needed.
Finally, the Cat phase is intimidating, but jumping EX Spread attacks do tremendous damage as every projectile will hit if you’re going for the face. This is one of those rare fights where the last phase is the easiest, so enjoy the calm before the storm!
Captain Brineybeard
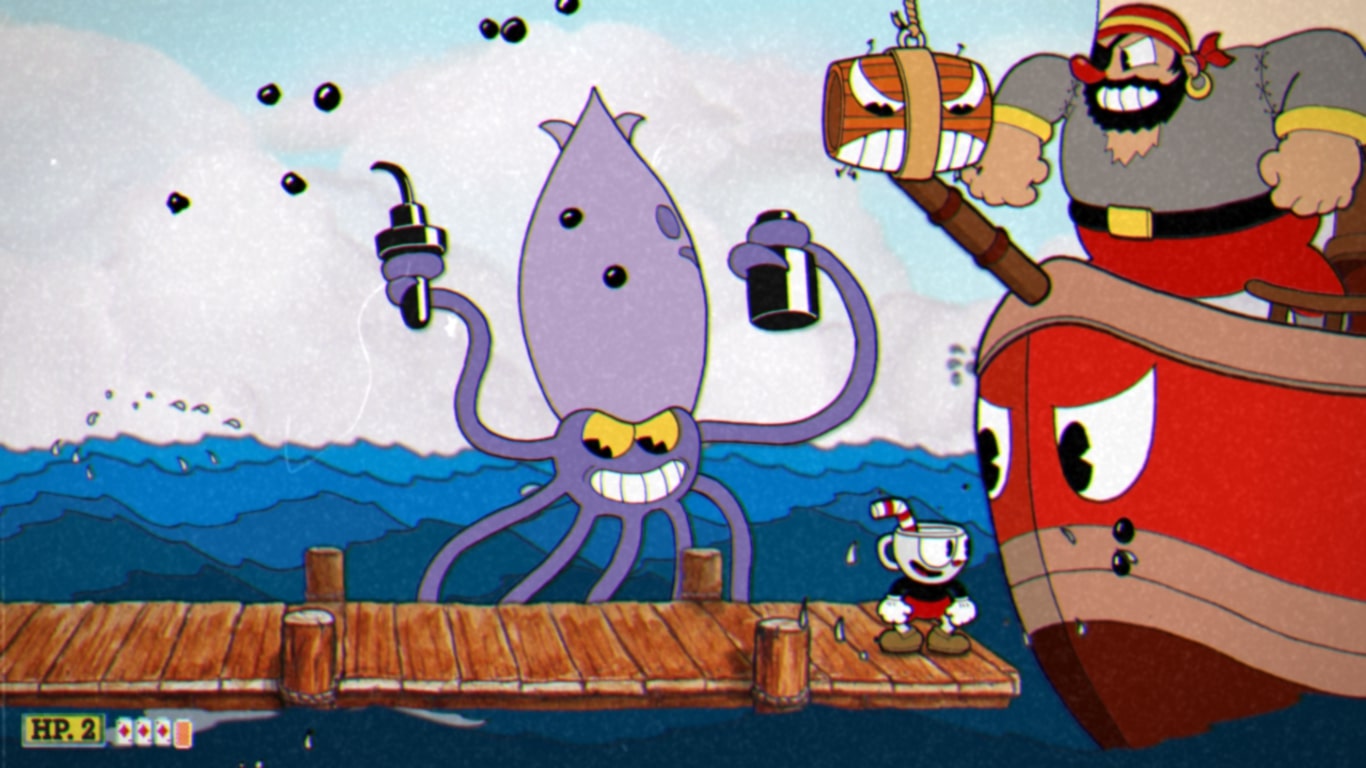
Top speedrunners use Spread and Lobber for this fight. Still, as it’s a little easier, I’d recommend switching Lobber to Peashooter for now.
Use Peashooter when you have to fight at range, but mostly, you want to be up close using jumping Spread. It’s important to note that you don’t take damage from brushing against the boat, so you can play aggressively here.
Most of Brineybeards attacks are easy to avoid once you know the timing, and you can relax if he summons the shark or squid, as you can ignore both if you’re up against the boat.
You can duck under the giant beam attack in the last phase, and you can even dash when you’re ducking if the barrel above causes you problems. This phase can get hectic, but EX Peashooter attacks can end this battle much faster if you find an opening.
Cala Maria

Cala Maria is a nasty opponent because she has so many attacks. Memorize them and come up with a game plan on the fly.
Fortunately, the last phase where you’re chasing her head through the tunnel is super easy! Position yourself, so you’re right in front of her face, and you’ll be too far forward for any attacks to hit you! You need to avoid spiky towers, but in the small space between Cala’s head and the edge of the screen, you can see where the towers will appear. If you’re quick, you can avoid them, but it will take practice.
Phantom Express

The Phantom Express is brutal and makes a fitting last boss for Isle 3. If you’ve been brushing up on your Kaleva Swaps, this is the place to put them to the test.
For the first phase, you want to switch between Lobber to hit the ghost and Spread to hit his projectiles. You can also use Spread for the annoying pumpkins that will be overhead for this entire fight.
Kaleva Swaps will be a huge damage dealer for the rest of the fight if you’re able to pull them off! You’ll want to do them in the air just underneath the Skeletons chin whenever they are available.
This is very tricky, as you’ll need to lightly press the jump button; otherwise, you’ll bump into the boss and take damage. You can use Spread instead if you’re struggling, but it is slower.
The last phase will also die quickly to Kaleva Swaps, but Spread is a decent alternative as there’s so much going on around you.
King Dice

King Dice is a menace and will take many attempts to beat him quickly.
The most important thing to practice is the dice rolls. If you can reliably roll the numbers you want, you can pick the battles you’re confident with. Ultimately, the only fight you absolutely don’t want is number 9, as it’s incredibly slow. Still, the most common picks are 3, 5, and 7.
If you choose number 3, you’ll be fighting Wheezy, and you can pull off a significant damage boost here. When Wheezy is about to move to the platform you’re standing on, instead of jumping to safety, stand still and dash through him when he appears. You’ll be safe behind him to pile on the damage.
If you’ve made it all the way to King Dice, you’re through the worst of it. Use Spread when you can, and EX Spread him in the face during your jumps, as every projectile will land.
The Devil

The entire run comes down to this!
As you would expect, the Devil is no joke, with many attacks requiring you to think fast to avoid them. To succeed in this fight, you need to know how to avoid everything, so practice a lot and then practice some more!
In the first phase, start with jumping with Spread shot, and if you’re comfortable, Kaleva swap whenever you can. If the Devil uses his spider attack, you can quickly set up Lobber Traps for more damage.
When you go down to Hell for the final phases, keep using Spread, and try to land Spread EX attacks in the Devil’s eyes. This is easier said than done with all the dodging you have to do down here, but a few well-placed EX attacks can end this fight fast!
If you’ve been using this guide to aid your first Cuphead speedrun, congratulations, you’ve not only beaten an extremely tough game, you’ve done it with style too!
Things we Wish we Knew Before We Started
Rebinding your Controls
Changing your buttons isn’t required, but make sure you are comfortable with the controls. Buttons are more responsive than Triggers, so you may want it elsewhere if Shoot is bound to a Trigger.
Sound is Important
Many enemy attacks are telegraphed visually and with a sound cue. Lowering the music volume really helped those sounds stand out, and it’s saved my life a few times. If you’re struggling with an attack pattern, turn the music down or off and see if it helps!
Useful Resources
If you use Livesplit, some smart presets are available here: https://www.speedrun.com/cuphead/resources
If you’re interested in setting up a Loadless Timer, you can find everything you need here: https://www.speedrun.com/cuphead/guide/5ooyb
There is a community Mod Tool available for PC players that can display enemy health bars along with other cool stuff. It’s open to download here: https://www.speedrun.com/cuphead/resources
FAQ
Question: Can I Speedrun Cuphead on Any Platform?
Answer: Yes, you can! The most popular platform is PC, but you can compete on anything.
Question: Is There a Way to see a Boss’s Health?
Answer: If you’re on PC, yes. There’s a link to a mod tool in the Useful Resources section above that displays boss’ health along with other helpful info. This is great for practice, but you cannot use it during a submitted run.
Question: Is Speedrunning Cuphead Difficult?
Answer: Yes, Cuphead is a challenging game even if you’re playing casually! A lot of the difficulty comes from memorizing boss attacks and movements. If you’re willing to put the time in to learn those, the game quickly becomes more manageable and is incredibly rewarding too!