
- Hollow Knight Trophy Guide - May 18, 2022
- HOTS Tier List - February 20, 2022
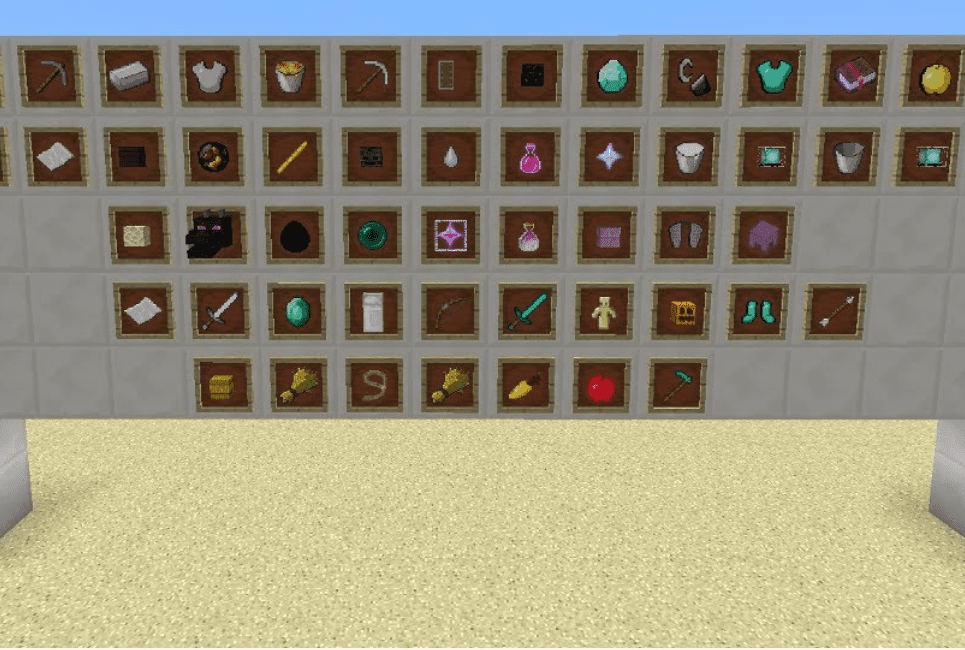
- Minecraft Achievements Guide – Advancements - January 26, 2022
Welcome to a fully comprehensive Minecraft Achievements Guide! This guide is exclusive to Minecraft Java Edition.
There are currently 80 individual advancements belonging to one of five categories. For Minecraft Bedrock Achievements, see our other article. The best practice is to do all of these advancements in order, but some exceptions will be mentioned.
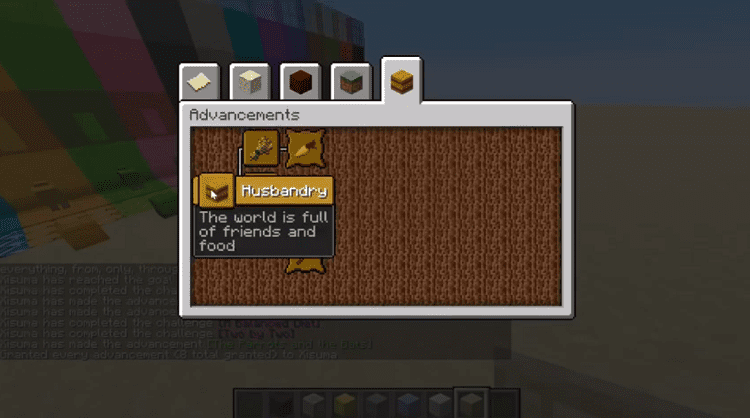
Advancement Menu
The advancement menu is where players can track their progress and see unobtained advancements. You can access this menu by pressing the L key or clicking on the Advancements button in the pause menu.
There are five different categories represented by tabs on the top of the window. Each category has its own repeating background related to the category and a hierarchy of advancements. Each time an advancement is unlocked it will display up to two additional unobtained advancements.
Types of Advancements
There are three types of advancements in Minecraft. Normal advancements, Goal advancements and Challenge advancements.
The only distinguishing factor between each of these is the difficulty. They are displayed using three different badges. In addition, each badge can appear as either silver when uncompleted or golden when completed.
Guide to Obtaining Each Advancement
On to the meat of the article! Each advancement’s details and steps to achieve them.
Category 1 – “Minecraft”
Minecraft
Unlocked by having a crafting table in your inventory. These can be crafted using four pieces of planks in your crafting menu. The planks can be any wood type.
Stone Age
Unlocked by having either cobblestone, blackstone, or cobbled deepslate in your inventory. You can pick up stone that you mine if you use a pickaxe, any quality pickaxe will do the trick!
Getting an Upgrade
Unlocked by having a stone pickaxe in your inventory. This is crafted using three cobblestone and two sticks in a crafting table menu.
Acquire Hardware
Unlocked by having an iron ingot in your inventory. Firstly you need to mine Iron Ore using a pickaxe. This will drop raw iron which needs to be smelted in a furnace or blast furnace.
Suit Up
Unlocked by having any individual piece of iron armor in your inventory. The easiest way to achieve this is crafting iron boots, since they only require four iron ingots.
Hot Stuff
Unlocked by having an iron bucket in your inventory. First, you need to craft an iron bucket using three iron ingots, then find some lava to right click on while having the bucket in your hand.
Lava can be found all over the world, deep underground or on the surface. If you’re having trouble finding some, save this advancement for when you’re in the Nether.
Isn’t It Iron Pick
Unlocked by having an iron pickaxe in your inventory. Identical to the previous advancement “Getting an Upgrade,” except you have to substitute iron ingots for cobblestone.
Not Today, Thank You
Unlocked by blocking a projectile with your shield. Firstly you need to craft a shield using six planks of any type of wood in conjunction with one iron ingot. Equip your shield into your offhand slot and go find a skeleton.
These can most commonly be found outside during night time. Get close to the skeleton and hold down right click to bring up your shield. The skeleton will shoot into your shield, unlocking the advancement.
Ice Bucket Challenge
Unlocked by having obsidian in your inventory. The easiest way to unlock this is by mining existing or created obsidian with a diamond pickaxe. If you haven’t found obsidian naturally by the time you’re ready to get this advancement, you can create obsidian by pouring water on lava or vice versa.
Diamonds!
Unlocked by having a diamond in your inventory. There are many ways to find diamonds. You can stumble upon a village or desert temple chests which may contain diamonds but the most reliable method is mining. Ideally, dig down to the deep cave biome, indicated by deepslate stone everywhere.
That’s when you know you’re at the right depth to find diamonds. The most efficient area for diamonds is slightly above the bedrock layer.
We Need To Go Deeper
Unlocked by entering a nether portal. These portals need to be built by placing obsidian blocks in a portal shape and using a flint & steel. Obsidian portals require at least ten obsidian blocks to construct, or fourteen if you want to fill in the corners.
Cover Me With Diamonds
Unlocked by having a piece of diamond armor in your inventory. This advancement is identical to the “Suit Up” advancement except it requires diamond armor instead of iron armor.
Enchanter
Unlocked by applying an enchantment to any item. Firstly you need to build an enchanting table which will require two diamonds, a book, and four obsidian. The enchantment level will depend on how many bookshelves surround the enchanting table although a level one enchant will suffice for this advancement.
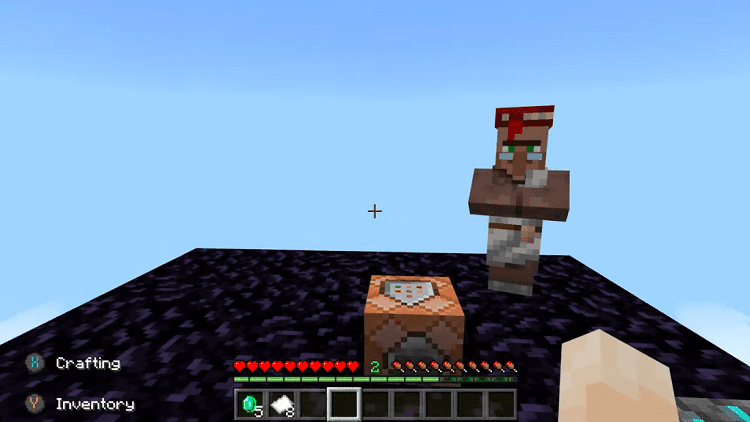
Zombie Doctor
Unlocked by converting a zombie villager into a regular villager. This is a tricky advancement because it requires ingredients from the Nether. It is wise to wait until later in the game to unlock this advancement. Firstly, you should acquire all of the ingredients necessary which involves crafting a splash potion of weakness and a golden apple.
The former is crafted using the alchemy table, which can only be built using blaze rods from the Nether. The latter is crafted surrounding an apple with eight gold ingots in the crafting table.
Once you have those two ingredients, you need to find a zombie villager. These can spawn randomly at night instead of a zombie.
Unfortunately, there’s no shortcut to spawning them, its simply random. Once you encounter one, the best practice is to lure them into a room which acts as a prison for the zombie villager. Make sure that this room has a roof so the zombie doesn’t burn from sunlight.
Once you have the zombie villager secured, throw the splash potion of weakness at him and feed him the golden apple. The process will begin, all you have to do is wait. Eventually the zombie villager will turn into a regular villager.
Eye Spy
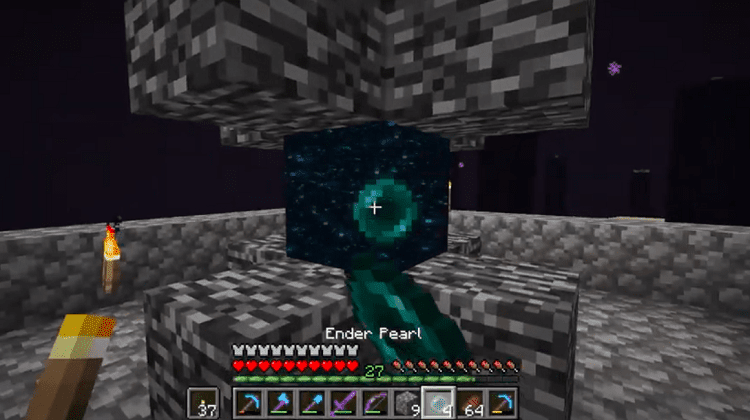
Unlocked by entering a Stronghold. Strongholds are fairly uncommon in Minecraft, hopefully you stumble upon one on your own while mining.
If not, you can make Ender Eye that can be thrown into the air. They are crafted by combining an Ender Pearl with Blaze Powder. Once thrown they act as a guide by pointing you in the direction of the nearest stronghold.
The End?
Unlocked by entering The End. This is a continuation of the advancement “Eye Spy.” By exploring a stronghold, you will undoubtedly come across The End Portal. It will always appear to have a few Ender Eyes missing from it’s frame.
Your goal will be to craft as many Ender Eyes as you need and insert them into the empty End Portal slots. Once all of the slots have been filled, the portal will open and you can enter.
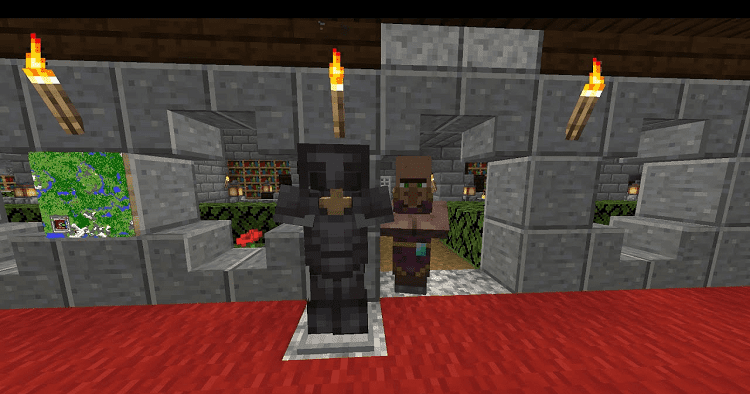
Be careful, The End is full of Endermen, it’s wise to wear a carved pumpkin on your head in order to look around freely without attracting the Endermen’s attention.
Category 2 – “Nether”
Return To Sender
Unlocked by reflecting a ghast’s projectile attack and killing the ghast. This advancement is significantly easier on a singleplayer world since multiplayer worlds can have lag.
Simply find a ghast and wait for it to shoot a projectile at you. Once the projectile is within melee range, simply punch it without an item in your hand and the projectile will be redirected based on where you are pointing your cursor. This can take some trial and error figuring out the alignment.
Those Were The Days
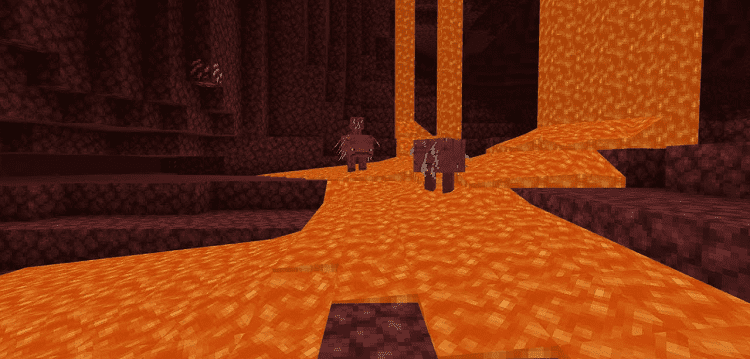
Unlocked by stepping foot on a Bastion Remnant. Unfortunately there isn’t a shortcut to finding these types of structures inside the Nether. You’ll have to walk around until you see one, once you do, just step on a single Bastion Remnant structure block and you’re all set!
Hidden in the Depths
Unlocked by having Ancient Debris in your inventory. Similarly to the previous advancement, there is no shortcut to finding these Ancient Debris blocks. A relatively safe technique is to mine horizontal shafts in the Netherrack until you find them. The best Y-Height for finding them is fifteen.
Subspace Bubble
Unlocked by exiting a nether portal 7000 blocks away from the portal you entered the nether with. Since distance is multiplied by eight inside the nether, this advancement is very straight forward. Collect enough ingredients to make two portals, which is at least 20 obsidian and one flint & steel.
Create one portal and enter it. Upon arriving in the nether, record your coordinates. All that is left to do is travel at least 875 blocks in one direction away from the first portal. Once you’re far enough away, create a new portal and enter it, teleporting you back into the overworld and unlocking the advancement.
A Terrible Fortress
Unlocked by stepping foot on a Nether Fortress. |Similarly to the “Those Were The Days” advancement, there is no shortcut to finding these. Wander around the nether until you see one. Once you see one, make your way over and stand on one of the blocks to unlock the advancement.
Who is Cutting Onions?
Unlocked by having a crying obsidian block in your inventory. This can actually be achieved in the Overworld or the Nether.
These blocks are part of a naturally generating structure called a “ruined portal.” It looks like a broken nether portal and has no predictable spawn locations. All you have to do is find one and mine one of the crying obsidian blocks.
Oh Shiny
Unlocked by giving a Piglin one of a variety of golden items. Piglins are creatures found roaming around in the nether. Firstly, you have to make sure you’re wearing a full suit of golden armor, otherwise the piglins will be hostile towards you.
Once you’ve donned your golden armor, head to the nether, find a piglin and drop a golden item at it’s feet. The cheapest item would be a single piece of raw gold, although it’s best to just give them whatever golden item you have lying around such as a golden helmet or boots that you might’ve obtained earlier by killing a zombie or looting a chest.
This Boat Has Legs
Unlocked by riding a Strider. This can be done by mounting a strider NPC using a saddle and controlling his movement with the “Warped Fungus on a Stick” item.
Saddles have to be found somewhere in the world, such as chests or fishing and the fungus on a stick item has to be crafted by combining a warped fungus with a fishing rod. Warped fungus and striders can both be found throughout the nether.
If you want to unlock a second advancement right away, ride the strider for fifty blocks on lava, unlocking “Feels like home” advancement.
Uneasy Alliance
Unlocked by killing a ghast in the overworld. This is a fairly tricky advancement since it requires bringing a ghast back into the overworld. The best way to achieve this is by creating a very large portal and luring a ghast over to it.
In the nether, find an area with a low ceiling and build a portal going all the way up to the ceiling. Now all you can do is wait for a ghast to spawn. Once you manage to get one through the portal, grab a bow, go to the overworld and shoot the ghast down.
War Pigs
Unlocked by looting a naturally generated chest in a Bastion Remnant. This is pretty straight forward, once you find a Bastion Remnant, explore it until you find a chest. Once you find one, right click on it and you’re all set!
Country Lode, Take Me Home
Unlocked by using a compass on a Lodestone block. For this, you will need to craft both a compass and a lodestone. The crafting recipe for a compass is four iron ingots adjacent to a piece of redstone dust.
The crafting recipe for a lodestone is a bit more tricky, it requires surrounding a netherite ingot, which is a combination of four netherite scrap and four gold bars, by chiseled stone bricks. Once you have the lodestone and the compass, head into the nether, place down the lodestone and use the compass on it.
Cover Me in Debris
Unlocked by having a full suit of netherite armor in your inventory. Much like the guide for “Hidden in the Depths,” this involves mining for ancient debris. You will need to gather twenty four diamonds, craft a full set of armor then use a Smithing table to upgrade each diamond armor piece with a netherite ingot.
Netherite ingots are created by combining 4 netherite scraps with 4 gold ingots. In total you will need sixteen gold ingots, sixteen netherite scraps and twenty four diamonds.
Spooky Scary Skeleton
Unlocked by obtaining a wither skeleton skull. Wither skeletons can be found naturally spawning in Nether Fortresses. Upon killing one, there is a 2.5% chance that the wither skeleton will drop his skull. You can increase this to 5.5% by having a Looting 3 sword.
Into Fire

Unlocked by having a blaze rod in your inventory. Blaze rods are dropped by Blazes. These Blazes are spawned by mob spawners only found in Nether Fortresses. Make sure to remember the location of these spawners or collect many blaze rods because you will need them for many different advancements.
Not Quite “Nine” Lives
Obtained by charging a Respawn Anchor to it’s maximum of four charges. First, you will need to craft a respawn anchor using 6 crying obsidian and 3 glowstone blocks. Once crafted, place it somewhere in the Nether and use 4 glowstone blocks on it to achieve a full charge.
Feels Like Home
Unlocked by riding a strider for fifty blocks on lava. This can be achieved in tandem with the “This Boat Has Legs” advancement.
Hot Tourist Destinations
Unlocked by visiting five specific nether biomes. You can visit the biomes in any order and there isn’t a straightforward way to unlock this advancement since the Nether is procedurally generated.
Simply find and step foot in a Basalt Delta, Crimson Forest, Nether Wastes, Soul Sand Valley and Warped Forest biome. You can check which biome you’re in by using the debug menu (F3).
Withering Heights
Unlocked by summoning a Wither. This can be done by placing three wither skulls in this formation above some soulsand. The wither skulls can be obtained by killing Wither Skeletons in Nether Fortresses.
Local Brewery
Unlocked by brewing any potion. In order to brew potions you will need to create a brewing stand by combining a blaze rod with any three types of cobblestone. After which, you can create a glass bottle using three glass blocks.
Use the glass bottle on water to place water inside the bottle. The rest is easy, place the glass bottle inside the brewing station along with some fuel and a random ingredient.
Bring Home the Beacon
Unlocked by constructing and placing a beacon. This advancement is fairly tricky because it involves spawning the wither and slaying it. The wither will drop a nether star which is paramount for this advancement. Combine the nether star with three obsidian and five glass to create a beacon.
In order for the beacon to be powered it needs to have an unobstructed view of the sky, and to be placed on a pyramid of either iron, gold, emerald, diamond or netherite blocks.
In order to obtain this advancement with the least material cost, place the beacon on a 3×3 grid of iron blocks. Although it’s recommended to build a size four pyramid instead to unlock the “Beaconator” advancement as well.
A Furious Cocktail
Unlocked by having the following thirteen status effects applied at the same time: fire resistance, jump boost, poison, night vision, invisibility, regeneration, slow falling, resistance, slowness, strength,m speed, water breathing and weakness.
Beaconator
Unlocked by being in range of a beacon powered by a size four pyramid. In order to construct a size four pyramid, you will need 164 blocks of either iron, gold, emerald, diamond or netherite.
First place a 9×9 square of blocks, then on top of that place a 7×7 square, then another layer up place a 5×5 square and lastly place a 3×3 square. The easiest way to construct this is by using whatever blocks you have on hand out of the ones listed above. If you don’t have any blocks, the quickest way is farming iron blocks.
How Did We Get Here?
Unlocked by having the following twenty six status effects applied at the same time: absorption, blindness, bad omen, conduit power, fire resistance, dolphins grace, glowing, hero of the village, haste, hunger, invisibility, jump boost, mining fatigue, nausea, levitation, poison, night vision, resistance, regeneration, slow falling ,slowness, strength, speed, water breathing, weakness and wither.
Category 3 – “The End”
Free The End
Unlocked by killing the Ender Dragon. The dragon will continuously heal using crystals atop tall towers. To kill the dragon you will need to destroy these crystals with a melee weapon or a well placed arrow.
It’s up to you if you feel more comfortable climbing up the towers or shooting at them from below. Once the crystals are destroyed, you can deal permanent damage to the dragon with a bow & arrow. Make sure to bring lots of food and arrows.
The Next Generation
Unlocked by having a dragon egg in your inventory. After the dragon is slain, it will spawn a dragon egg atop the exit portal. The egg cannot be mined because each time you hit it, the egg will teleport away.
The easiest way to collect the egg is dig two blocks below it, keeping a single block for it to stand on, then break that block ensuring the egg falls on a torch. The egg will become an item you can pick up if it falls on a torch.
Remote Getaway
Unlocked by exiting the End. You can either walk through or throw an ender pearl through the portal that is spawned after slaying the dragon.
The End…Again…
Unlocked by respawning the Ender Dragon. Respawning the dragon can be done by using four end crystals which need to be crafted by combining 7 glass blocks, 1 eye of ender and 1 ghast tear.
Once you have four of these crystals, place one on each flat side of the end portal atop the bedrock. This will initiate a process that places the end crystals back on their pillars and spawns the dragon.
You Need a Mint
Unlocked by collecting ender dragon’s breath in an empty glass bottle. While fighting the dragon, it will shoot fireballs and blow purple breath onto the floor. Simply scoop this purple breath with an empty bottle to unlock the advancement.
The City at the End of the Game
Unlocked by entering an End City. These can be found scattered throughout the mainland End dimension after slaying the dragon.
Sky’s the Limit
Unlocked by having an elytra in your inventory. Elytras are wearable items that can be found exclusively in naturally spawning item frames special to the treasure room of an End Ship.
End ships are naturally generating structures found scattered throughout the End. No shortcut is available for this, you simply have to find one of these ships and make your way to it’s treasure room.
Great View From Up Here
Unlocked by floating vertically while the Levitation effect is applied to you. The levitation effect is an effect that Shulkers, box-like creatures that live in End Cities, apply to you by hitting you with projectiles.
The easiest way to unlock this advancement is by finding an end city and purposely getting hit by multiple shulkers as you float towards the sky. Make sure to have lots of food and good armor because the shulker projectiles deal damage.
Category 4 – “Adventure”
Adventure
Unlocked by killing or being killed by an entity. The easiest way to achieve this is to craft a sword and kill a zombie during night time.
Voluntary Exile
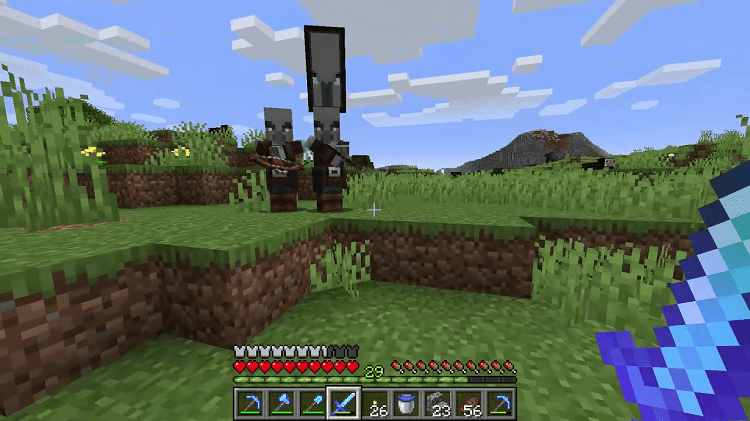
Unlocked by killing a Raid Captain Pillager. These pillagers are indicated by a large banner attached to them. They spawn nearby players during night time as small groups. Keep in mind, once you kill one, you will get the Bad Omen debuff which causes a raid to begin upon entering a village.
Is It a Bird?
Unlocked by looking at a parrot using a spyglass. Parrots are naturally generated friendly npcs that spawn in Jungle biomes. Spyglasses can be crafted by combining an amethyst shard and two copper ingots. Both amethysts and copper can be found in underground caves.
Monster Hunter
Unlocked by killing a hostile npc. This can be any one of thirty four hostile npcs. You will get this advancement in tandem with “Adventure.”
What a Deal!
Unlocked by successfully trading with a villager. Villagers reside in villages, these are naturally occurring groups of structures found in a variety of biomes. Explore until you find one. Upon interacting with a villager, you will see what trades they are offering. Find a trade that best suits what items you have lying around and make the trade!
Sticky Situation
Unlocked by sliding down the side of a honey block. Simply set up a three block tall column of honey and jump towards it while sprinting. Honey blocks can be crafted using four bottles of honey.
The bottles of honey can be obtained by using an empty bottle on a beehive that is full of honey. Keep in mind, you cannot get honey bottles by using bottles on empty hives, wait until the bees have had time to fill them up.
Ol’ Betsy
Unlocked by shooting a crossbow. Crossbows can be obtained by crafting, using three sticks, two strings and a tripwire hook or as a drop from a pillager.
Surge Protector
Unlocked by protecting a villager from a lightning strike. The best way to achieve this is by setting up a lightning rod, crafted using three copper ingots, in a village populated by villagers. In order to ensure a villager is near the lightning when it strikes the lightning rod, you can build a small house for the villager without any way to escape.
Caves & Cliffs
Unlocked by falling from the top of the sky to -59Y. Start by digging a one block wide hole all the way down to -59Y (use the debug screen (F3) to check your Y coordinate).
Make sure to put some water at the bottom of the hole so you don’t die upon landing. Climb back up to the surface and stack blocks below you until you reach the build limit at 319Y. All that’s left to do is jump into the hole you created.
Sweet Dreams
Unlocked by sleeping in a bed. This advancement is fairly easy, simply craft a bed using three wool blocks and three wooden plank blocks. Both the wood and the wool can be any variety of color.
Hero of the Village
Unlocked by successfully completing a village raid. Firstly, you will need to slay a raid leader to get the Bad Omen debuff. Once you have this debuff, a raid will be triggered next time you enter a village.
Before you trigger this raid, prepare yourself by having the best armor and weapons. To make it easier, you can lower your difficulty. To complete the raid, simply kill all of the pillagers that spawn across all waves.
Is It a Balloon?
Unlocked by looking at a ghast through a spyglass. This is pretty straight forward, craft a spyglass using two copper ingots and one amethyst then head into the nether. Wander around the nether until you spot a ghast and use your spyglass pointed at it.
A Throwaway Joke
Unlocked by hitting a mob with a trident. Tridents cannot be crafted, the only way of obtaining them is by looting a trident-equipped Drowned. The Drowned are special types of zombies that spawn underwater.
Simply hang out in the water at night time and you’re bound to find some. Once you kill a trident-wielding drowned, there is a 6.5% chance that they drop a trident. Once you acquire a trident, throw it at any mob to unlock the advancement.
Take Aim
Unlocked by hitting a mob with an arrow fired from a bow or crossbow. The easiest way to unlock this advancement is by crafting a bow using three sticks and two strings followed by crafting an arrow using a stick, flint and a feather.
After you obtain a bow & arrow, right click while holding the bow and release to shoot. Make sure your crosshair is overlapping a mob before you fire!
Monsters Hunted
Unlocked by killing one of each hostile monsters (mobs). Here is a full list of the monsters required for this advancement : Blaze, Creeper, Cave Spider, Drowned, Elder Guardian, Enderman, Ender Dragon, Evoker, Endermite, Guardian, Ghast, Hoglin, Magma Cube, Husk, Phantom , Piglin Brute, Regular Piglin, Pillager, Shulker, Ravager, Silverfish, Skeleton, Spider, Slime, Vex, Stray, Witch, Wither Skeleton, Vindicator, Zoglin, Zombie Villager, Zombie, Zombified Piglin.
Postmortal
Unlocked by activating a Totem of Undying. These items are activated by taking fatal damage while holding them in either your main hand or your off-hand. To obtain a totem, you must first kill an evoker. These type of pillagers appear as part of raids or in woodland mansions.
Hired Help
Unlocked by summoning an iron golem. Iron golems can be summoned by placing a carved pumpkin atop a t-shaped structure made out of iron blocks. Both pumpkins and iron are very common items in minecraft, the former is found in a variety of biomes and villagers and the latter can be found while mining underground.
Star Trader
Unlocked by trading with a villager while at 319Y or higher. This advancement is tricky because it requires moving a wandering trader or villager from the ground all the way up near the build limit. The easiest way to achieve this is by trapping a villager in a house and building a water elevator inside the house with the villager.
A water elevator can be constructed by using source water blocks surrounded by a block of your choice. At the base of the elevator you need to play a soulsand block to create a column of bubbles which pushes up any entity that steps into the water.
It is also wise to build a small platform at the top with walls to ensure the villager doesn’t fall off when it reaches the top.
Two Birds, One Arrow
Unlocked by using a piercing crossbow to kill two phantoms with a single shot. First, you will need to craft a crossbow and enchant it with piercing. By now you should know how to do each of these things individually because they are both required for two other advancements.
Once you have this bow, wait until some phantoms spawn, line up the shot and fire! Keep in mind, phantoms spawn at night after a player hasn’t slept in a bed for longer than 3 nights.
Who’s the Pillager Now?
Unlocked by killing a pillager using a crossbow. You can either craft the crossbow or loot one from a pillager. Either way, once you have one, all you need to do is shoot the pillager a few times.
Arbalistic
Unlocked by killing five different mobs with a single crossbow shot. It’s time to get the crossbow out again! The easiest method for getting this advancement is to use animal targets. Breeding a chicken, a cow, a pig, a sheep will help tremendously.
For the fifth animal, you can grab a goat or a wolf from the wild using leads. Create a small tunnel that has all of the animals, get a Piercing IV crossbow and fire. To maximize your chance of success, you can weaken the monsters by hitting them a few times each with a low quality weapon or your hands.
Adventuring Time
Unlocked by visiting all fifty overworld biomes. The biomes that you must visit are the following : Badlands, Bamboo Jungle, Beach, Birch Forest, Cold Ocean, Dark Forest, Deep Cold Ocean, Deep Frozen Ocean, Deep Lukewarm OCean, Deep Ocean, Desert, Dripstone Caves, Eroded Baldnads, Flower Forest, Forest, Frozen Ocean, Frozen River, Frozen Peaks, Grove, Ice Spikes, Jagged Peaks, Jungle, Lukewarm OCean, Lush Caves, Meadow, Mushroom Fields, Ocean, Old Growth BirCh Forest, Old Growth Pine Taiga, Old Growth Spruce Taiga, Plains, River, Savanna, Savanna Plateau, Snowy Beach, Snowy Taiga, Snowy Plains, Snowy Slopes, Sparse Jungle, Stony Shore, Stony Peaks Sunflower Plains, Swamp, Taiga, Warm Ocean, Windswept Forest, Windswept Gravelly Hills, Windswept Hills, Windswept Savanna, Wooded Badlands.
Sound of Music
Unlocked by using a music disc on a jukebox while standing in a Meadow biome. Music discs cannot be crafted but they occur naturally inside cave chests, nether fortress or end city chests. That is the easiest way to find them.
Once you find a disc, simply craft a jukebox by combining a diamond with 8 wooden planks and head over to a meadow biome, and pop the disc into the jukebox! Meadow biomes can be recognized by their relatively flat grass terrain nearby mountains.
Light as a Rabbit
Unlocked by walking on powder snow while wearing leather boots. Powder snow naturally occurs in groves or snowy slopes biomes but it can be obtained using a cauldron and bucket. To obtain the powder snow, place an empty cauldron in any snowy biome and wait for it to fill up. This can take a white so find something else to do in the meantime.
Once the cauldron is full, use an iron bucket on it to fill the bucket with snow. Once the bucket is full you can right click the ground to deposit powder snow onto the ground.
Is It a Plane?
Unlocked by looking at the Ender Dragon with a spyglass. This is similar to the other two spyglass advancements involving parrots or ghasts. Grab your trust spyglass and head into the End!
Very Very Frightening
Unlocked by hitting a villager with a lightning strike generated by a Channeling Trident. For this advancement, you need to enchant a trident with channeling which can be done through an enchanting table.
After obtaining such a trident simply right click on a villager. If you haven’t yet unlocked the “Surge Protector” advancement you can use this trident to help you.
Sniper Duel
Unlocked by killing a skeleton from a 50 block distance or greater. For this, all you need is a bow, some arrows, and great aim. Make sure to measure 50 blocks beforehand so you know roughly how far away that is.
Bullseye
Unlocked by hitting the center of a target block from at least 30 blocks away. In addition to your bow & arrows, you will need to create a target block. This is done by combining 4 redstone dust with a hay bale, which consists of 9 wheat. Once you have your target block, plant it down, move 30 blocks away and begin shooting!
Category 5 – “Husbandry”
Husbandry
Unlocked by consuming any consumable. Whether it’s rotten flesh, an apple, carrot, or any other potential consumable item, they all work towards unlocking this advancement.
Bee Our Guest
Unlocked by using a glass bottle on a beehive. Similar to our instructions for the “Stick Situation” advancement, you will need to grab honey from a full beehive using an empty bottle. To craft these bottles you will need 3 glass blocks.
The Parrots and the Bats
Unlocked by breeding two animals together. There are 22 different animals that can be bred, the most common ones are chickens, cows or pigs. The easiest animal to unlock this advancement is to find two chickens and feed them both some seeds. Both seeds and chickens are exceedingly common.
Whatever Floats Your Goat!
Unlocked by getting a goat to sit in a boat. First, you will need to find a goat, they naturally spawn in mountain biomes. Once you find a goat, create a boat using five wood planks. In order to get the goat into the boat, you will need to push the goat once it’s near the boat. You can lure it to the boat with wheat in your hand or use a lead.
Best Friends Forever
Unlocked by taming a companion mob. Cats, donkeys, horses, llamas, mules, parrots, trader llamas, and wolves are the available companion mobs. They each have their own item that you must feed them multiple times to tame them. The easiest item and companion mob combination would be feeding bones to wolves.
Glow and Behold!
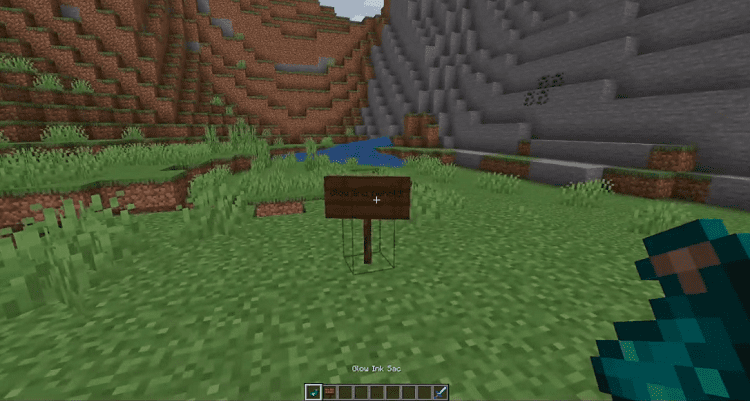
Unlocked by using a glowing ink sac on a sign post. Glowing squid can be found spawning in underground water blocks. Explore caves with water until you find one. Once you find one, slay it and collect its glow ink sac. All that’s left to do is craft a sign using sticks and wood planks and right click on the sign while holding the glow ink sac.
Fishy Business
Unlocked by using a fishing rod to catch any fish. To craft a fishing rod you will need 3 sticks and 2 string. Once you have a fishing rod, right click towards water to cast your line. You will notice the lure bobbing up and down while bubbles appear when there is a fish ready to catch, simply right click and hope it was a fish on the line instead of an item.
Total Beelocation
Unlocked by moving a bee nest containing three bees. This can only be done by hitting the bee nest with a tool that has the Silk Touch enchantment.
A Seedy Place
Unlocked by planting a crop. This can be done with beets, melons, nether wart, pumpkins or wheat. The easiest way is to break grass until a seed is dropped. Keep in mind that you need to till dirt before it can be used for planting.
This is done by using any quality hoe on a grass or dirt block. Craft a hoe using two wood, and two sticks. The wood can be interchanged for iron, gold, or diamond.
Wax On
Unlocked by applying a honeycomb to a copper block. Getting a copper block is easy enough, this is done by combining 9 copper ingots. The honeycomb however will take some work. You will need to shear a bee nest or beehive that is full.
You will be able to tell its full because it will be emitting yellow particles. Once you’ve done this, you can use an axe on the block to unlock the “Wax Off” advancement.
Two by Two
Unlocked by breeding all 21 possible mobs. The list of mobs that you need to breed for this advancement is as follows : Axolotl, bee, cat, chicken, cow, cdonkey, fox, goat, hoglin, horse, llama, mooshroom, mule, ocelot, panda, pig, rabbit, sheep, strider, turtle, wolf.
A Complete Catalogue
Unlocked by taming all 11 possible tamable cats. The list of cats that you need to tame for this advancement is as follows : tabby, tuxedo, red, siamese, british shorthair, calico, persian, ragdoll, white, jellie, black.
Tactical Fishing
Unlocked by using a water bucket on any fish mob. This advancement is pretty straight forward, grab a bucket, fill it with water, then go swimming in an ocean biome. Once you see a fish, swim up to it and right click while holding your water bucket.
A Balanced Diet
Unlocked by eating all 40 food items. The list of food items you need to either craft or farm or find are as follows : apple ,baked potato, beetroot, beetroot soup, bread, carrot, chorus fruit, cooked chicken, cooked cod, cooked mutton, cooked porkchop, cooked rabbit, cooked salmon, cookie, dried kelp, enchanted golden apple, glow berries, golden apple, golden carrot, honey bottle, melon slice, mushroom stew, poisonous potato, potato, pufferfish, pumpkin pie, rabbit stew, raw beef, raw chicken, raw cod, raw mutton, raw porkchop, raw rabbit, raw salmon, rotten fresh, spider eye, steak, suspicious stew, sweet berries, tropical fish.
Serious Dedication
Unlocked by having a netherite hoe in your inventory. If you did all of the advancements in order you will already know how to obtain netherite, if not see “Cover Me in Debris” advancement.
Wax Off
Unlocked by using an axe on a wax-coated copper block. See “Wax On” advancement.
The Cutest Predator
Unlocked by capturing an axolotl using a water bucket. See “Tactical Fishing” advancement for a guide about capturing fish with a water bucket. Axolotls can be found in warm ocean biomes.
The Healing Power of Friendship!
Unlocked by having the regeneration effect applied from a helpful axolotl or by being in the presence of an axolotl killing a hostile mob. You can use a lead on an axolotl to keep it nearby you.
After accomplishing that, simply approach a Drowned during night time or frankly any other aquatic mob except for turtles and dolphins. The axolotl will automatically apply the regeneration buff to you while in combat.
Frequently Asked Questions
Question: I Want to Check My Biome or Coordinates, How Do I Open the Debug Menu?
Answer: The default key bind for this menu is F3. You may want to change the GUI scaling in your options so that the menu doesn’t appear to clog up your screen.
Question: Where Can I Find More Details or Further Explanation for a Particular Advancement, or Other Element of the Game?
Answer: If you’re looking for more clarity in regards to a particular monster, item, advancement, status effect, or anything else : type in your query into YouTube or visit the Minecraft Wiki.
Be careful to use advice that pertains to the Java version of Minecraft since sometimes things are not the same across different versions of Minecraft.