
- The True Dovakhiin: Skyrim Trophy Guide - December 19, 2022
- Titanfall 2 Speedrun Guide - October 23, 2022
- Majora’s Mask Speedrun Guide - October 23, 2022
2018’s God of War was met with acclaim from both critics and players. Not only is it a beautiful game even years after its release, but it also has engaging and layered combat along with an emotionally mature story. The game went on to win Game of the Year from the Game Awards and numerous other accolades, and it deserved them. Thankfully, the game also isn’t too hard to platinum, and one is very much worth the time to do so since it is such a great game on top of it. It was recently released on PC, so more players can finally experience everything it has to offer.
Key Info Up Front
Genre: Action RPG
Difficulty: 5/10
Number of Playthroughs Required: 1
Time to Complete: Approximately 40 hours
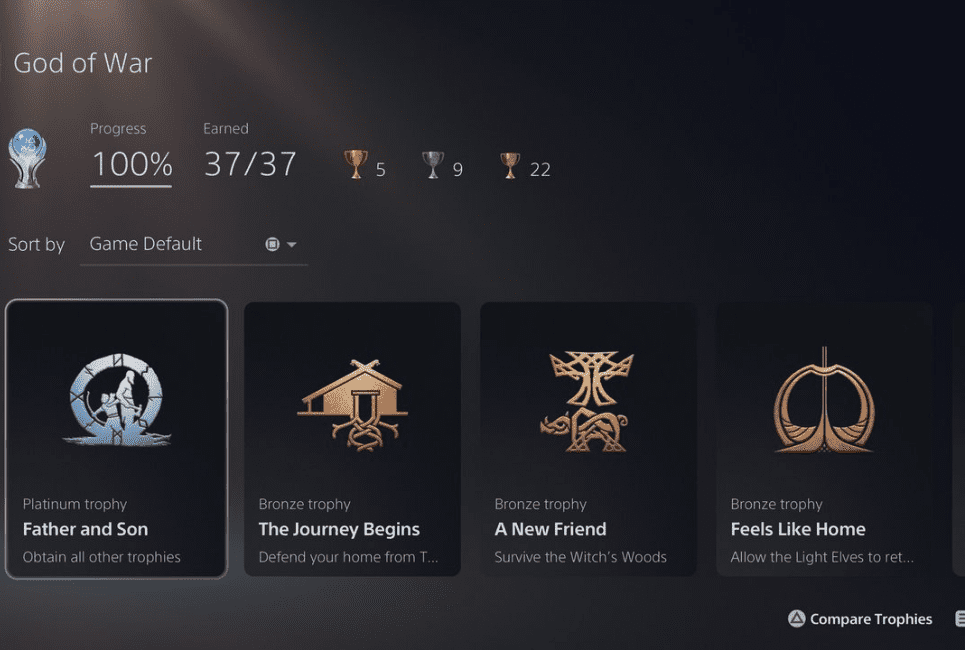
Number of Trophies: 35
Walkthrough
Enjoy the Story

Almost half of God of War’s trophies are gained by playing through the main questline. You will unlock 14 of the 35 total trophies by playing through it. Thankfully, the main story has no missable trophies, and the one area you get locked out of through story progression does not have anything required for the future. For this reason, I recommend first just playing through the main storyline at your own pace and enjoying it. It is one of the best narratives in a video game released in recent years, so you might as well get as much out of it as you can while you’re here.
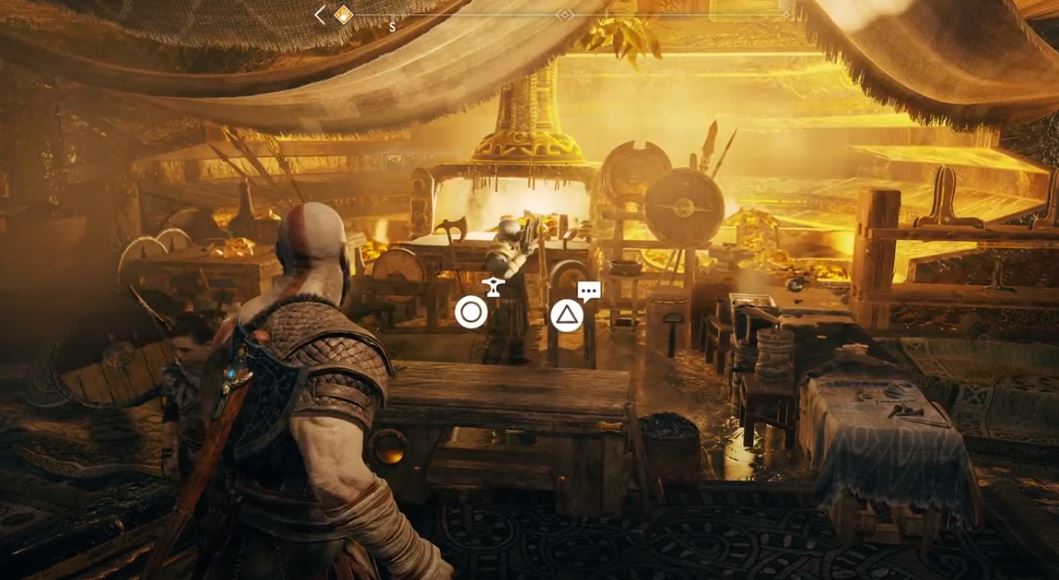
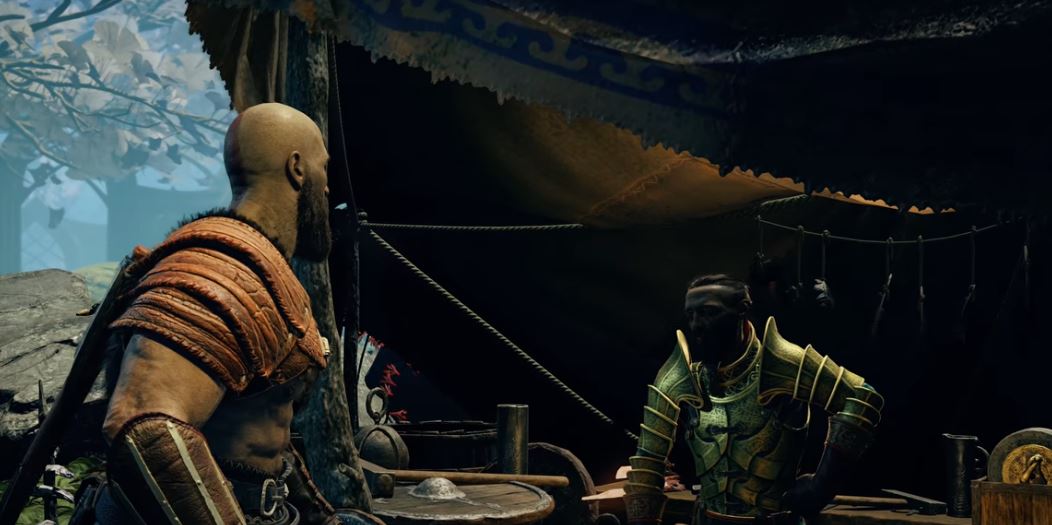
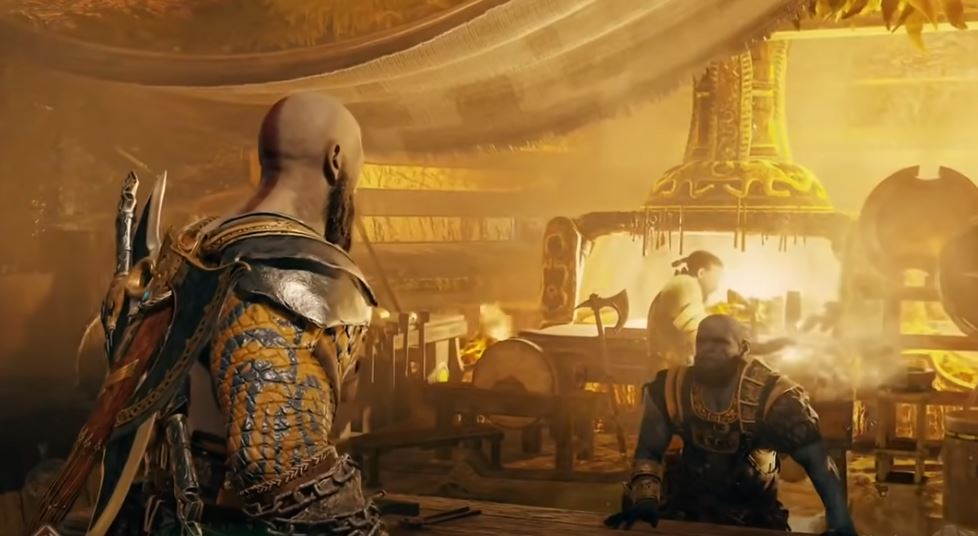
However, as you play, you’ll want to keep a few things in mind. The most important is staying on top of upgrading your gear. You’ll come across shops run by the blacksmith brothers Brok and Sindri as you play through the game. There you can purchase new gear and resources. You’ll want to make sure that you stop with them frequently to get new gear and upgrade the gear. You do have to stay appropriately leveled as you progress through the game to tackle enemies that are higher than you get tough. To do this, you’ll also want to loot as much as possible and get resources and collectibles to cut down on the grind later.
Wrap Up the Side Quests and Collectibles
Once you’re done with the main story, you’ll want to start tackling all of the side quests across God of War’s map. While you play naturally, there is a good chance that you’ll stumble on these and may have already done a good portion of them. If you have, you’ll still want to take care of whatever ones you have left to get Kratos as robust as possible before heading into the endgame content. These will include completing all of the favors for Brok and Sindri, freeing every dragon, helping every wayward spirit, and getting your hands on some solid armor sets.
As you go through the side quests and thoroughly explore the maps, you’ll also want to chase down any of the collectibles you missed. Many of God of War’s collectibles offer you benefits or help make Kratos stronger, so these are also great to have before going to the endgame. At this stage, you’ll also want to get all of your equipment and weapons fully upgraded and select which gear, runes, and abilities you like the best to tackle the game’s most demanding challenges.
Grind Through the Endgame
Now, you’re finally ready to dive into God of War’s endgame. Getting the trophies for this section will be challenging but still a lot of fun. First, you’ll want to start with the Trials of Muspellheim. The realm contains six trials that have to be beaten at different difficulty levels a few times. After that, you’ll move on to the Niflheim workshop that functions as a small rogue-like inside of the game. This section will likely take a while, as you’ll have to grind for currency and can lose an entire run’s worth if you die. However, once you’re done with that section, you’ll be able to tackle the most demanding bosses in the entire game: the Valkyries. There are nine valkyries in total, and each is a challenging encounter that pushes players to their absolute limit. Once you defeat all of them, you’ll also get your platinum and will have seen everything God of War has to offer.
God of War’s Trophies

The Journey Begins
Rarity: Bronze
Description: You will get this trophy naturally by finishing the story quest The Marked Trees.
A New Friend
Rarity: Bronze
Description: You will get this trophy naturally by finishing the Path to the Mountain story quest.
Feels Like Home
Rarity: Bronze
Description: You will get this trophy naturally by finishing the story quest, The Light of Alfheim.
Dragon Slayer
Rarity: Bronze
Description: You will get this trophy naturally by finishing the Inside the Mountain story quest.
Troubling Consequences
Rarity: Bronze
Description: You will get this trophy naturally by finishing the story quest The Magic Chisel.
Hello, Old Friend
Rarity: Bronze
Description: You will get this trophy naturally during the story quest The Sickness.
Promise Fulfilled
Rarity: Bronze
Description: You will get this trophy naturally by finishing the story quest, The Sickness.
Round 2
Rarity: Bronze
Description: You will get this trophy naturally by finishing the story quest Return to the Summit.
Past Haunts
Rarity: Bronze
Description: You will get this trophy naturally by finishing the Escape from Helheim story quest.
Twilight Beckons
Rarity: Bronze
Description: You will get this trophy naturally by finishing the Jotunheim in Reach story quest.
Last Wish
Rarity: Gold
Description: You will get this trophy naturally during the Mother’s Ashes story quest.
Beneath the Surface
Rarity: Bronze
Description: This trophy is for fully exploring the Lake of Nine.
Tips: There is a good chance you will get this trophy naturally while exploring, but if you don’t need to go to 11 areas, which are:
- Stone Falls – Northeast
- The Mason’s Channel – North
- Veithurgard – Northeast (see Death Happened Here below)
- Buri’s Storeroom – East
- Cliffs of the Raven – Southeast
- Lookout Tower – South
- Isle of Death – Southwest
- Iron Cove – Southwest
- Forgotten Caverns – West
- Ruins of the Ancient – Northwest
- Light Elf Outpost – Northwest
Death Happened Here
Rarity: Bronze
Description: This trophy is for fully exploring Veithurgard.
Tips: To get this trophy, you’ll have to wait until the water of the Lake of Nine is lowered for the second time. Then, the gate to Veithurgard will be exposed on the northeast side of the lake. To get this trophy, you have to thoroughly explore the area and remove all the fog from the map. To help you do this, there are a handful of quests in the area that you can do in the meantime.
Trilingual
Rarity: Bronze
Description: This trophy is for finding all of the language ciphers for Muspelheim and Niflheim.
Tips: These ciphers are found inside foggy purple chests all across the map, and you need at least eight of them, but there are plenty more than that in the game. If you explore as you play through the story, you shouldn’t have any trouble finding the eight required.
Dwarven Ingenuity
Rarity: Bronze
Description: You will get this trophy naturally as you play by upgrading a piece of gear.
Nice Moves
Rarity: Bronze
Description: You will get this trophy naturally as you play when you get your first Runic Attack Gem.
Iounn’s Orchard
Rarity: Silver
Description: You will unlock this trophy once you fully upgrade Kratos’ health.
Tips: Upgrading your health is by finding the eighteen Nornir chests, which will also fully upgrade his rage. Each chest has a puzzle associated with it that must be completed to unlock it, and the locations for the eighteen chests are below:
| Realm | Chest Location | Puzzle Solution |
| Midgard | Wild Woods | As you hunt the deer with Atreus, the first chest of the game is in the nearby temple. The three seals to unlock it are easily accessible in the room. |
| River Pass | Shortly after killing the first revenant, this chest is at the end of the path. You need the first rune behind the chest, and the others are just by the nearby bridge. | |
| You’ll then come to a spiked chamber with a second chest above you on a platform towards the end of the area’s puzzle. Raise the platform you’re on to see one of the runes. The other two you need are on the roof of the arena and the cave close by. | ||
| You can find a third chest after you kill Brenna Dauoi. There is a seal on either side of the chest, while the third is in the arena where you faced her. | ||
| Witch’s Cave | After you get into the Witch’s cave with the shock bow for Atreus, you’ll be able to create three bridges with them. The chest is to your left with one seal by the elevator up the well, the second lies past the first two light bridges going away from the chest, and the last is found by throwing a bomb at the platform opposite the chest. | |
| This chest can only be accessed once you have the Winds of Hel. Go to the pile of debris above where the witch lives and rebuild the destroyed structure. Then, climb the chain up to the top of the small hill. From there, use the Winds of Hel and insert it into the post found halfway down the hill. Then, you can extract the three runes from the posts and take them back to open the chest. | ||
| Lookout Tower | The cheesy is right by the docking place for this location. Once you clear all of the spikes around the chest, throw your axe to hit the visible rune before throwing it at the post with gears to reveal and quickly struck the other two. | |
| Foothills | The Nornir chest in this location is to the southwest. You have to rotate the runes on a spinning marker for this one. Start with the one directly behind the chest before going down the hill and to your left. | |
| Tyr’s Temple | The chest in this location is at the end of a long hallway filled with spikes. At the hallway entrance, you’ll find the first seal behind you. The second can be found by hugging the wall to your left and finding a wheel to lower the trap. Then, look to your right, and you should see the last seal. | |
| Fafnir’s Storeroom | The seals for this chest are easy. One is behind the chest, while the other two are at the top of the waterfall. | |
| The Mountain | Inside the Mountain, in a room filled with runes, you can find a Light Crystal hidden behind a pile of wood. Activate it to make a light bridge appear. You then need to arrange the posts near the cavern entrance with the runes you need to open the chest. | |
| The next chest in the Mountain is near the Jotnar shrine. The first rune is under the rubble at the end of the bridge, the second is on the upper level of the bridge, and the third is in the shrine room itself. | ||
| Light Elf Outpost | There is a light bridge puzzle you have to solve near the chest in this area. One seal is inside the gate while another is on its edge. The final seal is easy to find just past the chest itself. | |
| Veithurgard | This chest is just left of the dragon with the seals by the ruins, the ledges by the water, and just right of the chest. | |
| Alfheim | Light Elf Sanctuary | Stick to the right once you get to the giant body of water in the realm to reach the Light Elf Sanctuary. Head towards the gate and jump across the bridge before sticking to the right to find the chest. Nearby there are eight bells. When you strike them, three of them will display runes that you then have to hit in order to go clockwise. |
| Platform | This chest can be found by using your axe to freeze the gears and keep the platform in place. The three seals are then nearby and easy to hit. | |
| Blue Door | When you walk through Alfheim with Sindri, you will reach a blue door. Go down the path to the left to find the chest. Use your axe to destroy the veins nearby, and then you’ll see the seals. | |
| Main Boss | After you kill the main boss in Alfheim, you can find another chest by a nearby door. Put your back to the door and go to your right up the platforms. Hit the bells there and then quickly turn around to see the seals and hit them. | |
| Helheim | Escape from Helheim | As you will leave Helheim, you will eventually come to a boat. Before you enter it, the chest is to the left of the dock. Drop down by the chest using the big block nearby and burn through the plants with the Blades of Chaos to find a rune. The second is opposite of where you found the block, and you’ll find the third behind a block above you that can be pushed. |
Quick Tempered
Rarity: Silver
Description: This trophy is for fully upgrading your rage.
Tips: See Iounn’s Orchard above.

Best Dressed
Rarity: Bronze
Description: You will get this trophy naturally by crafting a new outfit for Atreus.
Enchanted
Rarity: Bronze
Description: You will get this trophy naturally by slotting an enchantment in your armor.
All Will Fall
Rarity: Silver
Description: This trophy’s description says it requires you to kill 2,000 enemies, but players have reported only having to kill 1,000. You will unlock this naturally.
Dangerous Skies
Rarity: Silver
Description: You will get this trophy when you free all dragons across God of War.
Tips: There are three dragons in total, and they are some of the most challenging encounters in the game, so you’ll want to tackle this near the end of your playthrough. The first is Fafnir, who is found to the right of The Mason’s Channel just underneath where you fight the Valkyrie there. The second is Otr, who is found on the beaches of Veighurgard. The third is Reginn and is located in Konunsgard after starting the Heil to the King side quest for Brok and Sindri.
Like Oil and Water
Rarity: Gold
Description: This trophy is for doing all of the sidequests offered by Brok and Sindri.
Tips: This trophy requires you to complete five sidequests in total. These are:
Second Hand Soul
Location: Volunder Mines
Quest Giver: Brok
Deus Ex Malachite
Location: Laudsuther Mines
Quest Giver: Brok
Fafnir’s Hoard
Location: Fafnir’s Storeroom
Quest Giver: Sindri
Family Business
Location: Northi Stronghold
Quest Giver: Sindri
Hail to the King
Location: Konunsgard Stronghold after completing the story quest A Path to Jotunheim
Quest Giver: Brok and Sindri
Curator
Rarity: Silver
Description: You will get this trophy when you collect every artifact.
Tips: Thankfully, you can collect all artifacts after completing the main story. You can also check each area on the main map to see where you have some remaining. All of the artifacts in the game are below:
| Area | Artifact Location |
| Wildwoods | You pass through to go hunting in front of Kratos’ house to the right of the gate.
Turn left just before the stone bridge when you go hunting with Atreus. |
| Turn right at the ruins where you find your first Nornir Chest and slide down the chain. | |
| Once you get to the temple, go right until you hit the last door. Go out onto the frozen pond and look next to the bridge. | |
| River Pass | Just before you meet Brok for the first time, you’ll get attacked by Reavers before crossing a ledge. There, you can climb down a chain and follow that ledge to find the area’s first artifact. |
| From Brok’s shop, turn right and follow the path there. Drop down the ledge. | |
| The third artifact will be right there once you get to the other side of the spide-ceiling puzzle. | |
| From the previous artifact, go along the cliff’s edge to find the next one. | |
| After completing the sand bowl puzzle and opening the big door, take the first left inside the tunnels. Go up the ledge. | |
| After fighting the troll, look behind the fourth building on your right when you get to the burned village. | |
| Once you’re under the Witch’s Cave, go down the ramp and turn left. Drop down the ledge, grab the pallet of rocks, and move it toward the water. Go on top of it and climb up the platform above you. | |
| From the well in the witch’s front yard, follow the nearby ramp down until a corpse on your right holds the artifact. | |
| Turn left and go up the chain from the Witch’s front yard. The final artifact is here in the grass to your left. | |
| Lake of Nine | Spin the panel above the Nornir Chest at the Lookout Tower to retract the spikes. The artifact is on the ground in front of the corpse to the chest’s right. |
| At Nilfheim Tower, ride the elevator to the top and find the artifact in front of a corpse behind the crates. | |
| At the Isle of Death, climb the wall ahead of the dock. Destroy the rocks to your left with a firepot to reveal the artifact. | |
| At the Forgotten Caverns, climb the chain on the right side of the beach. The artifact will be to your left. | |
| At Helheim Tower, ride the elevator to the top and find the artifact next to the corpse leaning against the doors next to the elevator. | |
| At Alfheim Tower, go to the top yet again, and it will be on your left. | |
| You have to go through the gate and go up the ledge next to the closed gate at Stone Falls. | |
| At the Cliffs of the Raven, you have to go left of the dead giant and boost Atreus through a gap. Then, climb up the chain he kicks down and go past the Legendary chest to find it. | |
| At Tyr’s Bridge, the artifact is at the boat dock on the area’s east side. | |
| Veithurgard | Go to the end of the dock on your left when you first land on the beach in the area. |
| To the right of the beach, you land on pull the chain to open a gate. You have to climb to the top of the cliff and then head back towards the beach through the gate. Once you drop down a ledge, smash the planks there. | |
| As you navigate outside the fortress, you will come across the three shrines to free the dragon Otr. As you go from the second to the third, you will blow up some rocks in front of the doors to the fortress to reveal the artifact. | |
| On your way back to the alter to free Otr, you can find an artifact behind the crates to your left. | |
| The last artifact is inside the dwarven fortress at the bottom of the channel you can drain the water out of. | |
| Alfheim | After reaching the Lake of Light, go down the shore to your left. From the beach where you can dock, turn right and down the broken pier. |
| Then follow the shore to the right down to the Light Elf Sanctuary. Go around the sanctuary past the puzzle doors and go to the right. Before dropping back down to the docking beach, the artifact will be at your feet. | |
| Then, after you fight the Ancient in the main temple, you need to restore the light bridges and head to the left. | |
| Once you take the elevator down, turn around to find the artifact in a cell. | |
| Finally, in the main section of the trench, you can create a light bridge that heads to your left. Across that bridge, the artifact is in one of the cells containing Draugr. | |
| The Mountain | The first artifact is directly across the first Nornir chest you’ll find in this area. |
| When you move the minecart in the Heart of the Mountain, you will reveal a spiked door. Break the spikes. | |
| Later, you’ll have to move a basket to blow things up with a Shatter Crystal. Look where you moved the basket from. | |
| Then, as you near the summit, turn left at the Hel-bramble that blocks the way up and follow the path. | |
| The last artifact can be obtained once you return to the Mountain during the main story. Once you get to the room where you created an elevator on your first visit, there is a wall of sap to your left that hides the artifact. | |
| Helheim | When you leave Tyr’s Temple, turn right and go around the corner. |
| When you climb down a pillar towards a chest covered in Hel-brambles, turn around and look for the broken pillar. Break the Hel-bramble near the top of that pillar and look behind it. | |
| Once you climb out of the area of the previous artifact toward the bridge, you’ll go under an overpass. Break the Hel-bramble stuck to the overpass’ underside to reveal the next artifact. | |
| You have to return to Helheim with Atreus for the following two artifacts. Go down the bridge until you go through two overpasses to reach the first. Then, climb the ledge and go left. Atreus can blow up the sap wall there to get to the Hidden Chamber that hides the artifact behind another sap wall to your right. | |
| Take the elevator down to the Valkyrie arena there but take the stairs up before Rota. Up there, the artifact will be behind the brazier to your left. |
Allfather Blinded
Rarity: Silver
Description: This trophy is for finding all 51 of Odin’s ravens.
Tips: Refer to your map to see what areas still have ravens in them. All of the ravens you need are:
| Area | Location |
| Wildwoods | Hidden Chamber of Odin past where you fight your first troll above the main arena. |
| The River Pass | Above the arena, you fall into the bridge in the marketplace ruins. |
| Atop the opening, you come to at the end of the tunnel behind the sand bowl puzzle. | |
| At the top of the ribcage, where you defeat the troll. | |
| On one of the burned buildings in the destroyed village that you can see from the overlook. | |
| Go up the chain to the left of the giant turtle and look to your left to the top of the high rocks there. | |
| In the Hidden Chamber of Odin, where you fight the Valkyrie. | |
| Lake of Nine | Near the Niflheim Tower on the western side of the lake. Take the elevator up the tower and look down at the wrecked ship past the Mystic Gateway. |
| Stone Falls | Above the waterfall by the bridge. |
| Lookout Tower | Above the Nornir Chest. |
| Iron Cove | Look up towards the ledge by the wrecked ship to the far right. |
| Isle of Death | Once the water has drained from the lake twice, it is visible by the coffin. |
| Forgotten Caverns | On the pillar of seals by the Nornir Chest. |
| Follow the shore past Svartalfheim Tower in your boat and dock near the cave on your left. Climb up the cliff and look down into the cave. | |
| Cliffs of the Raven | Look to the right of the Muspelheim Cipher Chest. |
| Veithurgard | Beach at the shore next to the statue of Thor. Climb up the path to your left and look above you. |
| Go in front of the dragon Otr and throw your axe at the boarded-up squares to reveal the raven behind one of them. | |
| Go to the entrance of the main Veithurgard Keep. Look behind the rubble to the left. | |
| Foothills | On the snowy path, look above the rocks to the left of Sindri’s Skymover elevator. |
| Behind the Hidden Chamber of Oden, perched above the entrance from the elevator. | |
| Alfheim | On the pedestal of one of the Light Elf monuments as you enter. Easily visible from the nearby beach. |
| Inside the Hidden Chamber of Odin inside the arena. | |
| Fafnir’s Storeroom | On the tip of the wooden crane on the shore. |
| Just past Sindri’s shop, look up to see it flying around. | |
| The open woods area past the tunnel is on a branch to your left near the waterfall. | |
| At the top of the entrance to the storeroom, look above the entrance. | |
| At the center of the room in the storeroom, look up to see a circling raven. | |
| The Mountain | Go across the bridge and turn around down the hole on the side of the bridge. |
| To the right of Brok’s shop, there are massive caverns where a raven can be seen. | |
| Go to the room to the side of the main elevator room and go past the dead animal before looking to your right and entering the small caved-in area. Light the room with the torch crystal and look into the opposite alcove. | |
| Within the Hidden Chamber of Odin, you face the Valkyrie in the arena. | |
| Volunder Mines | From the docking, beach lookup. |
| Thakur’s Corpse | When you dock at the beach, look to the left by the Mystic Gateway. |
| In the Hidden Chamber of Odin among the trees in the Valkyrie arena. | |
| Council of Valkyries | Go to the shore beneath the Alfheim Tower and look towards the statues of the Oarsmen. |
| Buri’s Storeroom | After the water lowers in the lake for a second time, there is a raven circling a large stone formation near a waterfall to the left of the docking beach. |
| Northri Stronghold | From Sindri’s shop, turn around to look across the boat dock. |
| Go to the Reaver’s Ship’s end, located after where you fight the Traveler. Look towards the large sealed gate with light passing through it. | |
| Landsuther Mines | In the ravine before Brok’s shop, jump across the gap and climb up the ledge. It will be across from you on wooden planks. |
| Look across the ravine to the northeast after you kill the Dark Elf Lord. | |
| Helheim | Underneath the World Serpent Horn above where you cut the Hel-bramble. |
| Go under the Bridge of the Damned and go to the right side, where a cliff looks below. | |
| Near the previous raven, look past the ice wall under the bridge. | |
| Once you return to Helheim with Atreus, go on the main path leading to the Bridge of the Damned and look up at the first platform you come across. Have Atreus destroy the wall of sap there. | |
| Behind a wall of sap on the path towards the Hidden Chamber of Odin. | |
| Up the stairs at the bottom of the elevator in the Hidden Chamber of Odin above the window in the upper balcony. | |
| Konunsgard | Go down the trail from Sindri’s shop and get rid of the poisonous cloud to your left. |
| On the platform where the Hel-Walkers were when you fight the Ogre, look out over the horizon next to the highest lump of rocks. | |
| Go opposite the imprisoned dragon and go through the sealed door. Stop on the wooden bridge and look to the right. | |
| After you set the dragon free, return to the original shrine. Look across the ravine to find the raven. | |
| Inside Konunsgard Keep’s first chamber, take a left to go over a low barrier. Look into the light above the coffin. |
The Best Moves
Rarity: Bronze
Description: This trophy is for fully upgrading a runic attack, which you should do naturally as you play.
Worthy
Rarity: Bronze
Description: This trophy is for fully upgrading the Leviathan Axe, which you can do after finishing the Niflheim workshop.
Why Fight It?
Rarity: Bronze
Description: This trophy is for fully upgrading the Blades of Chaos, which you can do after killing the Valkyrie in Muspelheim.
Path of the Zealot
Rarity: Bronze
Description: Collect every piece of the Traveler armor set.
Tips: You will come across enough travelers during the story to get the materials required to craft all three pieces of the set. Then you need a whopping 42,000 hack silver.
Primordial
Rarity: Bronze
Description: You’ll unlock this trophy when you craft the entire Ancient armor set.
Tips: You will come across enough ancients during the story to get the materials required to craft all three pieces of the set. Then you just need to collect 32,000 Hacksilver.
Unfinished Business
Rarity: Silver
Description: This trophy is for completing all of the wayward spirit sidequest.
Tips: There are five of these sidequests, which are:
- Hammer Fall – Stone Falls
- Dead Freight – Forgotten Caverns
- The Anatomy of Hope – The Mason’s Channel
- Unfinished Business – Shores of Nine
- Time Heals All – Fafnir’s Storeroom and Northi Stronghold
Treasure Hunter
Rarity: Silver
Description: This trophy is for doing all of the treasure map collectibles.
Tips: There is a total of 12 treasure maps and associated dig spots in the game. These are:
| Treasure Map | Map Location | Dig Spot Location |
| Turtles Tribute | In the Witch’s Cave, behind the wall of red sap by the Chest of Nornir. | In the Witch’s front yard, by the turtle’s left foot where a log lays between two rocks. |
| Kneel Before Thor! | In the Landsuther Mines, take the elevator up from the lower level. The map is in that room by the back wall. | In Lookout Tower, take the zipline to the Jotnar Shrine. The dig spot is to your right. |
| Dead and Bloated | In the Volunder Mines, climb down the chain at the back of the arena where you fight the Soul Eater. | At the Cliffs of the Raven, climb up the chain to your right from the docking area. Turn left, and go up the climbable wall on your right. Jump to your right, hop down to the left. The dig spot is at the back of this area by the belly of a dead giant. |
| Don’t Blink | In Fafnir’s Storeroom, the treasure map is next to the dead body propped up on the pillar at the center of the room by the side entrance. | In the Foothills, follow the path toward the entrance to the Mountain. Jump the gap and then turn left and scale the wall. The dig spot is to your left. |
| Creation Island | Go straight from the docking point in the Iron Cove after the water has gone down a second time. | Go to Buri’s Storeroom. From where you dock your boat go through the gate to your left, go to the end of the walkway, and turn left just before you get to the water wheel. |
| Finder’s Fee | After the water drops the second time, it is in the Forgotten Caverns in front of the chest to the left of the Mystic Gateway. | In Northri Stronghold, go up the flight of stairs near the docking area halfway through the region, leading to a climbable wall. Go up to it and the dig spot is against the back wall. |
| Njord’s Oarsmen | In Northri Stronghold, behind the destructible wall of the boat at the end of the area. | In the Mason’s Channel, climb the wall near Sindri’s shop before taking a right and following the path. |
| The Boat Captain’s Key | Right on the shore when you go to Stone Falls. | In the Isle of Death, after the waters have gone down for the second time. At the center of the island, climb up to where the original shore was and go under the broken ship to find the dig spot. |
| Island of Light | In the Mason’s Channel after the water has drained for the second time. Dock to the left of the statues and head left, and the map will be on the ground. | In the Light Elf Outpost, go down the chain in the junction to use the chain or climb a wall. The dig spot is just next to the bottom of the chain. |
| The Historian | Dock your boat on the left shore of the Ruins of the Ancient. Jump over the pillar, and the map is in the center of the clearing. | In Fafnir’s Storeroom go to Sindri’s shop. From there, continue deeper into the area until you reach the open field. Go up the stairs to your left and look next to the leftmost brazier. |
| Hunter’s Kingdom | By the Lookout Tower, go past the areas of spikes until you can climb the wall. Then, take a left and jump down the ledge. | In Veithurgard, go to the large door in the back left corner of the area. Next to the nearby lore marker is the dig spot. |
| The Last Place They’d Look. | Take the Mystic Gateway to the top of The Mountain. Go back down the way you originally came until you can climb down on your left. Follow the left side of the path until you can go down even further. Head through the double doors, take a right and go through the crouch space to find the map. | The Council of the Valkyries goes to the area with the eight thrones. The dig spot is on the left side between the second and third thrones. |
The Truth
Rarity: Silver
Description: This trophy is for getting all of the Jotnar Shrines.
Tips: You will get many of these naturally as you play and even get this trophy. To unlock it, you need to find eleven of them, which are:
- Skoll and Hati – Wildwoods
- Hrungnir – The River Pass
- Skadi – Veithurgard
- Jormungandr – Foothills
- Groa – Alfheim
- Ymir – The Mountain
- Thamur – Thamur’s Corpse
- Bergelmir – Tyr’s Temple
- Thrym – Lookout Tower
- Starkadr – Konunsgard Stronghold
- Surtr – Muspelheim
Fire and Brimstone
Rarity: Gold
Description: This trophy is for completing all of the Muspelheim trials.
Tips: This should be one of the last things you do in your playthrough. To get this trophy, you have to complete the first five trials on the normal and hard difficulty. You will then face the Valkyrie Gondul. You then have to go back and complete three of the five previous challenges on the impossible difficulty to unlock the sixth and final challenge. Complete the trial, and you will get the trophy.
Darkness and Fog
Rarity: Gold
Description: This trophy is for getting all of the treasure at the center chamber of the Workshop.
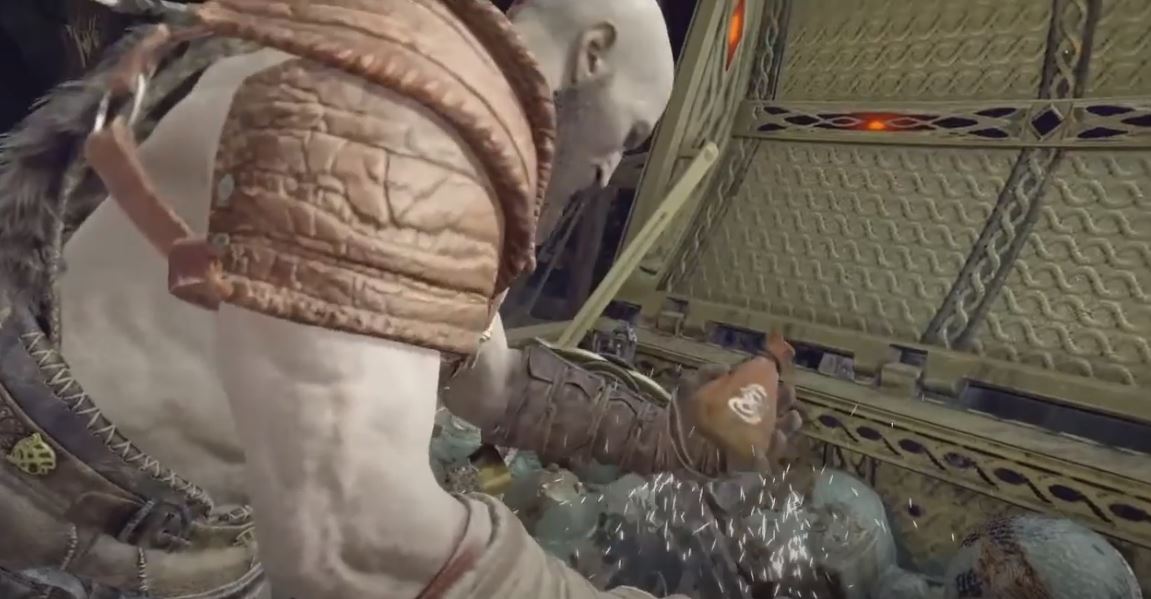
Tips: The Workshop is a unique area in God of War that is a roguelike mode where you gather Mist Echoes that can be spent at Sindri’s shop. While you’re in the workshop, however, you are slowly poisoned continually, and if you die, you lose all of your Mist Echoes. For this trophy, you have to buy an entry stone for 500 Mist Echoes from Sindri to open the treasure room at the center of the Workshop. This room has some rifts and treasure chests that can be opened with Mist Echoes. To get this trophy, you have to open every single one, which costs a total of 70,000 Mist Echoes.
Chooser of the Slain
Rarity: Gold
Description: This trophy is for defeating the nine Valkyries.
Tips: The Valkyrie fights are the most challenging content in God of War, so you’ll want to tackle this trophy last and only after you have Kratos in the armor and gear you want with full enchantments and runes. However, the Valkyries are meant to be a test of skill, so you can only do so much to make the fights easier. The Valkyries and their locations are:
- Geirdriful – Foothills
- Kara – The River Pass
- Eir – The Mountain
- Gunnr – Thamur’s Corpse
- Olrun – Alfheim
- Rota – Helheim
- Niflheim – Hildr
- Gondul – Muspelheim
- Sigrun, the Valkyrie Queen – Valkyrie Council (only available once the other eight have been defeated)
Conclusion
Some parts of God of War will undoubtedly challenge you, but getting the platinum trophy is still a worthy endeavor. The game is rightfully hailed as one of the best in recent years, and now that it’s on PC, even more players can get their hands on it. Even if you don’t want to go for the platinum entirely, the game is well worth your time.
FAQs
Question: Does Difficulty Affect God of War trophies?
Answer: No, you can play through the game on any difficulty to get the trophies.
Question: Is There DLC for God of War?
Answer: No, there were pre-order cosmetic skins, but no DLC was released after the game.
Question: Are Any God of War Trophies Missable?
Answer: No, every trophy can be earned even after finishing the game.