Kingdom Hearts 3 is the masterful third main release of the fantastic RPG slashing series from Square Enix. It brought new mechanics to electrify the experience and is intensely rewarding to speedrun.
Sora’s journey consists of many distinct worlds contributing to the overarching story. Because of this, speedrunning KH3 becomes like playing multiple games with engaging nostalgic characters from Disney & beyond.
It’s a fulfilling goal to conquer the game at lightspeed through the various intricate universes. I’m your dependable speedrun expert because I completed the platinum and a decent speed run focused around the Ultima Weapon.
On average, KH3 takes around twenty-five hours to complete and over thirty with all the extras. It will be ideal to strive for under five hours for this to be considered a successful speed run.
There are different classes of speed runs for KH3 based on difficulty and completion percentage. I will discuss taking on the Beginner/Standard difficulty for this KH3 Speedrun guide, but the principles apply to other advanced runs.
KH3 is a unique run because it’s many distinct experiences, making it incredibly fulfilling upon completion. Let’s teleport through the dark portal so you can achieve your record time!
Bottom Line Up Front
The Kingdom Hearts 3 Speed run will go smoother if you plan before attempting and have already beaten it once. It would help to consider your beginning stats wisely, set a personal goal, understand the core mechanics, and study each world’s unique encounters and challenges.
Referencing a comprehensive walkthrough can help with the small details. Your decisions are critical because they will influence your final time, so playing with prudence and time management skills is imperative.

Before You Face Your Fears
Choosing Stats
Remember not to accidentally automatically select “no” when choosing your stats and class. You must move down one to select them. The first question you’re asked when choosing stats is, “what do you desire?”
You are then given a choice between wisdom, vitality, and balanced. I recommend wisdom to acquire the right abilities to improve your speed run, but you can do well with the other stats. Magic is notoriously overpowered in the Kingdom Hearts series; this title is no exception.
If you’re a fan of spells, this can be enhanced if you choose wisdom and speeds up mandatory Heartless or Nobody encounters with more casting. Element-boosting items or abilities are crucial for improving magic and increasing stats for faster destruction.
Choosing Your Class
The second question is, “what power do you seek?” The options include Guardian, Warrior, & Mystic. Guardian will keep you safer during battle, making Sora a damage sponge with enduring abilities.
Warrior will give you a lot of damage which can help you clean up enemies and bosses more expediently. Finally, Mystic will enhance your magic capabilities by decreasing cost and increasing spell damage.
Choose the Mystic class to make quicker work of enemies in a standard run and maximize your speed.
Set a Personal Time Goal
Setting a personal time goal comes down to what is reasonable for you. You should assess your skill level and overall experience with KH3. Once you play your first-speed run, you’ll see where you stand, and it’s easier to set a better goal. The point is you shouldn’t put unnecessary pressure on yourself.
Selecting a Suitable Difficulty
If it’s your first-speed run for KH3, then there’s no shame in trying beginner mode to get a feel for it. However, I recommend doing normal mode because it won’t be that difficult and more rewarding if you’ve played the game once.
If you’re an expert and know the game like the back of your Keyblade, then by all means, give proud or critical a try! They’re a trying test for a player to speedrun because there will be many challenging moments and obstacles to endure, all in a race against the clock.
Platinum 100% or Any%?
A platinum trophy speed run is for the daring and will naturally take longer than Any%. I wouldn’t recommend it unless you have completed the platinum before and know the correct order to beat the game at a fast rate while attaining the achievements.
A typical run is what most players aspire to complete, and it’s still a fantastic notch for your gaming belt to show off! At any rate, platinum speed runs are another ballgame for hardcore players with extensive experience and a solid, unwavering game plan. Of course, it also requires careful planning for the Any% run.
Altering Starting Abilities
Right out of the gate, unequip any pre-ordered key blades for this to count as an official speed run. For Sora, unequip the Sonic Slash, Buzz saw, Somersault, Sonic Cleave, and Aerial Charge abilities.
These are all related to movement and make the run slower. For Donald, unequip Blizzard & Thunder. For Goofy, unequip Goofy Turbo, Goofy Discus, & Treasure Magnet. Equip Water & Fire Spells under customized shortcuts.
Now go to Donald and turn off item recovery for himself and others to focus solely on Sora. This makes things much more manageable and is essential.

Tips for Achieving a Good Final Time
Skip All Possible Cutscenes & Keep Accurate Time
Since you’re doing a speed run, you must remember to skip through all optional cutscenes. However, you can theoretically record your run and edit out the cutscenes to get your true time. The game will track your time played, and you will see if things need to be sped up as you progress.
Watch Other KH3 Speedruns to Pick up Important Items
Items are essential to get through the game quickly, but you can’t collect them all because some are out of the way. Each speed runner does it differently, but some are worth going out of the way to enhance Sora, Donald, and Goofy. Inventory management strategies can also be discovered here.
Quickly Manage Your Inventory & Stock Extra Items
You want to be ergonomic and efficient when managing your inventory in Kingdom Hearts 3. Remember that the clock is ticking, and you don’t have twenty minutes to decide which Keyblade to use.
I advise reviewing the items and making a plan tailored to your playstyle. Saving money and buying items in bulk instead of visiting the store multiple times is an excellent way to save time. Try to use cure only in a battle and only items if necessary during MP charge.
Run Through Most Enemy Encounters
You can run through Heartless like there’s no tomorrow, but wiping out a few groups here and there would be best. This way, you can still do some minor farming, but the bulk of XP is in defeating the major bosses.
It will go much faster and work to your advantage if you cut to the chase on each world and ignore most heartless, nobody, or unique enemy spawns.
Ignore Optional Fights, Challenges & Activities
Some secret bosses, challenges, and activities like cooking at the Twilight Town Bistro are fun but inappropriate for this run.
Always follow the main story and don’t deviate from it, or this will inevitably increase your time. Ignore battle gates and keep your eye on the prize! Also, treasure hunting is okay, but only on the immediate path toward the main objective.
Intensify & Utilize Magic Spells
It’s common to feel outnumbered, and the game almost encourages you to use magic to spice things up and hasten the battles. Abilities can boost magic and make it lethal beyond belief in the right hands.
Thundaga is my favorite spell because it requires little precision or effort to deal with threats. The Water spell is also exquisitely powerful.
The Thunder Cufflink accessory is good for quick farming to gain a few levels. One of the highest XP farming locations is found in the Caribbean, where you get hundreds of points from simply sinking Heartless ships. Spending a few extra minutes doing this makes future challenges easier.
Craft a Powerful Gummi Ship
You don’t want the gummi parts delaying your playthrough, so studying the parts and being familiar with the gummi shop is ideal for reducing long battles against heartless ships and bosses. I highly recommend using some time to find the Endymion gummi blueprint to make later space battles easier.
Starting Your Kingdom Hearts 3 Speedrun!

Olympus
Thebes
Many fire enemies are here, so the water spell will exploit their weaknesses and help you breeze through them. The first encounter of the game includes a large-bodied heartless accompanied by some smaller ones. Use Water repeatedly on the large heartless, then quickly remove the rest with your keyblade.
When you get to Goofy’s shield slide, you can skip through the second path by repeating a keyblade swing into an airside, saving some time.
Using pillars to gather heartless to cast Water on is a good strategy in the next part of Thebes, and you’ll want to pick up the magic ring by hitting the statue in this area to equip. Use Goofy’s shield to pass through the next room and then keyblade swing air slide across the bodies of lava.
When you arrive at the timed fight where you receive the abilities, a good strategy is to cast water spells in the air to activate the Magnet Burst finisher and kill multiple enemies simultaneously.
Now you’ll face the large heartless boss, so utilize pirate ship until it runs out. From there, cast Water; it should be dead in no time. You can air slide away or block his attacks to avoid getting hit while looking for an opening.
Mount Olympus
When you reach Mount Olympus, a treasure chest is in the water on the right near the broken-foot statue that contains a water cufflink. Pick this up to boost water damage and make things flow easier.
Now when you make your way up the mountain, there’s a part where you come up to a peak and can skip the next two fights with an exploit. From that peak, you can keyblade swing air slide to a ledge on the left and skip two forced fights.

In the picture above, you can see the ledge off in the distance, and Sora can reach it with enough height. It takes practice, but it saves a lot of time. Keep making your way up the mountain quickly until you reach the Rock Titan sequence, and avoid each boulder for the sake of time.
Once you face the Titan, start spamming Water on his legs. Avoid the blue lines with either dodge-roll or airdash. When down, jump on the points to his head and do some damage with Donald’s finisher for significant damage. Keep attacking, and then use the mountain coaster for an easy finisher.
Realm of the Gods
When you reach the Realm of the Gods, you’ll be greeted with formidable, heartless, armored enemies. Start the fight using Water and then block multiple times to break their armor. Alternatively, you can stand back and spam Water until their defenses break. In the next room, pick up that refocuser in the chest before proceeding.
There is also a fluorite in a chest in the following area you’ll need for upgrading the keyblade later. Proceed to the air-stepping tutorial part; this shouldn’t be an issue if you’ve done it before.
Once you reach the top, it’s time to face three titans simultaneously. Sora never catches a break. When the fight starts, target the Ice titan with shot lock until fully charged for massive damage.
Utilize block on incoming attacks. Airstep to the lava Titan and wait till he’s not glowing to spam water and keyblade combos on him. Hercules swing is a good option that shouldn’t be overlooked here, nor should the Carousel finisher.
Now for the Tornado Titan fight, immediately use a refocuser and then block the incoming debris to reflect some damage. Use a few souped-up water spells, but preserve your magic.
When the Tornado sucks you up, keep moving forward while avoiding objects. Use your shot locks when they’re charged, and keep casting Water where possible without running down magic too much. I know this is a speedrun, but you should spare time to equip Hero’s Origin and other accessories or items as you acquire them.
Dark World
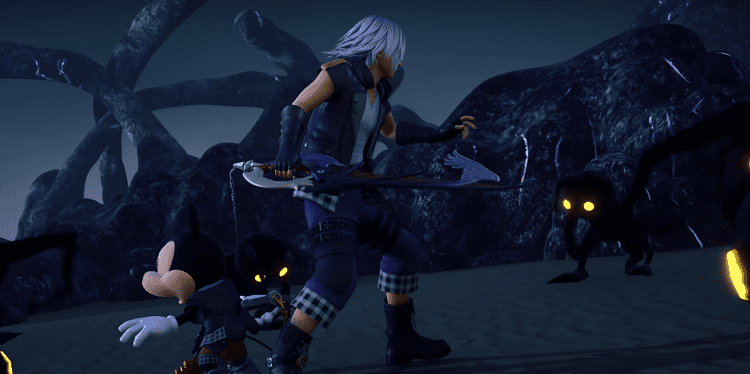
This brief yet memorable section is where you switch things up and play as Riku. Your only fight here is against the Demon Tower of Heartless, where King Mickey aids you. Riku has a ton of health, powerful magic abilities, and great dodging agility to simplify this part.
Start by attacking the Demon Tower with your standard key blade combo attacks, and this will charge up special attacks that will eradicate this dark abomination before you know it.
Even though you switched characters, remember Riku carries items, so use them if you get low on health. Using a good balance of block, thunder, and finishers will make quick work of this enemy. Block when he’s red, use thunder and finishers when yellow; that’s the key.
Twilight Town
After entering Twilight Town, you’ll face a group of trickier nobodies without a “best” way to handle them. Just improvise, and it will be over fairly quickly.
Next, you’ll face a rather daunting boss known as the Demon Tide with tons of health, but you only have to damage it a certain amount before the fight ends. Utilizing the previously introduced Link summons will help this fight along so you can get out quickly.
Target and Max shot lock to start the battle with a strong attack. Block with a counter-shield against his attacks, block again, and then unleash the finisher, but the timing is challenging and unpredictable.
Flare Force can do a lot of damage. From there, you will have a few easier heartless battles before you are introduced to the Bistro and need to collect ingredients. I would pick up the Defense Boost next to the Mansion entrance.
These can be found in the town, woods, or mansion locations. Before you leave, visit the shop, buy some ethers, and upgrade the shooting star to replace the Kingdom Key.

Toy Box
Take out the first group of heartless at Toy Box and then pick up the fluorite under Andy’s bed. On the house’s side is a large chest with an Elixir. Blizzard is a good spell for movement and allows you to slide to other areas quickly.
Now it’s time to deal with the robot fights using your mech. Use jump, boost, and finishers to optimize your mech’s performance and remove multiple enemies without dying. It’s ideal for pinning these enemies to a wall so they can’t flee.
When you enter the Toy Shop, there’s an encounter with some more toy enemies, but look to the left, and you can hop in a lone mech in the corner to make it faster and easier.
Run to the side and into the vent, ignoring any spawning heartless. Keyblade air slide your way to the record player and then down to the Doll boss. Use Guard at the right time when she attacks after appearing and then Fire spam.
Keeping a decent distance is a good idea to avoid attacks. Use ethers and commands while not attacking when she’s invincible. Next, fly a mech from the ground floor to the UFO battle on the top floor and take him out quicker than usual. After the cutscene, you’ll see your robot outside the store and can hop in.
During the Verum Rex fight, try shooting the breakable floors to kill multiple mechs simultaneously. When Prime mechs appear, do your best to suit up with one of these to take on the final Gigas.
Shoot the floor initially, then continue strafe, punch, and shoot until dead. For the Dark Corridor boss, locate the stuffed animals immediately to jump on top of the UFO spaceship and attack the vulnerable point while occasionally using Rocket Ruckus.
I suggest you wait to face him until you’ve acquired the keyblade from finishing the Kingdom Of Corona. The Ever After keyblade makes this final encounter much more manageable.
Upgrade Ever After if you have enough Fluorite three or four times. Shot lock him a few times, and it should take him out. If not, then continue to use thunder afterward. Block incoming attacks and always look for an opening to shot lock despite the buildings.

Kingdom of Corona
During your first encounter in this world, thunder spam all the enemies. When entering the forest, take the right path to avoid the air-sliding sequence on the left.
When you reach the Canon Heartless, Focus on the additional enemies and then wait until the canon stops so you can attack the monkey on top. It then transforms into a white horse chariot heartless, so watch out for stampede attacks and wait for it to stop moving.
Repeat the same steps in the third section of this boss. Even the most experienced KH3 speedrunners get hit here, but do your best to guard against attacks and use shot lock and additional spells where possible while saving enough MP to heal.
The dancing sequence is straightforward as long as you aren’t colorblind. Just keep matching the colors, and it’s relatively fast. For the next group of nobodies, try to use the carousel and finish them off with fire or thunder spamming. You get used to dealing with mobs like this.
Mother Gothel’s heartless is the next part to focus on and is the last boss. Here’s the speed strategy for this world’s final boss. To start the battle, summon Wreck-it Ralph to do some initial damage and take off a couple of health bars.
From there, quickly make your way to the top of the tower and start hacking fast. Shotlock is reliable and works well for a devastating blow.

Monstropolis
When you arrive, use two shot locks and thunder to eliminate the group of unversed after meeting Sully. Afterward, stop briefly to pick up a few ethers. You’ll then approach the factory interior, where there will be a wave of unversed, and you should use shot lock followed by Meow-wow.
This is a reliable strategy for the second wave of larger enemies, but you’ll need to air-step to them across the large room to save time. Execute another shot lock followed by Meow-wow to move on.
Enter through the door, and from there, keep air sliding your way through the factory sliding sequence while shooting where necessary to prevent taking damage. The next room will have more unversed.
Call on your best friend Meow-wow and spam the body slam attack. Travel through another door lift and always drop to avoid getting shocked by the electric pillars that waste time.
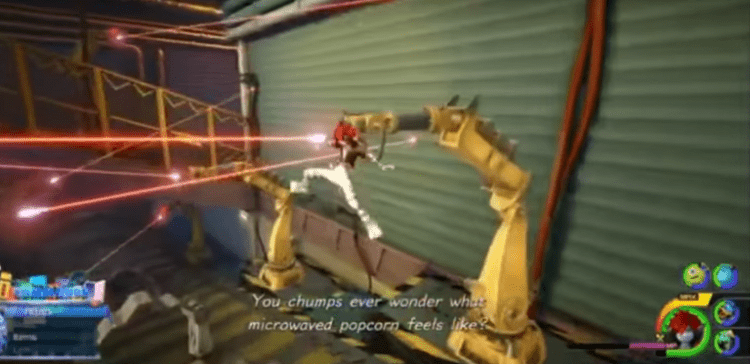
When you land, keep running to the door and ignore the enemies. At the factory, keep dodge-rolling forward, and then jumping over the enemies in your way, and they shouldn’t hit you. Roll through the lasers up the conveyor belt and open the chest with a Damascus in the left corner.
Keep heading up the second floor until you get to another group that requires Meow-wow again. If they aren’t finished off, use shot lock at the end. On the second row of lasers, you can jump off the wall on the right to take a shortcut to the upper belt. Here’s the section screenshot for reference.
The next room contains a snail-looking unversed with a few minor enemies. Shotlock and Meow-wow work well here and also in the next room. It might be repetitive after a while, but it’s the fastest method for these waves.
The next section has similar enemies; if you get splash run, I suggest using it because it’s beneficial here. Head up the stairs past the enemies, and then run past more unversed, leading to a wall you can run up.
When you get to the part with the helicopter in the air, head into the factory and spam water after using splash run to put the fire out. Speedrunners only use water and not watera because the first tier of magic has more range.
Slide on the pipe to the next encounter with a large unversed. Two shot locks should do the trick, then spam thunder for the remaining enemies.
Head through the door vault and follow the trail of black goo to the final boss. Air slide or dodge his charge sweep attack that he commonly uses initially.
Mirage staff is an excellent tool against this boss, and then clean up the rest by spamming fire spells. Of course, a shot lock is always an option. When the arms appear, I suggest using thunder to remove them quickly.

Arendelle
There are some neat tricks to get through the Frozen world faster, and here I’ll share them with you. Simba is your best friend in this world to melt away those enemies! Start rolling up the North Mountain through the Treescape to be greeted by some heartless. Airstep to them and proceed forward without engaging in combat.
Ignore the next group and head to the right up the mountain. There will be some more heartless here, but ignore them and head to the mound as pictured below. Once on top, you can keyblade swing air glide to the ledge by jumping off the wall.

So, wall jump up this mound till you’re on top.

Now, keyblade swing air slide to the wall and jump up that ledge where you’ll find a wall you can run up. This will lead you directly to the Gorge and save some time.
Dodge roll forward to the next mini-boss encounter, where you’ll use Simba for the first time. You can use the leap attack, but most speedrunners stick to spamming fire roar. Don’t forget to use his finisher.
After that, utilize an attraction summon like the carousel before the large-shouldered heartless enters his second phase, which will shorten the battle. Now it’s time to enter the Labyrinth of Ice. Make your way up the stairs and caverns until you reach the next group, and Simba is your go-to.
Fire roar a few times, and the finisher should end the fight. Make your way down the slides and try not to get hit by protruding ice crystals. Now you’ll head down into another chamber with enemies for Simba’s dinner.
At the save point, air step to the left spire, and that’s the only one you need to trigger. From there, air step to the top of the ice wall where you should roll once to prevent being knocked off by heartless.
Proceed to air step up the second wall and the bridge to your next encounter. You probably guessed what happens now. Summon Simba for his time-saving fiery routine. Air step to trigger the larger spire and slide across the ice rail, being mindful of your jump timings to avoid the enemies hurling at you.
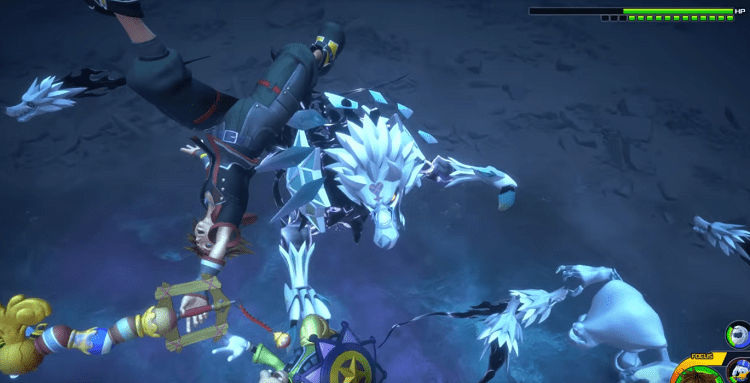
Keep moving forward and use Simba again when you reach the next group. Exit the castle to enter the gorge, where you progress until the sled part. Continue to time your jumps over the lasers while strafing back and forth.
After that, you’ll sled forward down a hill and the easiest and quickest path is to the left to avoid the trees. Staying to the left during this also helps you skip a couple of caves except for one. Avoid bumping into the ice when traveling through it.
Stay left until you reach the flying creatures, and then start spamming fire, followed by a couple shot locks to kill them. The next part involves finding Olaf. Climb up the wall near the large snowball to collect his body first.
Use three air slides from that point, landing perfectly on the snowball to roll and break for his head. Then collect his legs in the middle. Progress and use Simba on the next enemies with only fire roar. Keep running past the subsequent heartless encounter and head up the mountain to reach the palace.
For the snow monster, avoid him when he hops and keep using fire, and if he tries to use his desperation move, then shot lock to interrupt it. Keep using fire while strafing until he’s defeated. For the harsh wind part, use Simba only for movement to run faster through the snowstorm and roar when the wind gets fierce.
Always use a tent before the next boss. For the final Ice Wolf, use shot lock, block his charge attacks, and use fire where possible. Spam thunder during his special move and continue using shot lock because it automatically restores after the move.

The Caribbean
First, use Blizzard to travel toward the ship, triggering a cutscene with heartless. Equipping the Happy Gear Keyblade for this world to switch during battle is excellent. Firespam the two heartless hanging from chains and then utilize shock lock. When in command of the ship, shoot the orbs to destroy them quickly.
During the next air skirmish, shoot the flying enemy when he appears. Shooting torpedos will accelerate the process. Now you’re back at the high seas and hit the shop quickly before heading out.
Buy some ethers, equip the fire cufflink, force ring, and rune ring if you have them, and eat some food. Now use the keyblade to propel yourself through the next underwater sequence.
Make your way through to the end and then fire spam the large fish heartless when he appears. Try to keep your distance and move around because he uses thunder. After he’s defeated, there’s a large chest at the bottom of the room with the Ariel summon, so grab that because she’s useful. Now you appear on the ship again, and it’s time to set sail.
Three heartless ships will appear almost immediately after, and you must take out two until the gauge is almost full. This is because you can save your finisher for the race instead. Proceed to the boss battle.
The race against Luxord is crucial because you want to do this quickly. Focus on the orbs of the other ships and use the shield as you quickly progress toward the goal. During the next ship fight, take out the projectiles as they shoot at your ship, or use the shield.

From there, build up your three finishers to unleash on Luxord’s ship. Now board and take out the heartless with fire and thunder spamming. For the hanging chain heartless, shot lock works well.
Now you’re back at the port for a record-time crab hunt. When collecting white crabs, air step across Port Royal to the bridge and start a Goofy slide there while collecting crabs until you reach the cells.
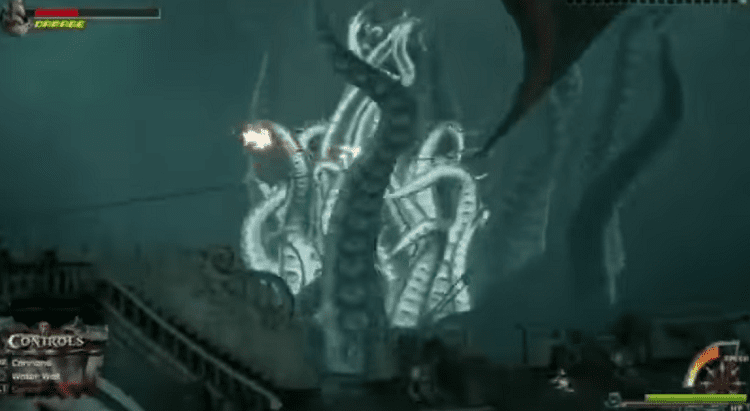
Head to the eastern military fort, where many reside in barrels and crates. Use thunder to break them. This will certainly speed things along.
Behind the waterfall on your way back, a sorcerer’s ring is worth picking up. Another ship encounter is next. Aim for the orbs and be careful with your shots because sometimes the ships disappear or are too far to hit.
Here’s how you should handle the Kraken fight in your speed run. Keep shooting at the tentacles until more ships spawn. Aim for the orbs, build up your finishers, and use them all at once. Ensure there aren’t any ships in the way of the Kraken, or it will absorb damage and waste your finisher, slowing the fight.
Keep using finishers until he’s defeated while paying attention to surrounding ships and damaging them as they appear. For Davy Jones, shot lock and then fire spam while following him around the deck.
Tentacles will grab the deck, and two thunder spells should remove them so you can attack him again.
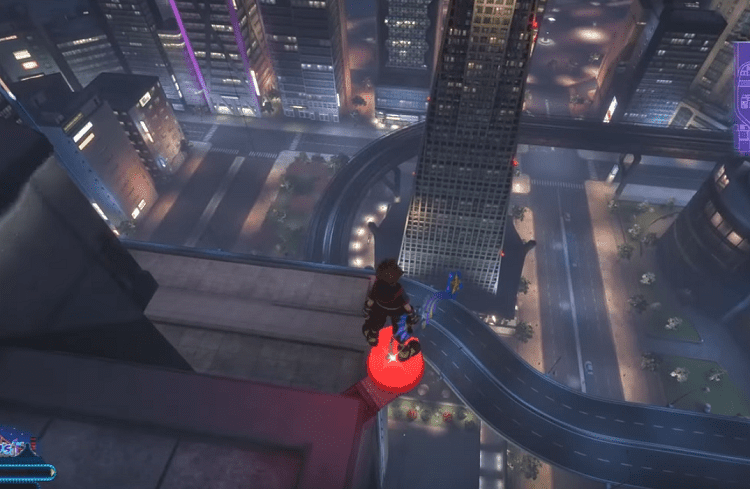
San Fransokyo
Use a single thunder for the first enemy encounter, and it will take them out. Keep progressing down the street while using thunder on each group of enemies instead of using the keyblade for the sake of time.
After they’re eliminated, a giant robot enemy will appear. Remember the Ariel summon you picked up earlier? Time to put it to some good use and destroy this foe quicker than normal. If he still has health, use a final shot lock.
Purchase a Kupo coin at the shop when you reach the garage, along with a couple of tents and ethers. If you have any strength or magic boosts, definitely use them.
When you reach the ring part, do your best to follow the path and collect them. There are different movements through this section you can study and improve on. Air step your way up to the next group on top of a building, and thunder spamming should take care of them.
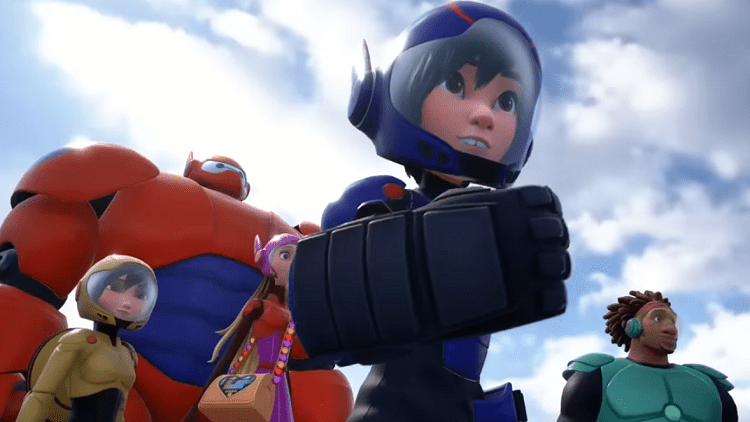
For the T-Rex looking heartless, start the fight by guarding because he attacks immediately. Summon Ariel and time her attacks well to destroy him in one shot for a brief battle.
He will then retreat to the top of a high building, and you air step to reach and finish him. When saving your friends, air step to save a few seconds between each.
When you obtain the hero’s glove for rescuing them, I suggest you equip it. Darkubes is next, and he’s unpredictable, so do your best to dodge his attacks. Fire spam plus shot lock is the fastest solution. If he goes into his other form, be prepared to block that instead of attacking.
Talk to Hiro to initiate the fight with Dark Baymax. All you need to do for this fight is keep shooting at him, and the red projectiles can be flung back for more damage. For the second phase, lock on and keep shooting, but stay clear when he attacks.
Finishers and shot lock are not needed here, so fire away! If you get low on health, utilize the healing spray Baymax can use. Note that using your punch can also reverse projectiles in this phase.

The Keyblade Graveyard: Final Trial Through The Darkness
Before you begin the Keyblade Graveyard, I suggest boosting one or two levels in the Caribbean by destroying ships to prepare for some battles. This may not be necessary for beginner mode. It would help if you prepared by stocking up on items, synthesizing accessories, and checking your abilities to equip any you may have forgotten.
Do the same for your party and start equipping Elixirs, Megaelixirs, and Ethers. Xehanort is your final struggle, and it’s a lengthy multi-phase fight.
For The 10k heartless fight, use Meow-wow followed by Simba for the big heartless and fire spam. There are many boss battles here, but they’re relatively straightforward, especially if you’ve faced them before.
Continue using sensible core strategies against the lesser bosses until you reach Scala ad Caelum. If you have anything that can increase defense, then I would use it.
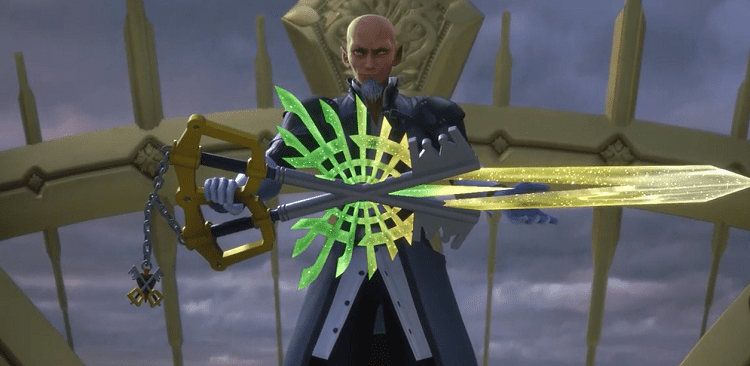
Confronting Master Xehanort
Before this fight, I suggest you place Aeroga in your shortcuts to handle the first encounter. After entering Scala ad Caelum, spam Aeroga on the floating enemies to get rid of them. It shortens the fight and saves you time.
The first phase of your battle with Xehanort is ruthless, and he’s hard to keep track of and predict. Spam fire continuously while refilling MP with ether and healing.
The next phase is an underwater fight where you must dodge the attacks initially and cast cure when HP is low. Continue to spam fire while paying attention to his movements until his health is gone.
In the next phase, you’re in the air again, and he gets very aggressive, so be sure to dodge the fire pillars and keep casting fire with the finisher. You are on top of the building now, and he will unleash a barrage of attacks, so try to block them.
Fire strafe until you see a glowing mystical seal on the floor, and avoid the energy ball projectiles. You can block and continue casting fire when he starts teleporting and attacking through the keyholes.
His next attack will consist of pillars of energy, so use dodge roll to avoid and look for an opening. Rack up damage until you can trigger the light command.
In the next phase, he throws more projectiles; you need to block them immediately, which lasts for a minute or so. Keep casting fire during openings and press the final action command to finish him when it appears.
Helpful Resources
- You can view the record times for KH3 runs at Speedrun.com
- KH3 Speedrun streams on Youtube
- Reviewing the KH3 Strategy Guide
Frequently Asked Questions
Question: Is Speedrunning KH3 Difficult?
Answer: It can be challenging if you decide to pursue a proud or critical speed run. An entire platinum run can also be grueling. Doing a speed run on standard is more realistic for a good balance, and that’s what I suggest, given my experience with each difficulty setting.
Question: What is the Fastest Anyone has ever Completed KH3?
Answer: According to the online leaderboards at speedrun.com, the top player is ranked fastest at two hours, twenty-seven min, and forty-five seconds. A good speedrun time for this game you can be very proud of is anything below eight hours.
Question: Should I Use Magic when Speedrunning KH3?
Answer: This is a definite yes because magic will get you through quicker. It would be best to use magic to its full potential when speedrunning this game. However, sometimes you don’t want to spam it into the ground, or it could hinder your ability to use powerful abilities.

